
+ Learning to record and mix at home? Check out Soundfly’s acclaimed online courses on mixing, production, and beat making — Subscribe for unlimited access.
Once upon a time, recording music worked like this: An arranger made a score, a copyist made parts, and a group of musicians got together to play while the tape rolled. The rhythm section’s pulse or the conductor’s baton were all that was needed to keep everything in sync until last note decayed and the master tape was labeled and stored.
Once upon a slightly more recent time, when multi-track “Sel-Sync” heads made overdubs feasible, musicians didn’t need to play together anymore. This made everything more complicated (and eliminated some musical give-and-take), but as long as there was a clear count off at the beginning, everything generally lined up fine (even when SMPTE timecode allowed multiple tape machines to be locked together). To keep track of such complex sessions, rigorous documentation and organization became the norm. If a collaboration with someone in a different city was required, copies of the of tape would have to be couriered to them at another studio. Because most processes were destructive (or at the very least, not without risk), fastidiousness and care were imperative — careers depended upon it!

Today, things are at least theoretically more flexible and forgiving. The capacity for unlimited overdubs with sample-accurate time sync is taken for granted. Collaboration with people in other cities or even other countries can be rolling as quickly as an FTP upload and download. Overdubs can often be done at home. Few processes are destructive (and “undo” is usually an option), rendering the entire recording process less fraught with anxiety and stress. Decent recording equipment is less expensive than ever.
But these largely-positive developments are not without downsides. The feeling of lower stakes often results in less care and organization. Unprecedented access to low-cost equipment means that modern musicians are often expected to be recording engineers as well, despite lacking the requisite experience and training (not to mention proper facilities). This results in a lot of avoidable mistakes that lead to wasted time, frustration, and even some strained professional relationships.
So let’s talk about how to maximize what’s good (and minimize what’s bad) about recording and collaborating remotely in the 21st century!
+ Read more on Flypaper: “4 Tips for DIY Drum Recording”
Session and File Hygiene — Getting Started
A common problem area for the self-recording musician is file management — the art of naming, organizing and ensuring that files are in the correct format. Of course, many producers are not entirely innocent where this is concerned, either, so clear communication of needs and expectations is a good first step.
Some producers may wish to send you a complete session folder. But since this requires that you both use the same DAW (and since session folders often contain the bloat of many unused audio files), this is usually not ideal. Instead, request either a two-track rough mix, a set of stems, or a complete set of consolidated, zero-bounced files that you can import into your DAW. Ask for something resembling the final arrangement as closely as possible, to ensure that your part makes sense in context. Make sure you’re given the session’s sample rate and bit depth, and set up your session to match.¹ If the track uses programmed drums or was recorded to a click, obtain the exact tempo marking from the producer. Ask that the consolidated files start at timestamp zero of their session (even if this means several empty measures at the top) to ensure grid alignment in your own.
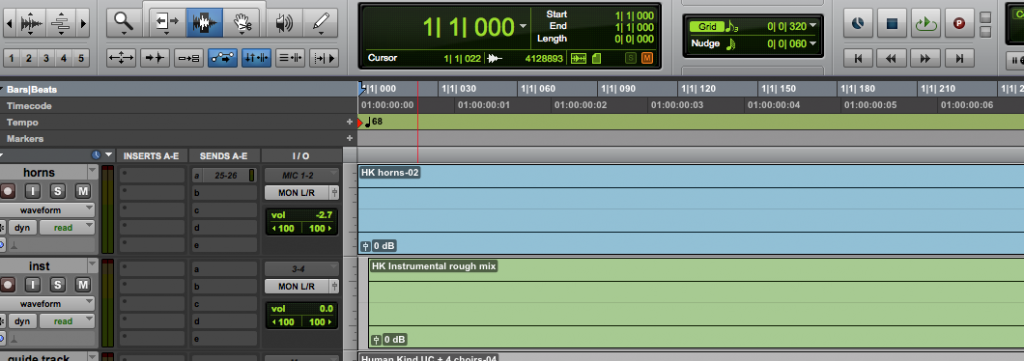
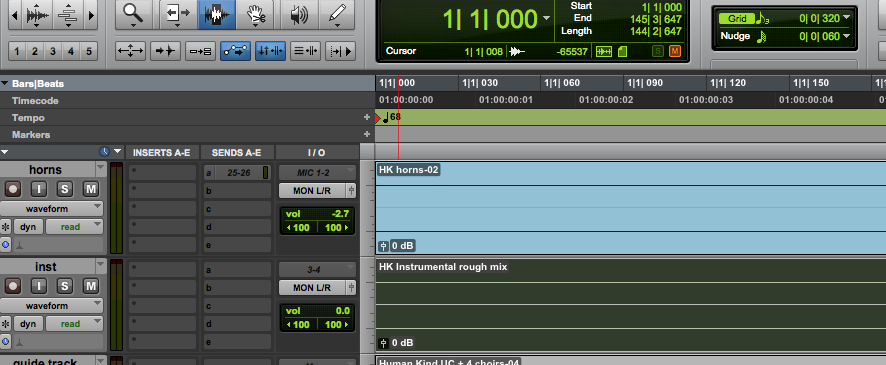
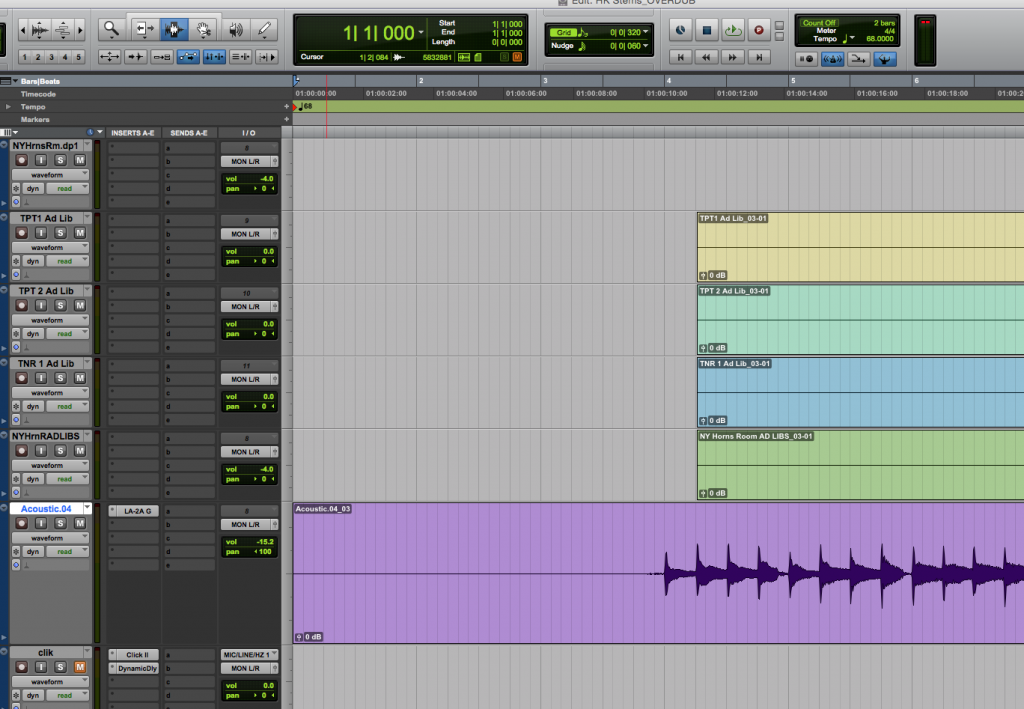
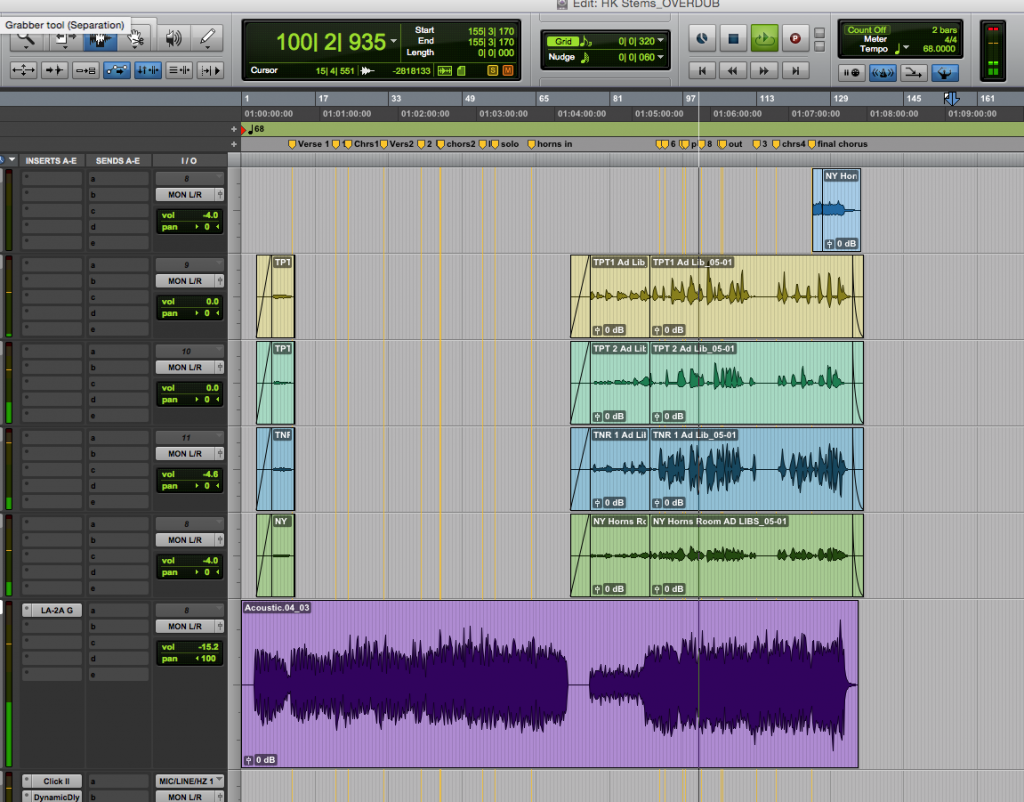
Once you have what you need, create a new session in your DAW. Import all of the audio into your session, making sure it’s aligned to the very start of the grid at timestamp zero. Set your session’s tempo to the one provided by the producer, so your grid reference will match theirs (allowing you to set up your own click track, if necessary). You’ll occasionally be given a track where the song starts right at the beginning of the session, leaving no space for a count-in. In this unfortunate case, you may wish to move ALL audio files rightward one or two measures on the grid, but do not forget to move everything (including your newly-recorded part!) back to its original location later!
When ready to add your part, create a new track and immediately (before recording anything) name the track with something clear, concise, and descriptive (e.g. “Rhy Gtr L,” “Bridge Shaker,” etc). This tells your DAW what to name the associated audio files. We want to avoid ending up with a bunch of files with names like “Audio_01.02.wav” or “Audio_10.14_L.wav,” as such file names will lead to a frustrating exercise in forensics down the road (particularly if something comes up missing).
Now that your session is set up, you’re ready to arm your track and hit record!
Audio Hygiene — Getting Sound
We’ve come a long way since the early days of home recording. Contemporary prosumer interfaces, while not totally comparable to bona fide professional equipment, are getting better all the time. The most popular units usually have solid A-to-D conversion and usable mic preamps which are, at the very least, unlikely to be the biggest obstacle to meeting expectations. Most of what you’re able to accomplish sonically will depend on your skill and experience as an engineer, so let’s leave aside the aesthetics for now and focus on avoiding the kind of technical problems that could render your work unusable.
Let’s handle the low-hanging fruit first: Double check that your project’s sample rate matches that of your collaborator’s. Sample rate conversion has gotten better over the years, but it still always comes with a subtle, though audible compromise. Even if your collaborator isn’t fidelity-obsessed, unnecessary sample rate conversions are an entirely avoidable degradation.
“A Quick Guide to Microphones” from our free course, Capturing and Warping Samples in Ableton Live
Once you’re getting signal to your mic preamp or DI, set your gain/level appropriately and conservatively. With 24-bit digital, there’s no reason to risk coming anywhere close to clipping, as the dynamic range of the format is extremely wide. However, as a courtesy to your client or collaborator, it’s probably best to avoid excessively low levels, too. Lots of gain applied later requires an extra step, and can sometimes come with a noise penalty, so shoot to have most of the activity right near the middle of the meter’s range. This is not exactly set-and-forget — during the course of your recording, keep an eye on the meters and clip indicators, as it’s not uncommon for players and singers to get a bit louder as they warm up.
Speaking of noise, most home recording environments are quite noisy, both in terms of ambient rumble (HVAC, appliances, room noise) and interference (EMI/RFI from cell phones, bad power, fluorescent lights, etc). Take steps to minimize this as best you can, as these sorts of problems will become exacerbated at mix time. Remember, the noise floor of multi-tracked layers compounds with each additional stack (and any compression will bring up the noise as well), so close those windows, turn off the A/C, and kill the fluorescent lights.
If you’re recording a DI signal with an amp simulation, make sure you print and provide the sound of the sim. If you like, you can print your performances to two tracks — one with the raw direct sound and one with the simulated amp — for safety. Choose the simulation carefully and make it sounds exactly like you want. Your playing dynamics will unconsciously respond to what the virtual amp is giving you, so changing it later doesn’t always work well. If you’re monitoring effects that you feel are integral to the part, you may wish to print those, too. It can be safest to print effects like reverb and delay to a separate track (reverb is seductive and tends to make us want to go overboard). But if you’re confident something is an essential part of the sound (like spring reverb on a guitar, or a delay pedal that defines the part) it’s often best to take the risk and print what’s working.
+ Read more on Flypaper: “The Ins and Outs of Recording Your Guitar ‘Direct In’”
Session and File Hygiene Redux — Getting Finished
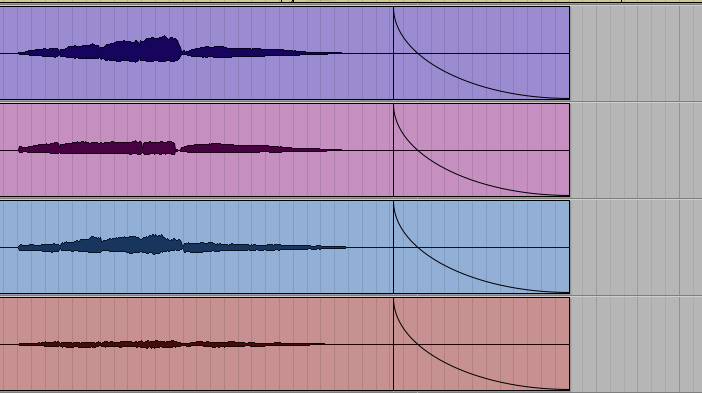
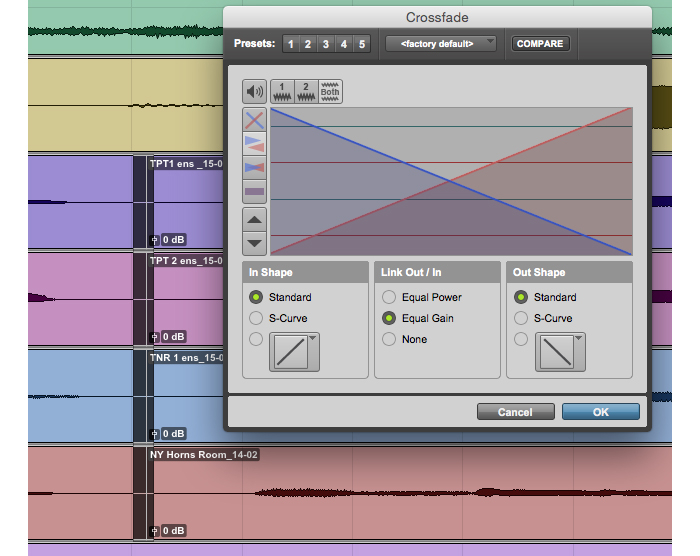
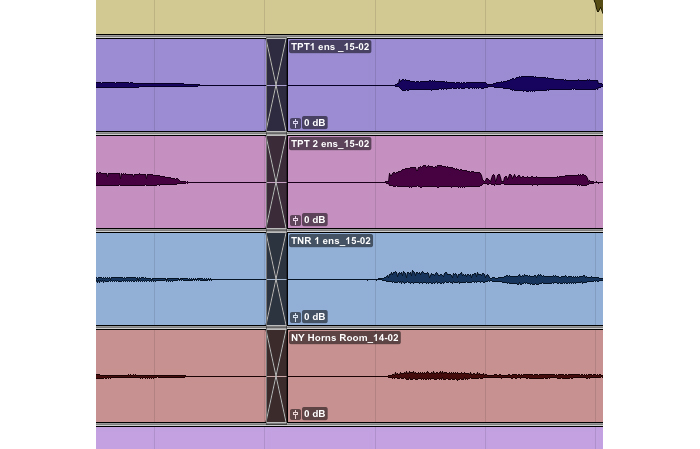
Once the part is recorded, we have to ensure that your collaborator can import it into their session without tearing their hair out in frustration. If you’ve done any punch-ins or edits, make sure to go through and finesse the edit points carefully, placing crossfades at each one to avoid pops or tics. Check each crossfade, really listening analytically (headphones are a plus) to make sure there are no unnatural decays, double breaths, chopped-off sustains, or ghosted notes. If you hear anything amiss, adjust the edit point until it’s perfect — you’re about to commit to these edits forever! If a clean edit proves impossible (and it wasn’t a once-in-a-lifetime performance), it’s probably best to re-record that section and do a better punch. For this reason, I actually like to check punches and edits as I go (rather than saving the clean-up for the end), but you’ll determine your own best workflow.
Here’s what I mean:


+ Read more on Flypaper: “10 Tips for Making More Realistic MIDI Music”
Comp together your best raw performance and leave any processes like vocal tuning to the producer. However, if you do give in to your ego and try to sneakily pitch-correct, never apply multiple tuning passes to one file, as this degrades fidelity severely, and can start to sound very unnatural. Always go back to the original raw file and start again.
When all editing is accomplished to your satisfaction, consolidate the file (do a save as or new playlist, if you wish), making sure that your file starts at timestamp zero. If you had to move the audio rightward earlier to give yourself a count-in bar, now’s the time to move it all back to the original zero point!
Finally, it’s time to export. If your file is a mono source (like a vocal), export it as a mono .wav file. If it’s a stereo file (like a stereo keyboard), then export it as a stereo .wav file. Never export or bounce mono tracks as stereo files, as this creates confusion and extra steps for the producer or mixer. After the files are exported, check once more that everything is clearly and logically named (you might wish to remove any auto-numbered appendages from the end of the file names).
Always send the highest resolution file you can (usually a 24-bit .wav file), and never send a lossy format like an .mp3! The .wav files are typically too large to send via email, so use free services like Dropbox, Hightail, Google Drive, or WeTransfer to deliver them.
While you’re waiting hear the final mix, you can feel good that you’ve spared your collaborators the frustrating agony of needless detective work and salvage missions. A little care on your part allows them to focus their energy on making your collective work sound the best it possibly can. I promise it’s worth it.
Want to get all of Soundfly’s premium online courses for a low monthly cost?
Subscribe to get unlimited access to all of our course content, an invitation to join our members-only Slack community forum, exclusive perks from partner brands, and massive discounts on personalized mentor sessions for guided learning. Learn what you want, whenever you want, with total freedom.