
This is the fourth lesson in our multi-part course series, How to Make Your First Beat in Ableton Live. To follow along from the beginning, click here, or check out our Mainstage course, Beat Making in Ableton Live, for a more in-depth mentor-assisted experience!
Making a Sound
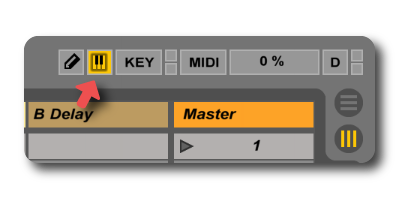
Ready to make some noise? Let’s get started. One way to start making sound is by using your laptop QWERTY keyboard. To do this, turn on the Computer MIDI Keyboard by clicking the little keyboard icon in the top right corner of Live (if it isn’t already highlighted).
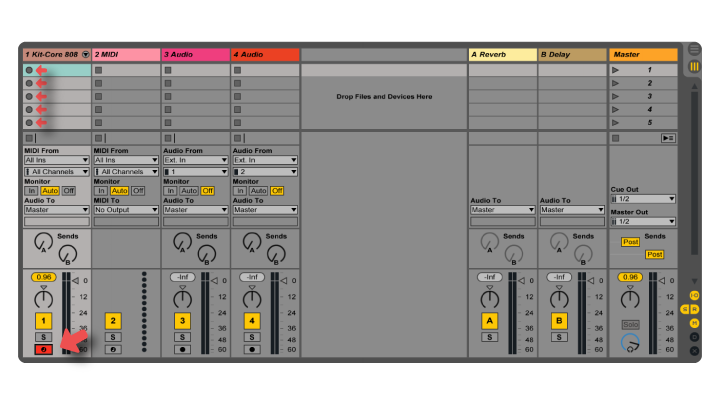
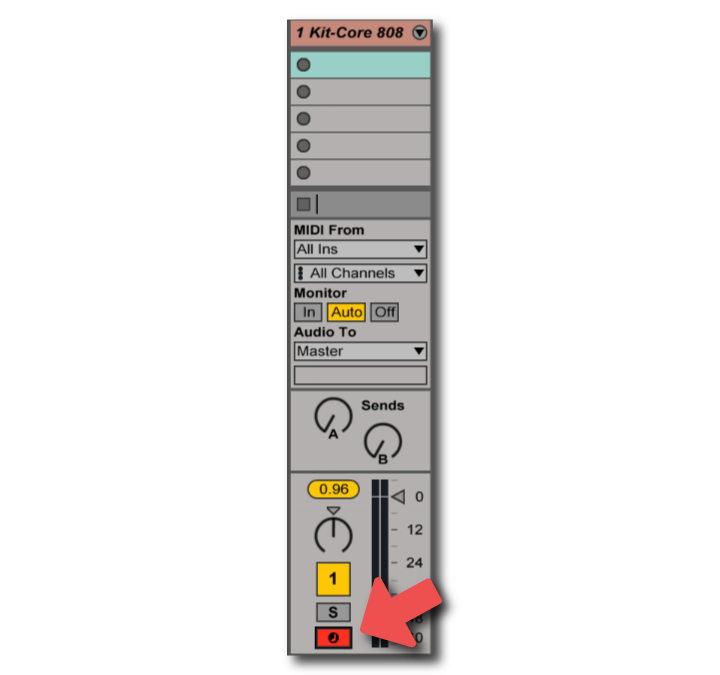
Next, click the Arm Session Recording button on your track containing the Drum Rack. It’s highlighted with a red arrow in the image below. This tells Live which track you want to send notes to. Notice how the buttons in the Clip view of our armed track are now circular? We’ll come back to these shortly.
Now press the A key on your keyboard. Still not hearing anything? It’s because we’re playing notes outside the range of the samples in our kit. In order to play lower notes, we need to make our keyboard play two octaves lower. We can do this by pressing the Z key twice. Now your A key should sound like an 808 kick drum.
Here’s a helpful key map to show you the layout on your QWERTY keyboard:
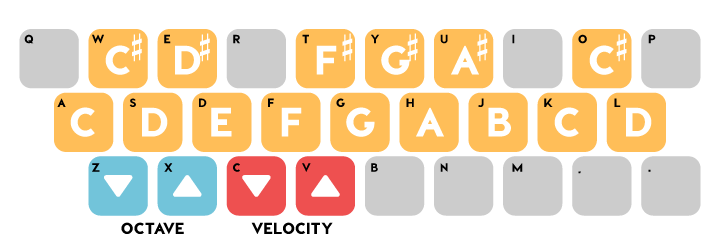
Download: keymap
Setting Up a MIDI Controller
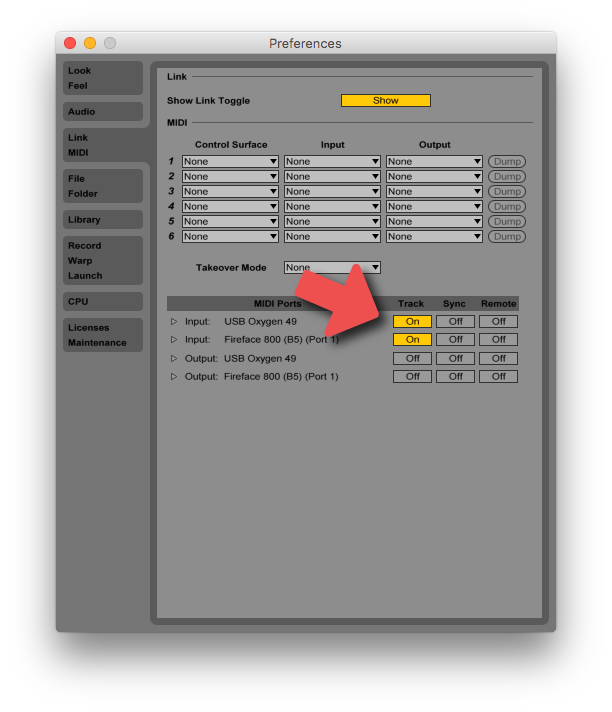
If you have a MIDI controller you want to use, we need to first make sure it’s enabled, which we do in Preferences. To access Live’s Preferences, use the shortcut CMD+comma (CTRL+comma on a PC) or go to the “Live” menu in the top-left corner and click “Preferences.” Click the “Link MIDI” tab on the left, and make sure the “Track” button is on for your MIDI keyboard.
When you’re ready, close the Preferences window, make sure the Arm Session Recording button is red for the track containing your Drum Rack, and play a few keys. You’ll find the kit begins on the C two octaves below middle C.
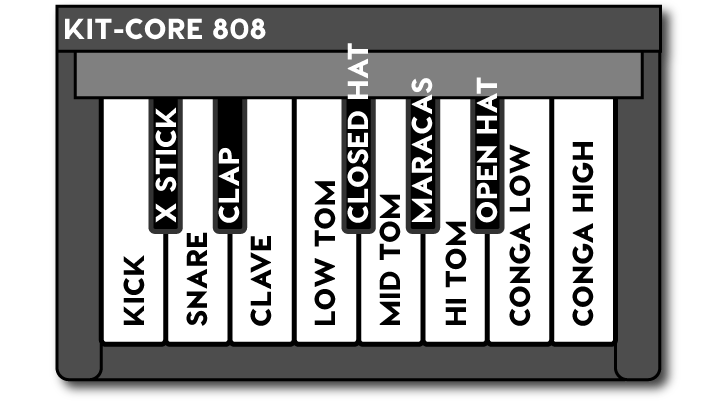
Again, you might need to adjust the octave of your keyboard to hear the sounds. Typically, the octave control is on the left-hand side of a MIDI controller. In the graphic below, you can get an idea of how drums are typically laid out.
Do I Need a MIDI Controller?
No. If you don’t have a MIDI keyboard or controller, don’t worry at all. Work with what you’ve got. This video from The New York Times shows the creative process behind Justin Bieber’s “Where Are Ü Now.” Notice that Skrillex uses Ableton’s keyboard function around 3:20 in the video rather than a MIDI controller. It’s 100% possible to write an incredible beat without any MIDI peripherals.
Do you feel weird knowing that you kind of like a Justin Bieber song? Me, too. Let’s move on.
Recording a MIDI Clip
Now that you can make sound, let’s record something! In this quick video, we’ll select a tempo, set up a click including a one-bar count in, and record a kick and snare pattern.
Give It a Shot!
Try playing and recording a beat into Live. Finding the right tempo can be tricky. If you’ve got a beat in your head, try adjusting the tempo until the click matches up with what you’re hearing. When you’ve got it, play in your beat.

How does it sound? If it’s a little messy or offbeat, don’t worry. We’re about to help you fix that!