+ Master the tools and techniques of producing pro-level electronic music and audio in Ableton Live with Soundfly’s course, Intro to Music Production in Ableton Live.
Part of having a good workflow is maximizing the time you spend producing. Investing time to create a default template of your own allows you to start a session and instantly have all your favorite tools ready to go to make music.
The genres I like producing (trap, future bass, hip-hop) are very drum/rhythm heavy. As such, I use a lot of Ableton’s drum racks and have decided to include that in my default template. I also have different instances of Serum set up in my template as I use it on every song I produce.
One thing to keep in mind is the speed of your computer, a big template can slow down launch times, thus be mindful of creating a template that is lean, but at the same time fits your needs. I have included a link to download my template at the bottom of this blog post.
*A bit of housekeeping: Soundfly’s got an all new online course that teaches you all of the tools to get started making pro-level music and audio using Ableton Live, one of the most versatile DAWs out there. Check out Intro to Music Production in Ableton Live here or sign up for our email list to stay up to date with new courses and offers.
Creating the Template
The idea of this template is to kickstart your production process. You want it to be open enough to start different types of projects. I usually avoid adding any loops or musical patterns in my default template for that reason.
Here’s a rundown of my personal default template, which is broken down into five different groups:
Battery, Melodic, Bass, Vox, and FX (there is also a Sidechain group)
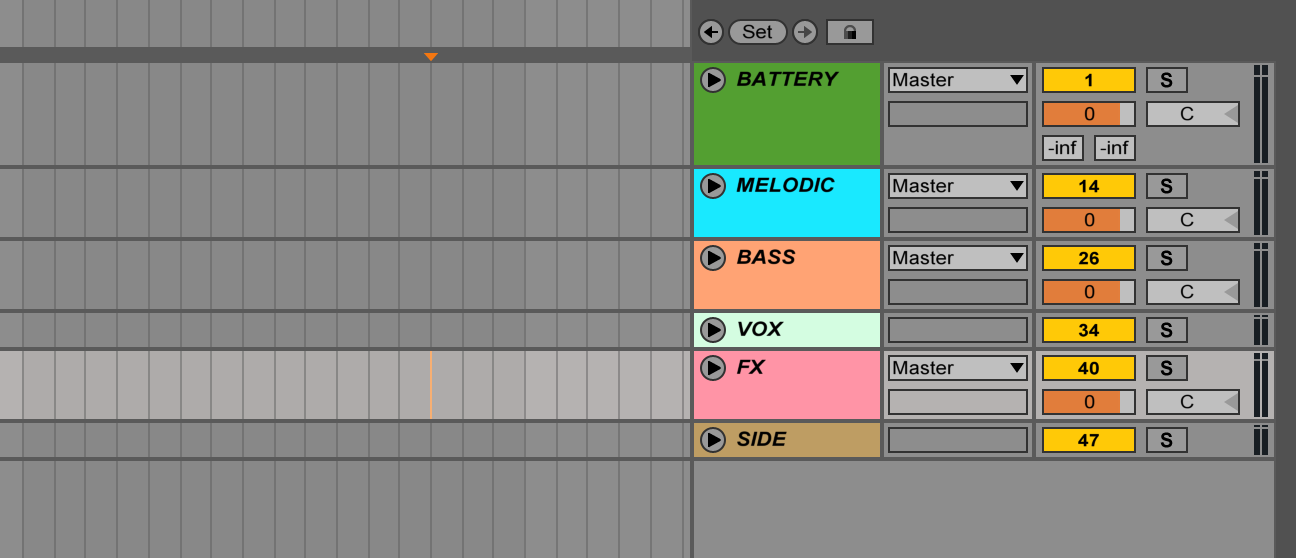
Battery (Drums and Percussion Elements)

Tracks include: one empty drum rack, two full drum racks of trap and hip-hop samples, Sampler, Kontakt, audio tracks for loops and Palmas (Max for Live clap plugin)
Melodic (Harmonic and Melodic Elements)
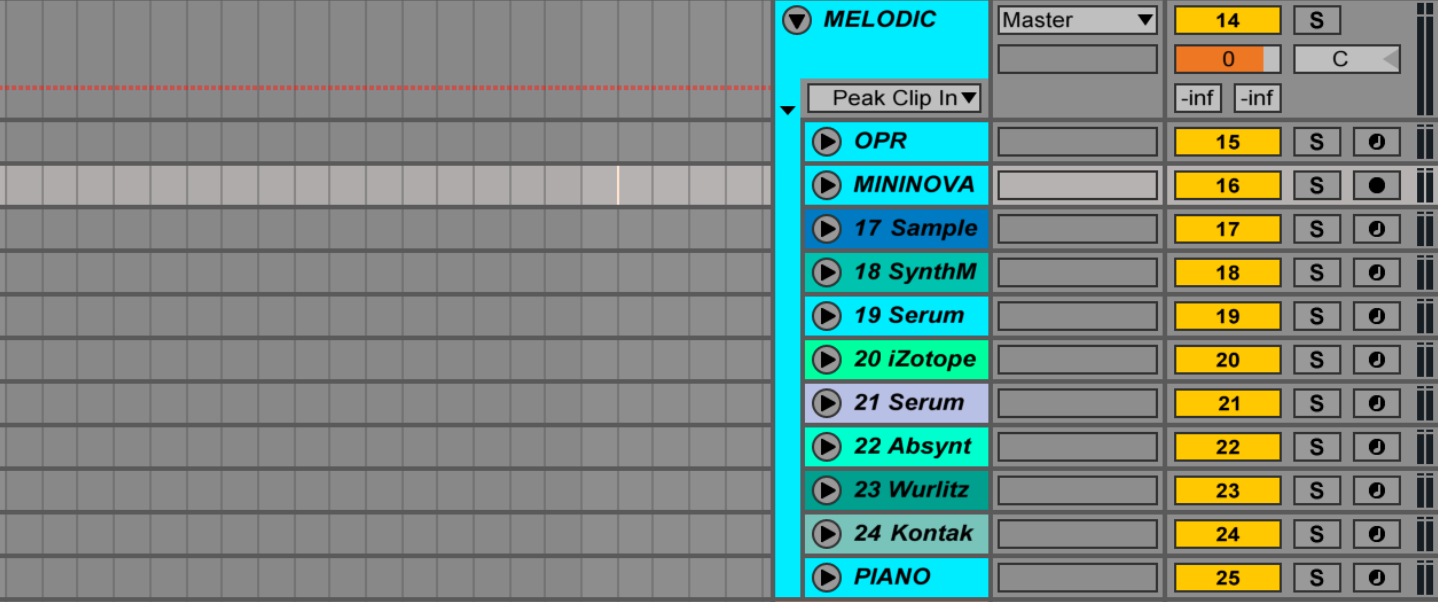
Tracks include: Operator, Sample, Synthmaster 2, Kontakt, Wurlitzer (by Arturia), Absynth, Serum, and audio tracks.
Bass (Bass Elements)
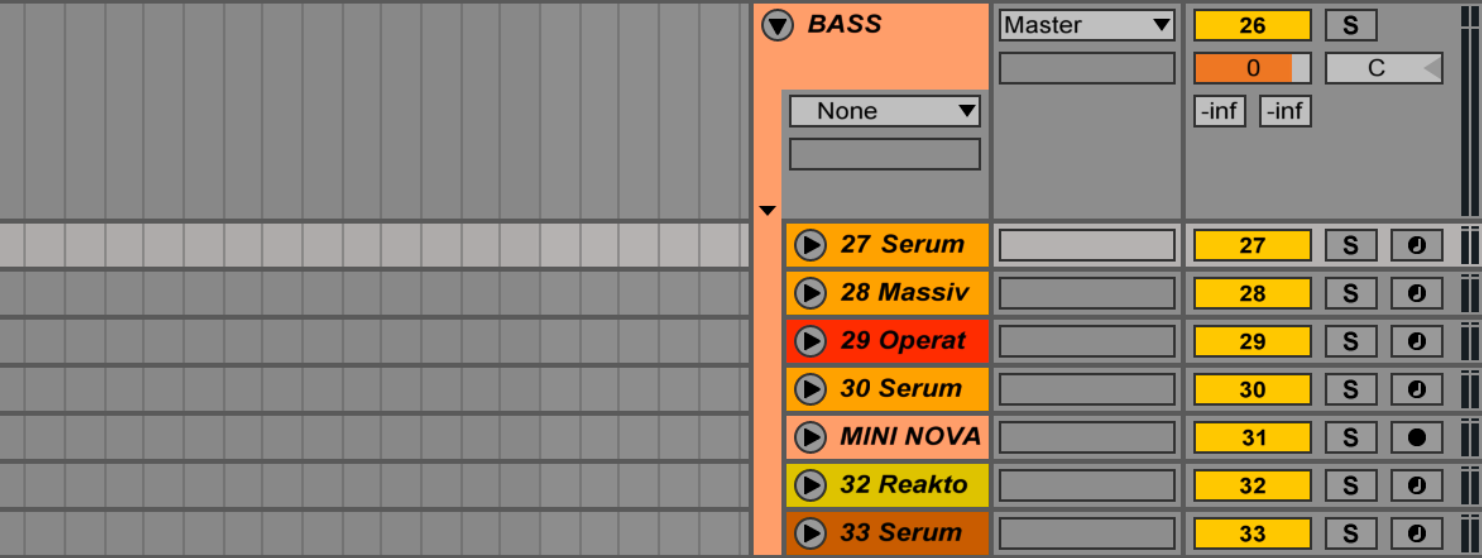
Tracks include: Serum, Massive, Operator, Reaktor, and an audio track to record my Novation Mininova.
Vox (Vocal elements)
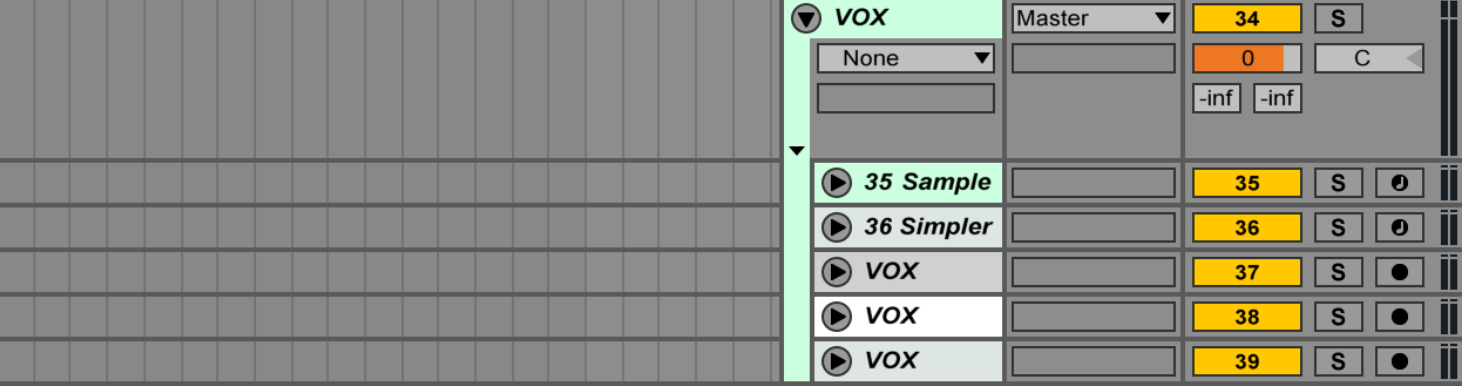
Tracks include: Sample, Simpler, and three audio tracks open for recording.
FX (Sound Effects and Transitional Elements)
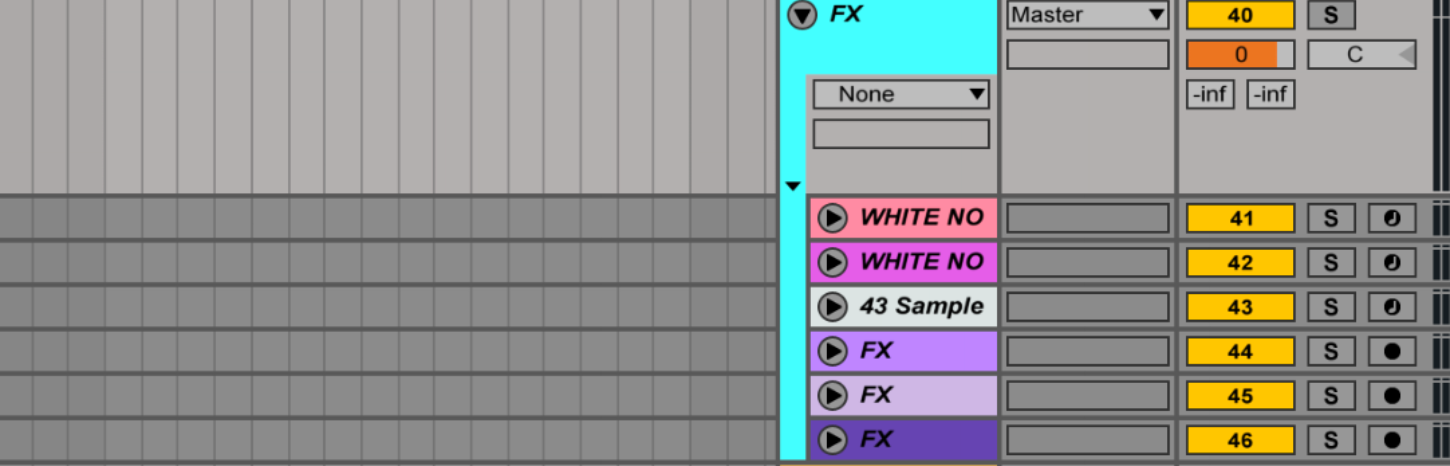
Tracks include: two operators set to white noise, one Sampler, and three audio tracks.
Bonus: Put your go-to effect processing chains (compressor, EQ8, utility, etc) on tracks that you like to speed up your workflow.
Saving the Template
Once you have everything the way you want it, navigate to Ableton’s settings and go to “File” > “Folder.” Click to save using the first option that says “Save Current Set as Default” and you’re good to go!
Don’t Be Afraid to Break the Template
Having a robust template is great, but there are some factors to be wary of. Frequently using the same template over and over again can inhibit your creativity in the long run. To counter that, make sure you update your template every few months so you can keep evolving your sound.
I also recommend occasionally starting projects with a blank slate, simply add a new track and delete the rest of your template tracks. This way you are starting back at zero, which can also inspire creativity.
If you have a template that works for you, let us know in the comments! Download my Ableton Default Template on Splice.
Continue learning with hundreds more lessons on mixing, songwriting, home audio production, electronic music recording, beat making and more, with Soundfly’s in-depth online courses, such as Modern Mix Techniques, The Art of Hip-Hop Production, and Intro to Music Production in Ableton Live.
Subscribe to get unlimited access here.