+ Learning to record and mix in Logic? Preview Soundfly’s online course, Intro to Making Music in Logic Pro X for free, and subscribe for unlimited access here.
By SIRMA
A lot of music producers are very excited about the new Step Sequencer in Logic Pro X. And for good reason. The way it’s laid out right next to the Piano Roll makes it so easy to incorporate to anyone’s workflow.
With dedicated, automatable parameters assigned to each note division, Logic’s Step Sequencer pushes the boundaries of a traditional but monumental creative tool that’s usually found built into synthesizers.
Before this update, I often refrained from using sequencers in my arrangements, since I generally found them a bit rigid. So here’s why the Step Sequencer has changed my point of view as a producer, and nine ways you can integrate it into your creative process from the beginning.
But first, have you heard about Soundfly’s brand new online course, Advanced Synths and Patch Design for Producers, yet? It in, you’ll learn to move beyond presets and create a wide array of scintillating synth sounds for your productions, no matter the genre or brief. Preview the course for free here, and subscribe for unlimited access here.
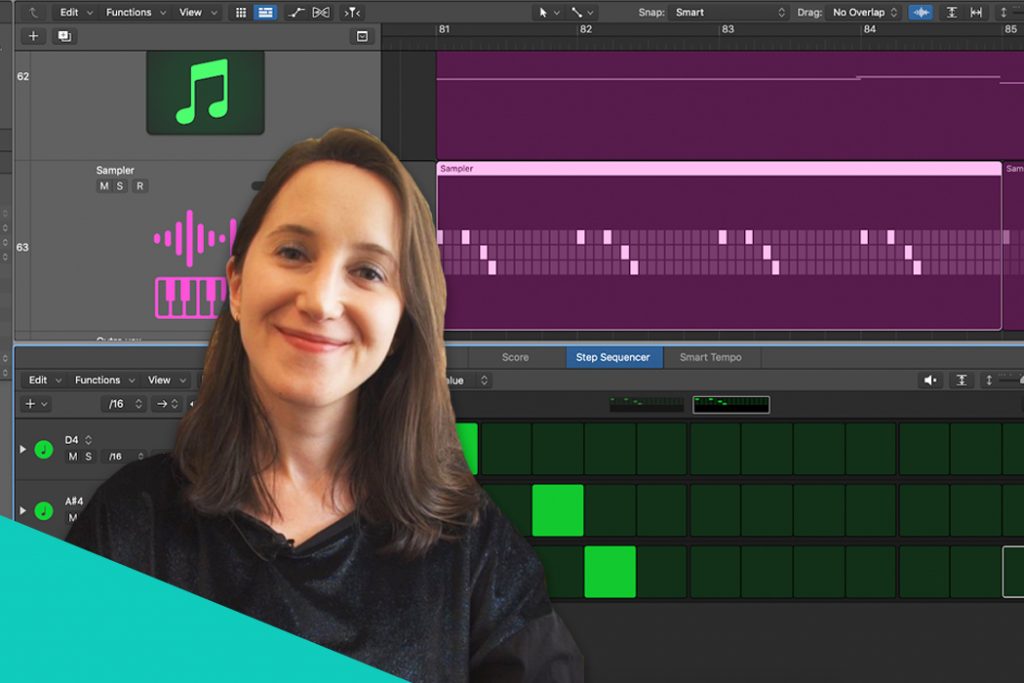
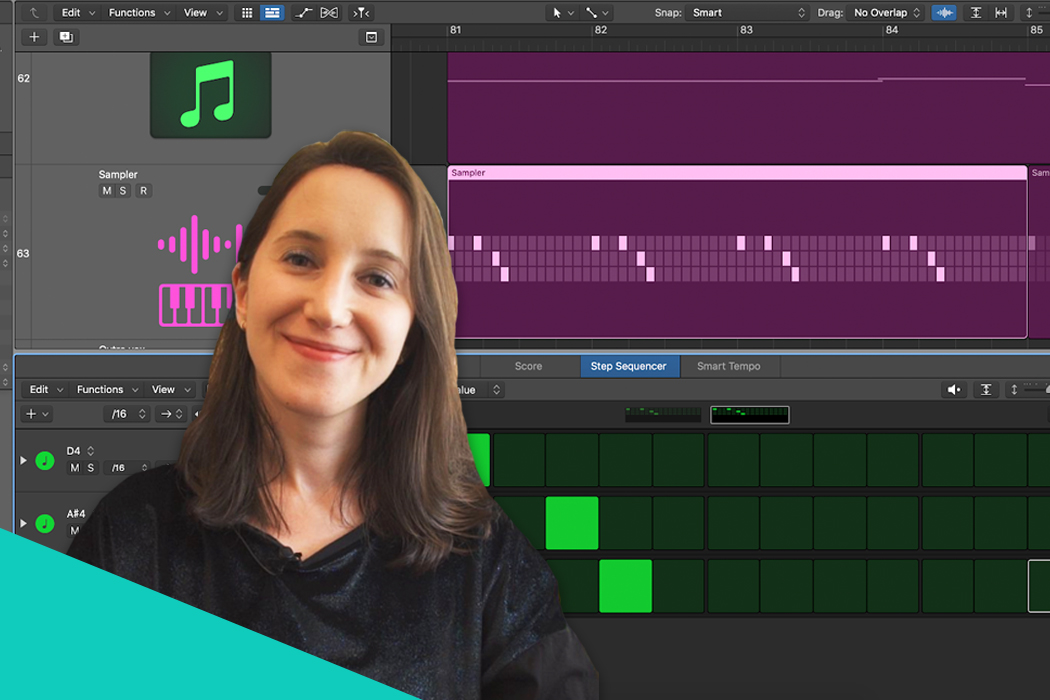
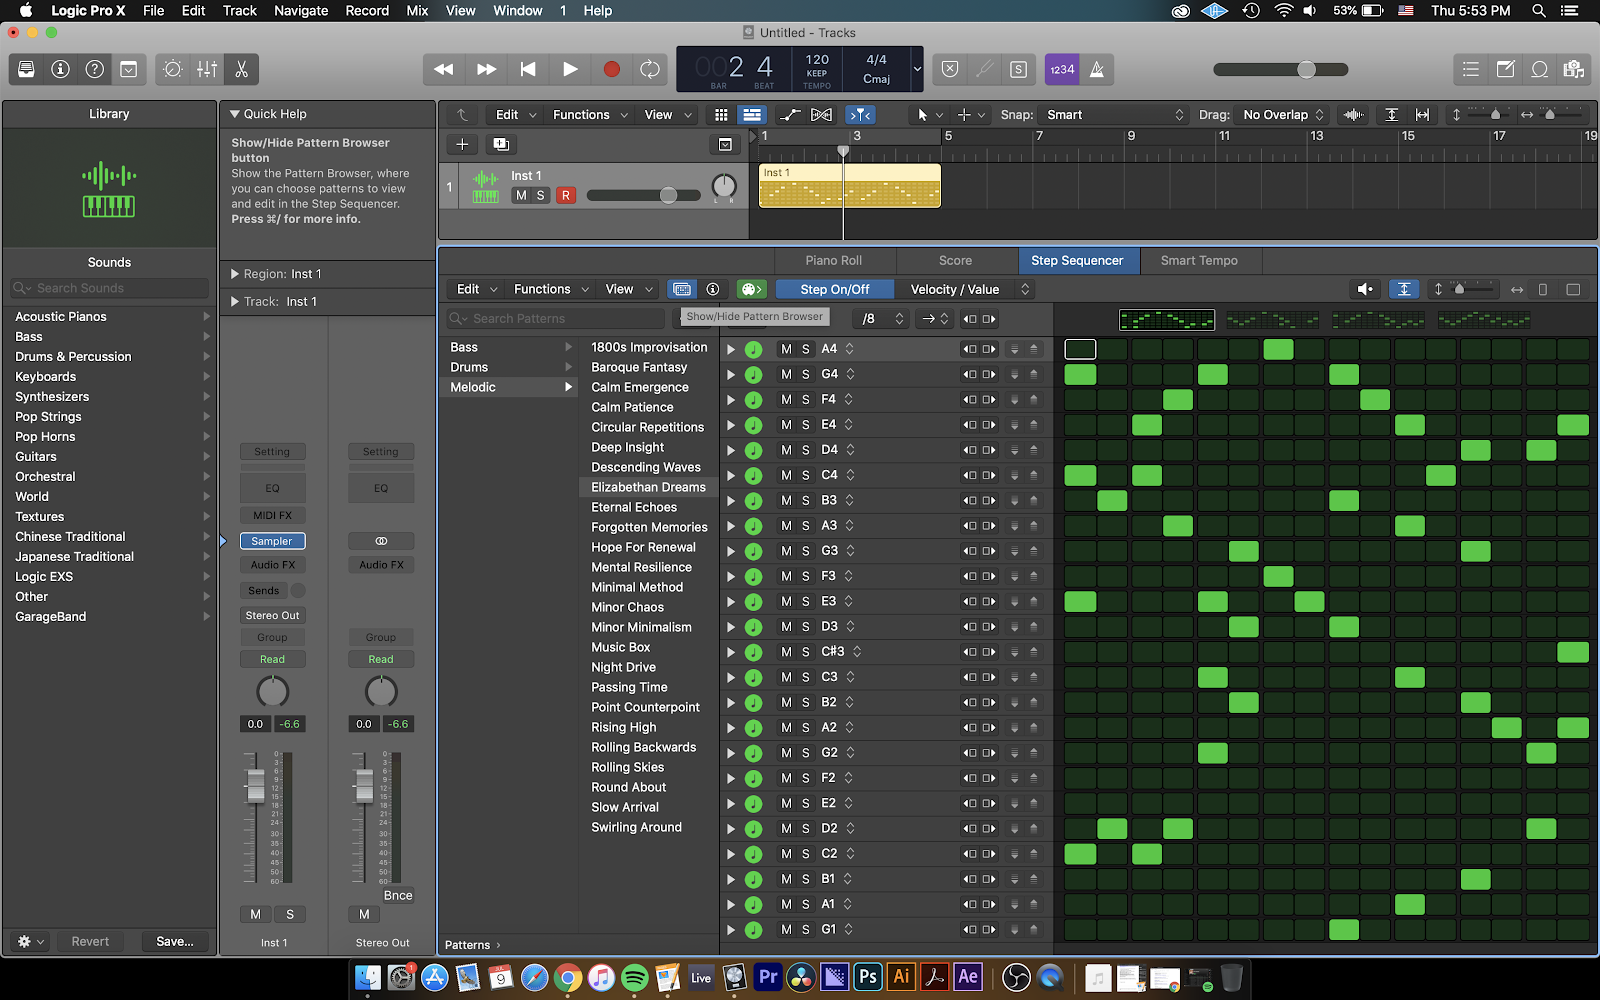
1. Step Sequencer’s pattern regions are very similar to the Piano Roll’s MIDI regions.
As soon as you create a pattern with the Step Sequencer, Logic creates a clip in your workspace that looks very similar to MIDI regions. These clips are called pattern regions.
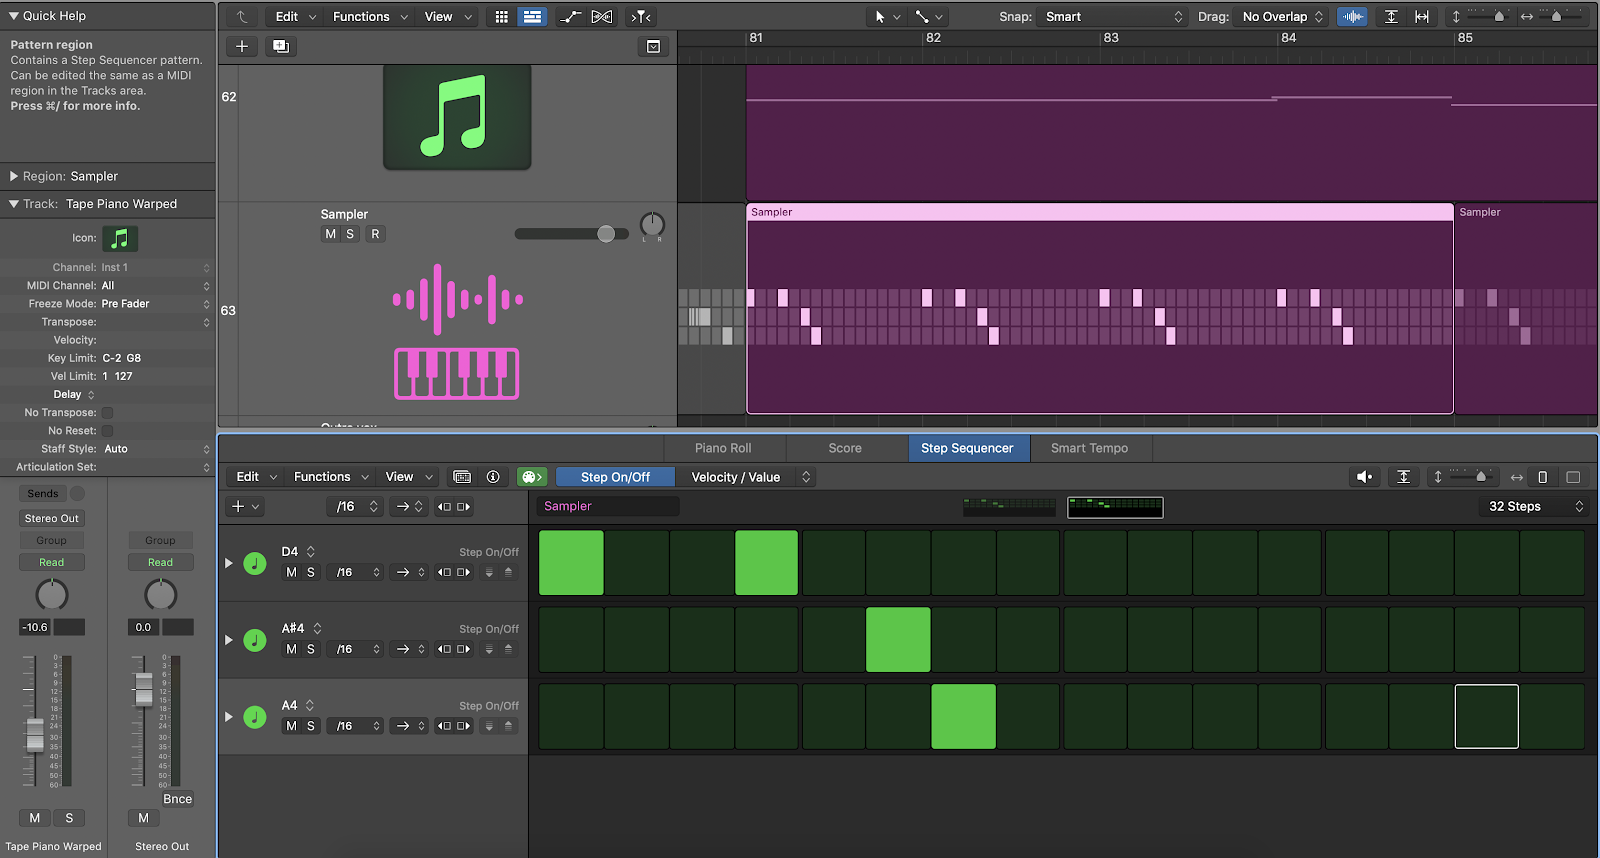
By editing the pattern regions, you can create ever-changing and varying patterns with the Step Sequencer. All you have to do is double click the pattern region you’d like to edit, just like you would do so with MIDI regions to edit a note in the Piano Roll.
2. The Add Row pop-up menu is filled with vast possibilities.
The fact that you can add a row for not just every instrument, sample, or note, but also any parameter you want to automate per step with the touch of a button is definitely one of the biggest selling points of the Step Sequencer.
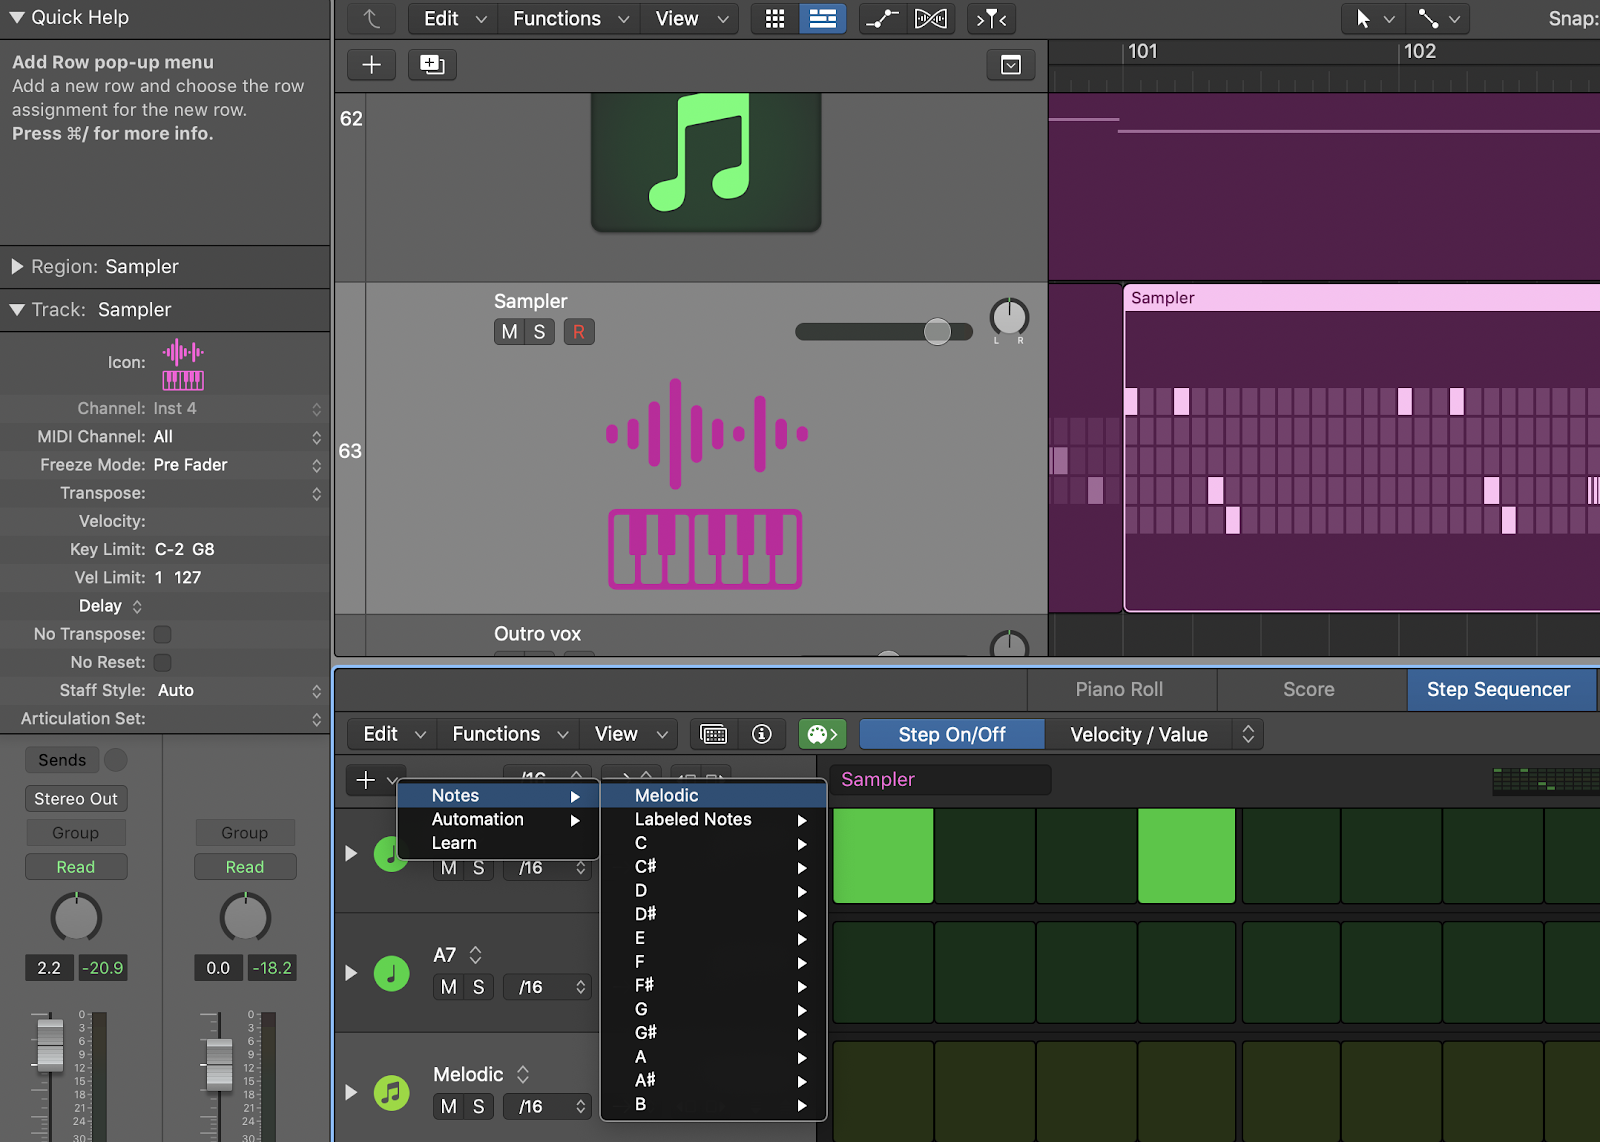
All you have to do is click on the plus (+) sign on the top left corner of the Step Sequencer window to view all the options.
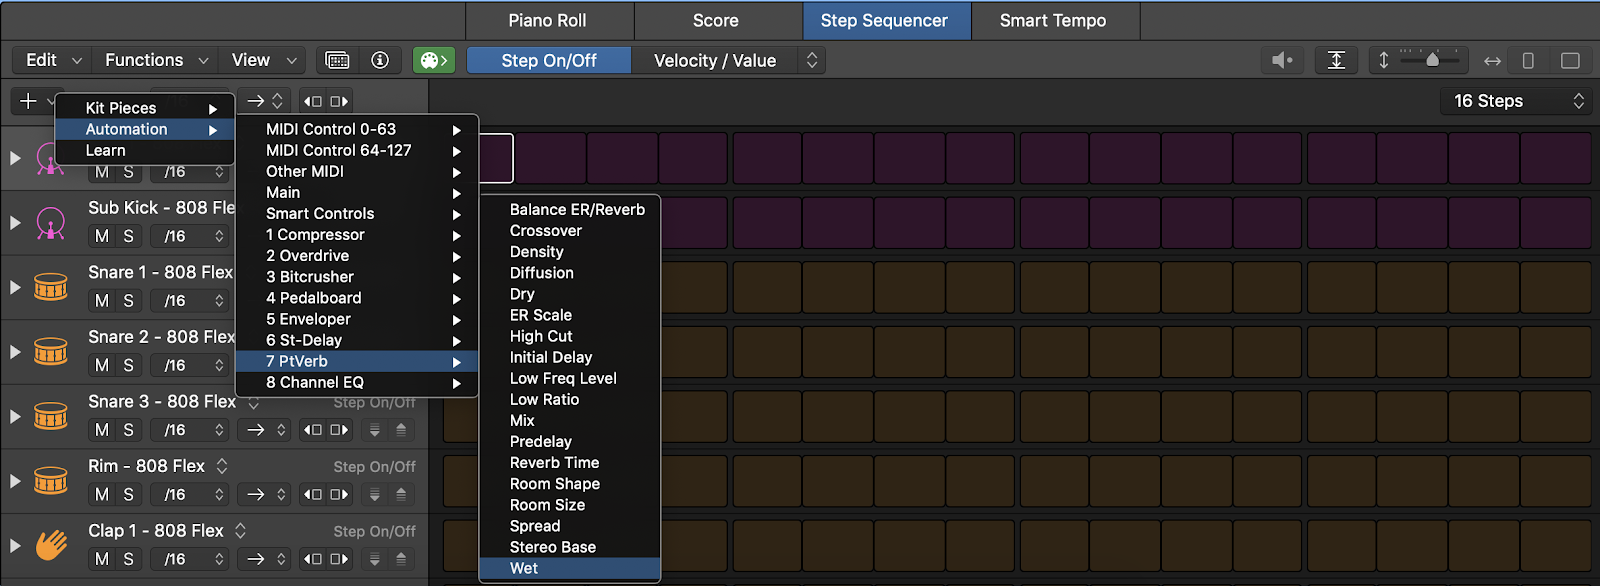
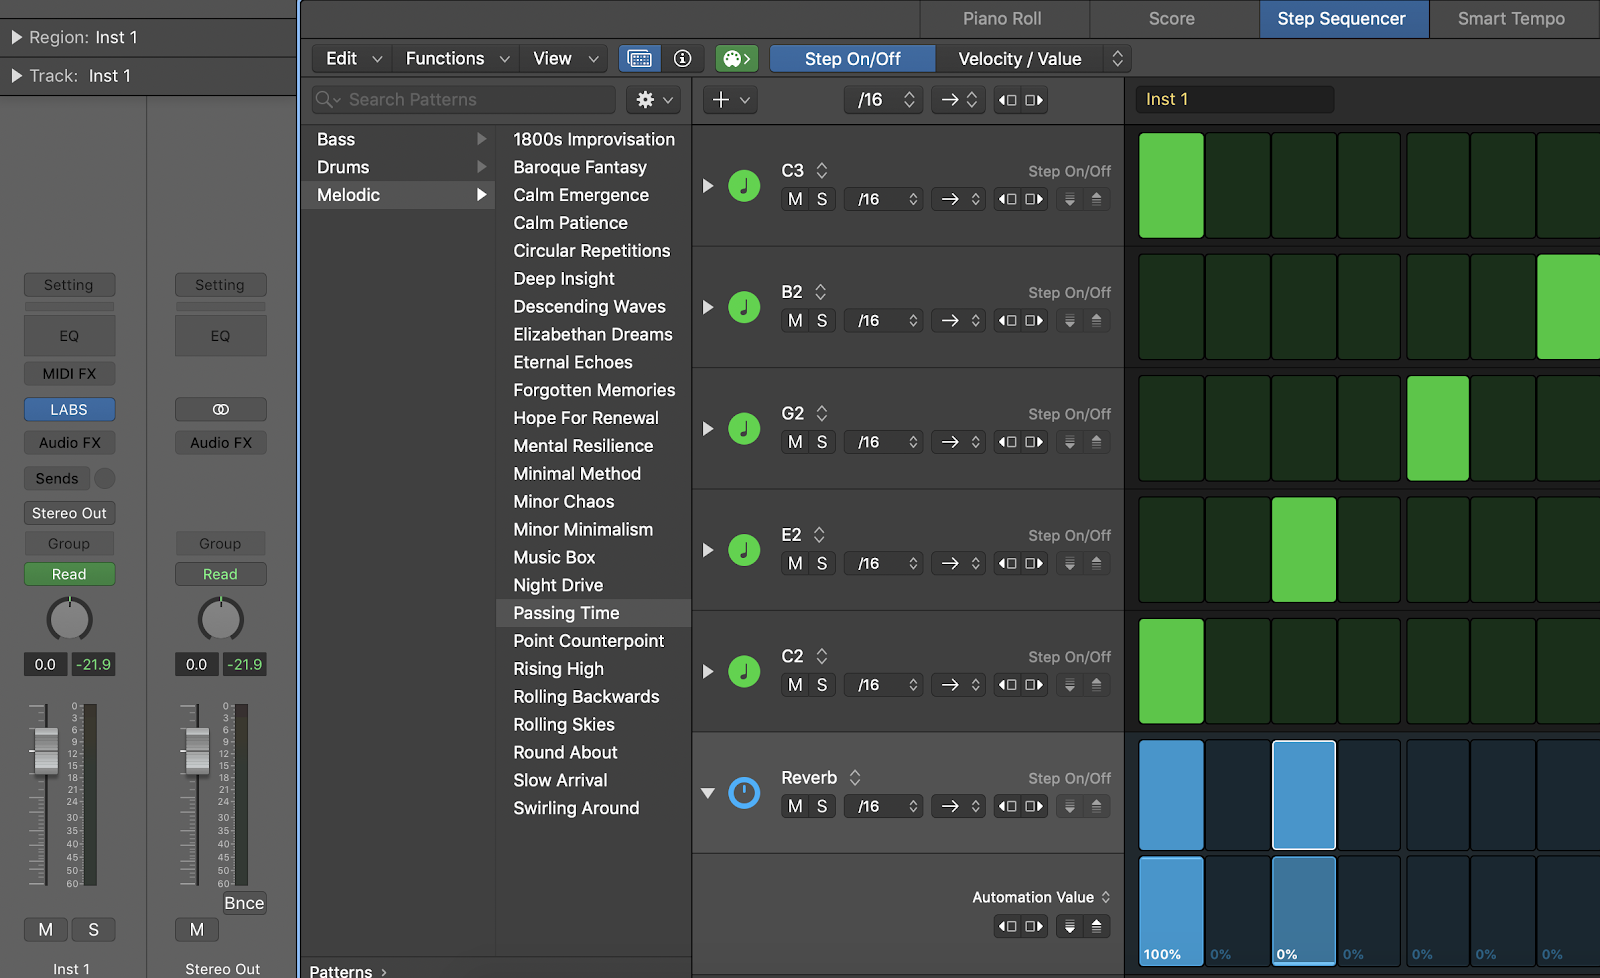
3. The Automation Row in the Step Sequencer is a great alternative to track automation.
Did you know you can automate anything and everything within the Step Sequencer, almost like you would with track automation in your workspace?
Say you’ve created an intricate and continuously altering arpeggiated synth pattern with the Step Sequencer. If you wanted to add momentary effects like delay throws, flanger or big reverb moments within that pattern, you could make it happen easily by using the Automation Row, whether those parameters live within the software instrument of your choosing or as an audio effect inserted on your channel.
While the automation track in the workspace gives you flexible tools to control the fluidity of the adjustments you make happening over time, the automation rows in the step sequencer are great for when you want to add a special effect that only lasts for a beat or two.
Because you can copy and paste the pattern region you create with the Step Sequencer as many times as you want with ease, just like you would with any other region in Logic, this saves you the trouble of writing in the effect you want to achieve via the track automation every time that particular beat comes around.
In short, the Automation Row is a great alternative to track automation, and can serve to meet very specific creative needs.
+ Learn songwriting, theory, production, composition, arranging, mixing, and more — whenever you want and wherever you are. Subscribe for unlimited access!
4. With the subrow edit mode, MIDI editing is intuitive and practical.
With the subrows, you can control the velocity, octave, note and the step rate of each note division.
Perhaps that much is to be expected, but one particular subrow deserves a special mention here: Note Repeat. Creating stutter effects has never been this easy, and I simply cannot stop playing with it!
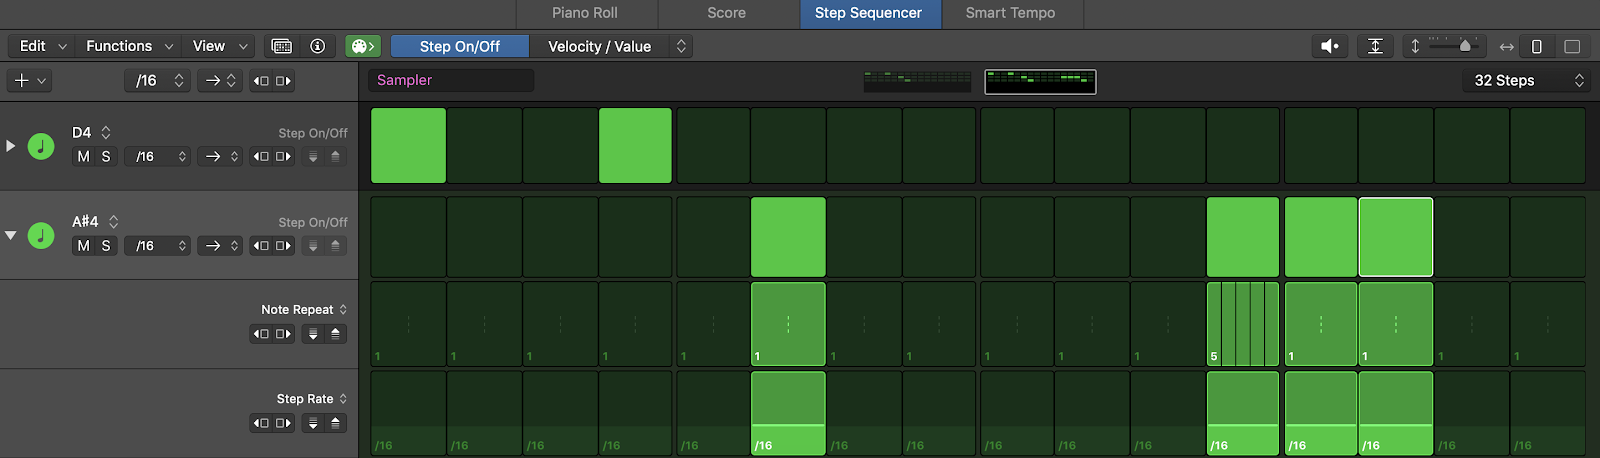
The Note Repeat subrow is especially a godsend for trap beat-makers. Just imagine how quickly you can create complex 808 hi-hat patterns with this thing!
5. Pattern Browser is there to inspire you when you hit creative roadblocks.
The Pattern Browser button is right next to the View drop down menu within the Step Sequencer. If you’re new to sequencers in general and you’re looking for inspiration, you’re in luck — because the pattern browser comes with pre-made patterns for not just drums but also bass and melodic instruments.
If you’re working with an exotic plucked string instrument, I strongly recommend browsing the Templates menu within the Pattern Browser as well. There are several modes to choose from, and while the choices are heavily Western influenced, there are a few Middle Eastern, Southeast Asian, and Eastern European modes in there, too.
6. The Step Sequencer comes with four different playback modes.
The playback modes in the Step Sequencer will remind you of the note order in the Arpeggiator MIDI FX in Logic. Depending on your choice, the Step Sequencer can start from the top to play the pattern, or from the bottom to play the sequence backwards.
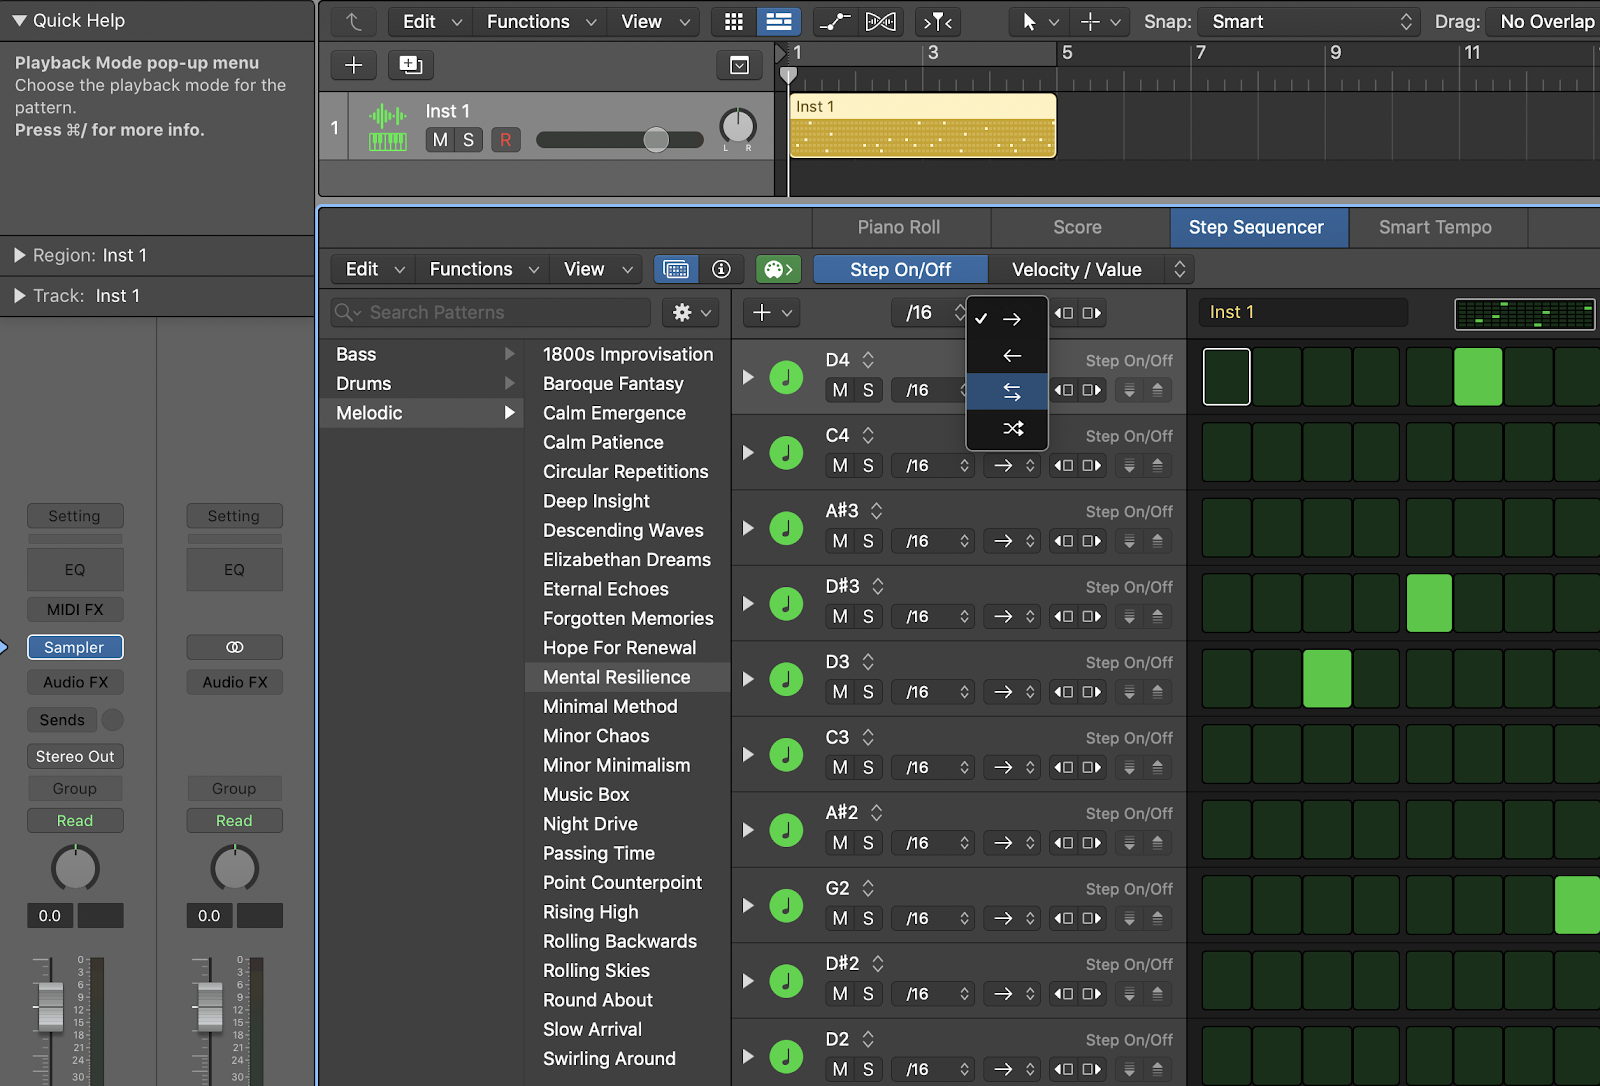
You can also make your sequence play back and forth between those two directions or randomize it to keep things interesting in your arrangement.
+ Read more on Flypaper: “Your Guide to the Unmissable Highlights of the New Logic Pro X 10.5”
7. AU Instruments can be played with the Step Sequencer
This is another huge factor that makes the Step Sequencer one of the best things that has ever happened to Logic Pro X! Any AU instrument, meaning, any third-party software instrument you are able to use within Logic, will be connected to the Step Sequencer as soon as you insert it on a channel.
What makes this even more incredible is that you can also create momentary effects using the parameters available within the AU instrument of your choosing. Any automatable parameter in the workspace is also automatable in the Step Sequencer!
If you’re going to give the Automation Rows a shot to control the effects within your instrument, here’s a pro tip: Make sure you write in exactly when you want the effect to go back to default mode.
For instance, if you want the downbeat of your pattern to sound more reverberated than the rest, turning up the reverb wetness amount for that particular step is not sufficient: You also have to turn it back down on the following step to achieve the desired effect.
8. The Step Sequencer is not just a beat-making tool.
Most people use sequencers to make beats, because when you have all the note divisions laid out in front of you, all you have left to do is fill in the blanks. This workflow is almost comparable to solving a crossword puzzle.
However, this is exactly why the Step Sequencer can be used as a melodic and even a harmonic compositional tool.
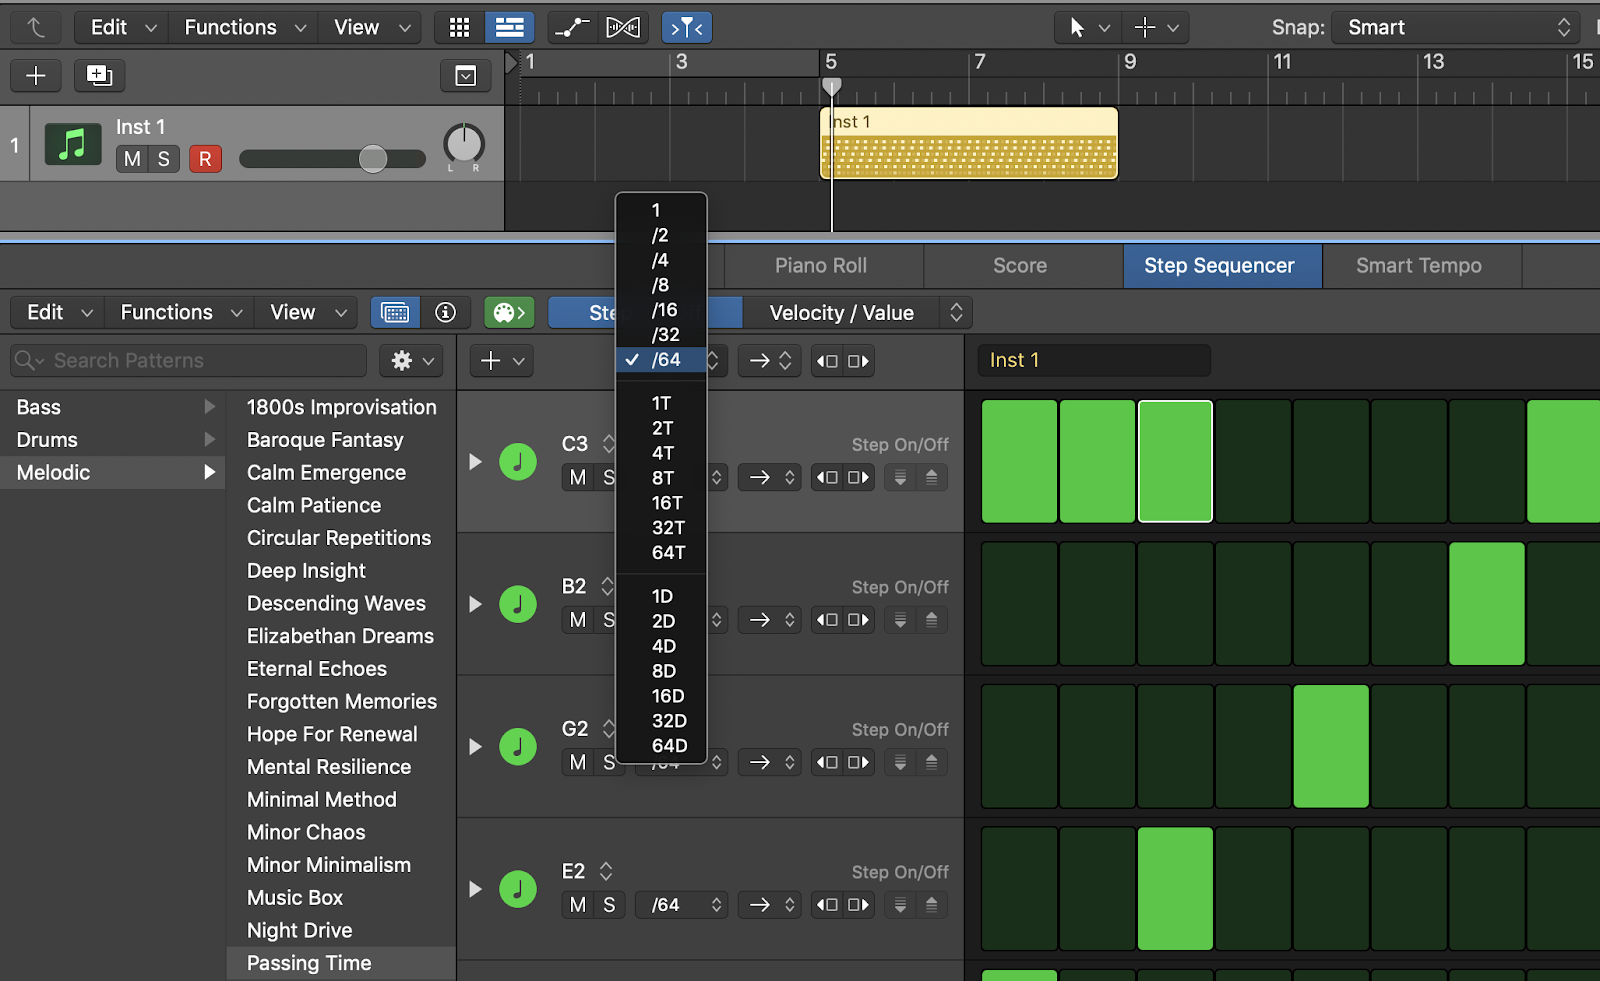
Most producers stick with the sixteenth note division layout, but the Step Sequencer allows you to divide your steps up to sixty-fourth notes. And of course, you can also compose in triplets or dotted notes. Imagine the possibilities!
9. Creating intricate monophonic and polyphonic textures has never been easier.
You can use the Step Sequencer to not just compose but also design sounds and samples.
By automating effects, velocity, step rate, or even using the chance or skip controls in the Step Sequencer, you can build ongoing patterns that evolve and transform over time.
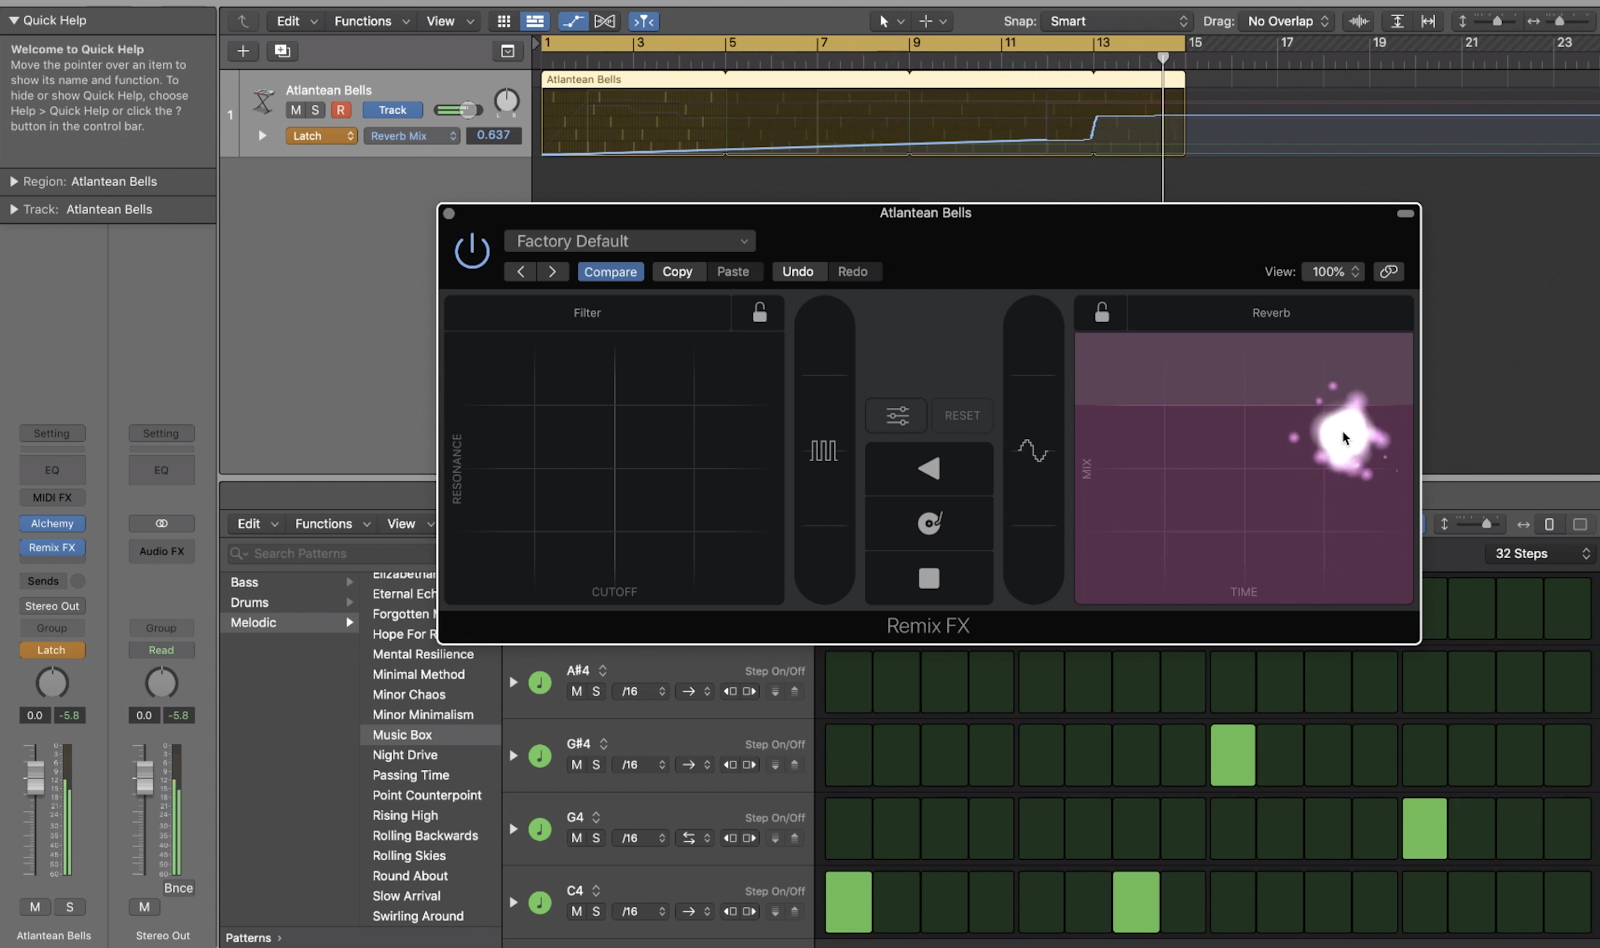
For especially monophonic and polyphonic patterns, I highly recommend trying out the Remix FX to take your sound design to the next level. When you play with the Remix FX in Latch mode in the track automation within the workspace, it feels much like the hands-on creative experience you get from playing with the knobs on an analog synthesizer.
Want more?
Continue learning with hundreds more lessons on mixing, DIY home audio production, electronic music recording, beat making, and so much more, with Soundfly’s in-depth online courses, like Making Music in Logic Pro X, Modern Pop Vocal Production, and the new Advanced Synths & Patch Design (to name a few). Subscribe to get unlimited access here.