+ Our brand new course with The Dillinger Escape Plan’s Ben Weinman teaches how to make a living in music without making sacrifices. Check out The Business of Uncompromising Art, out now exclusively on Soundfly.
Most of us are recording music at home right now (whether we like it or not). And because of that, our recording space may be limited. Or it may require a little more finagling until we can get a professional sound.
Regardless of your setup, high-quality vocals are always of utmost importance. They’re one of the main elements that take your song from amateur- to pro-level recording.
So in this post, we’re going to cover how you can make a DIY vocal booth for your home studio. There are three main steps: Treat your recording space, isolate your microphone, and avoid plosives and sibilance.
But before we get into it, if you’re looking to learn how to produce vocals at home that sound modern, polished, and most importantly, professional, check out Soundfly’s comprehensive course on Modern Pop Vocal Production, which is chock full of hands-on lessons and expert advice.

1. Treat Your Room
Before you set up your DIY vocal booth, you’ll need to treat your home recording studio.
“But if I have a vocal booth, it doesn’t matter if my room is treated!”
Wrong. This is a DIY vocal booth, meaning it probably won’t completely isolate all the sound. So your recording room needs to be ready for any sound that escapes your little isolated vocal corner. And your recording space should be treated anyway for all the other recording, mixing, and listening you’re doing.
Absorption Panels
Acoustic absorption panels (like the soft, spongey wedges you’ve seen a million times) typically absorb mid-to-high frequencies. This means they cut down on reflected sound, which is the sound that bounces off the walls, ceiling, and floor, and then returns to the mic.
Basically, absorbers cut down on echoing sound, and in a small room with lots of potential reflections, this could sound maddening. But since these absorption panels will be sucking up your high end frequencies, you might need to add a bit of gain back in to the high end while recording voice work.
The best place to put absorbers is at the side reflection points (in line with your ears height-wise), directly behind you, behind your monitors, and above your head. These are the main points sound bounces off of before returning to the mic or your ears.
Bass Traps
Bass traps absorb the low-end frequencies. Too many low sounds in your studio and things will sound muddled and messy. The best place to put bass traps are in the corners of your room, which is where low-end frequencies tend to build up.
Hardwood Floors and a Rug
It’s ideal for you to set your home studio up with a hardwood floor and a rug on top.
If your room is all carpet, it will absorb too many frequencies, especially the high-end frequencies, making the resulting audio you hear not exactly an accurate reflection of what’s happening in your mix. On the other hand, if it’s all hard flooring, your mix will sound too echoey.
A hard floor with an absorbent rug is your best bet.
2. Isolate Your Microphone
The next step is to isolate the area directly around your microphone. The sooner you absorb frequencies from your mouth, the fewer reflected frequencies you’ll have.
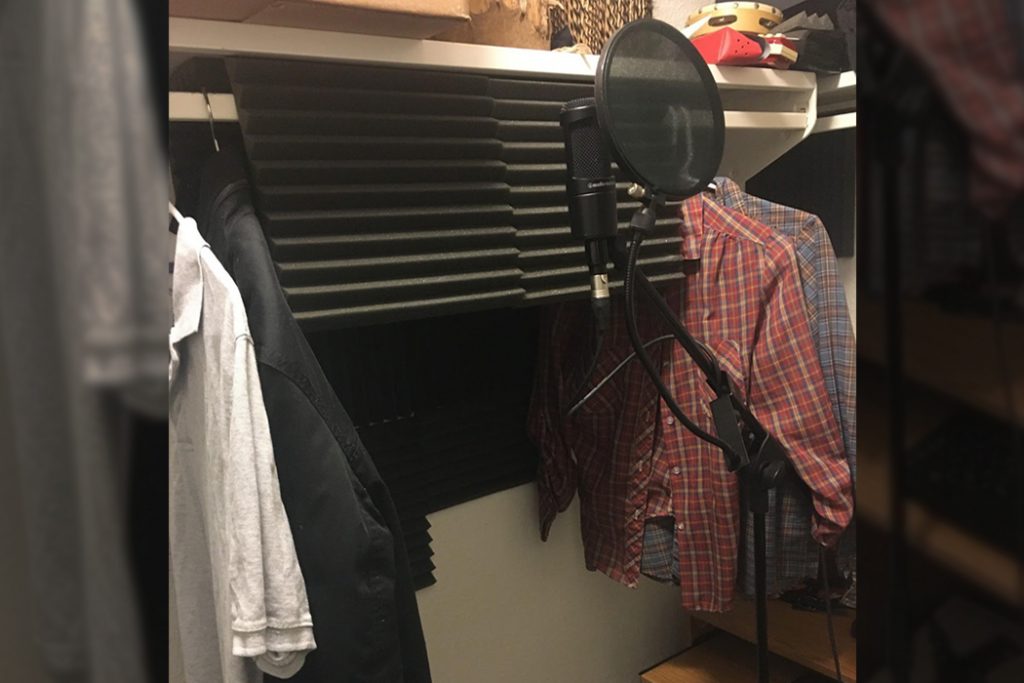
My “Vocal Booth”
My vocal booth is truly DIY (see the header image up top). But hey, I work with what I got.
I hung absorption panels on my wall. Then I set up my mic directly in front of those panels.
Now, my studio is in a walk-in closet, so there’s a shelf that runs along that wall. Connected to that shelf underneath is a place to hang clothing. So I hang a couple more absorption panels from that clothing hanger directly behind the mic. Then on either side of the mic, I hang shirts and sweaters.
Thus, I have a makeshift vocal booth. It ain’t pretty, but it works.
Other DIY Options
The most common DIY vocal booth is a closet full of clothes. You simply open the door to your closet, align your clothing so it hangs the whole way across the door frame, and put your mic right in front. The fabric will absorb enough frequencies.
You can also hang a thick blanket on your wall as a backdrop for your mic. I had a “blanket booth” in my old studio (a basement) — I hung four blankets from the rafters to make a little square vocal booth.
Another viable option is to use a mattress or multiple mattresses. If you have just one mattress, lean it up against the wall behind your mic. If you have two (who has two extra mattresses?!), stand them up in a V-shape behind the mic.
+ Learn production, composition, songwriting, theory, arranging, mixing, and more — whenever you want and wherever you are. Subscribe for unlimited access!
3. Avoid Plosives and Sibilance
There are a few other elements you’ll need for a good DIY vocal booth: A pop filter and a couple of well-oiled vocal-recording techniques.
Pop Filter
A pop filter is an essential tool for recording vocals. If you don’t have one, get one now. It’s a piece of mesh you put in between your mouth and the mic. It breaks up plosives (“p,” “b,” and “ch” sounds) and can help cut down on sibilance (“s” and “t” sounds).
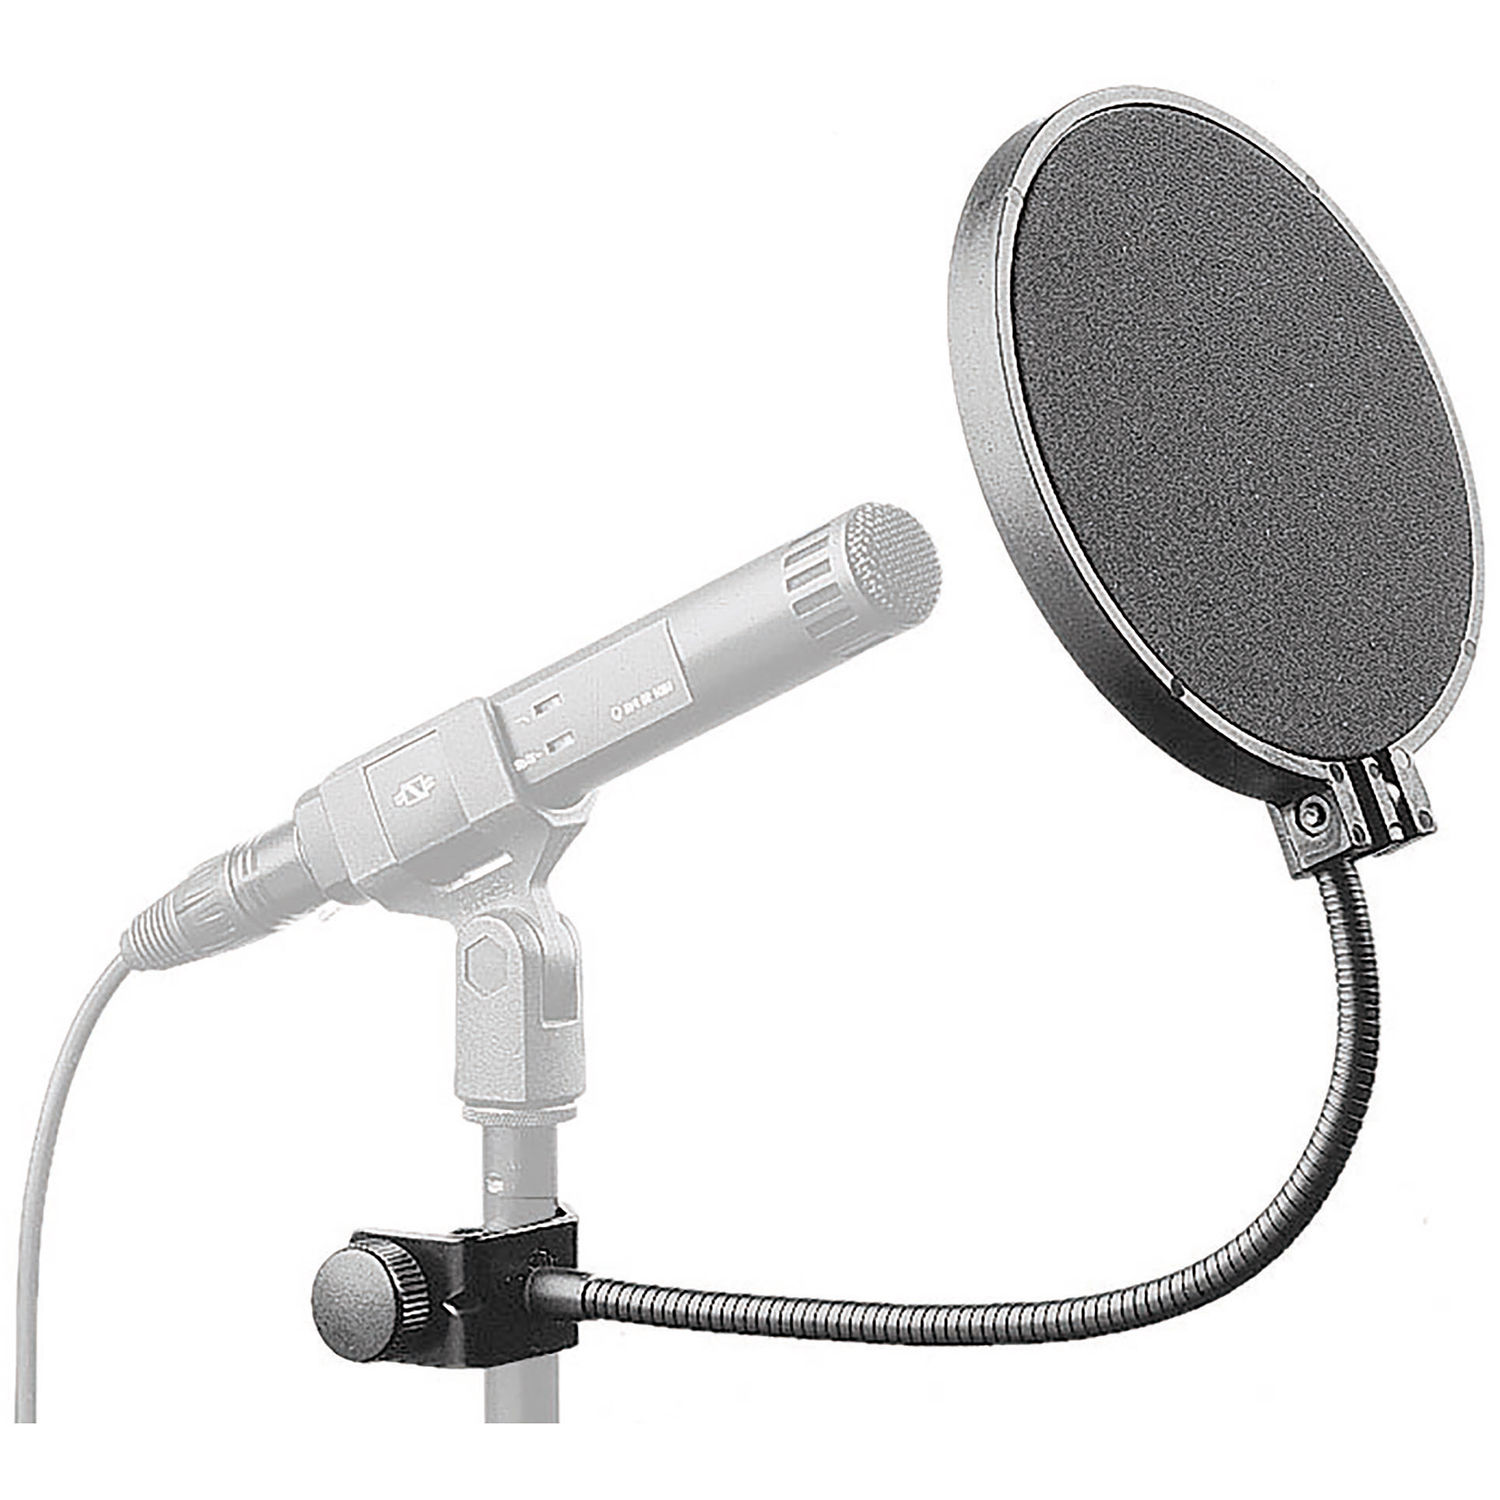
Basically, it helps you avoid blasts of mouth-air hitting the capsule of the microphone.
The Off-Axis Technique
On top of using a pop filter, you can use the off-axis technique. This is where you turn your head or the mic slightly to one side as you sing. Not too much that you lose quality, but enough that you avoid plosives and sibilance.
For other mic placement techniques, visit our article here.
Step Back
Another very simple way to avoid plosives and sibilance is to just step away from the mic.
If you’re too close to the mic, you’ll have more plosives and sibilance and a lot more low-end. If you step too far back, your voice will become married with the sound of the room, which will make mixing a huge headache.
You’ll have to experiment and see what sounds good depending on where you stand.
Don’t stop here!
Continue learning with hundreds of lessons on songwriting, mixing, recording and production, composing, beat making, and more on Soundfly, with artist-led courses by Ryan Lott, Com Truise, Jlin, Kiefer, RJD2, and Kimbra: Vocal Creativity, Arranging, & Production.