+ This is an excerpt from Soundfly’s Advanced Synths and Patch Design for Producers course. To access this lesson, plus hundreds of videos and tutorials on production, songwriting, composing, beat making, and mixing, subscribe here.
This is part two of our exploration of the Reese bass synth sound. To learn more about the history and sonic make-up of this incredible production tool, head over here.
Drum and bass music should immediately make you think of two things: Frenetic drum breaks, and Reese basses. The Reese is this larger-than-life, monolithic sound that contributes a thick layer to the low-end of tracks in tons of genres.
Let’s check out an example of how to make this bass with the now-classic software synth, Massive, featuring this now-classic drum and bass track, Netsky’s “Escape.”
Watch the video below as I rebuild this sound in real time, and follow along in your soft synth of choice with the step-by-step underneath. And don’t forget to head over to Advanced Synths & Patch Design for Producers to learn so, so much more about building custom synth patches that fit your tracks.
Composition Notes
Reese basses are usually sustained bass layers, often filling entire bars without letting up. In drum and bass music, it’s common for the bass to be the primary defining voice of chord changes.
In the case of “Escape,” the Reese is the only sound defining the harmony, at least in the drop sections, and though it primarily serves as the harmonic foundation for the track, it also has an unusually melodic role in the way it’s written.
Everything else is just supporting this overall B minor vibe without playing any actual chords. The motion of the bass define the chords of the moment, outlining the notes of a B minor scale, while the melodic elements above steadily shift and repeat their simple phrases.
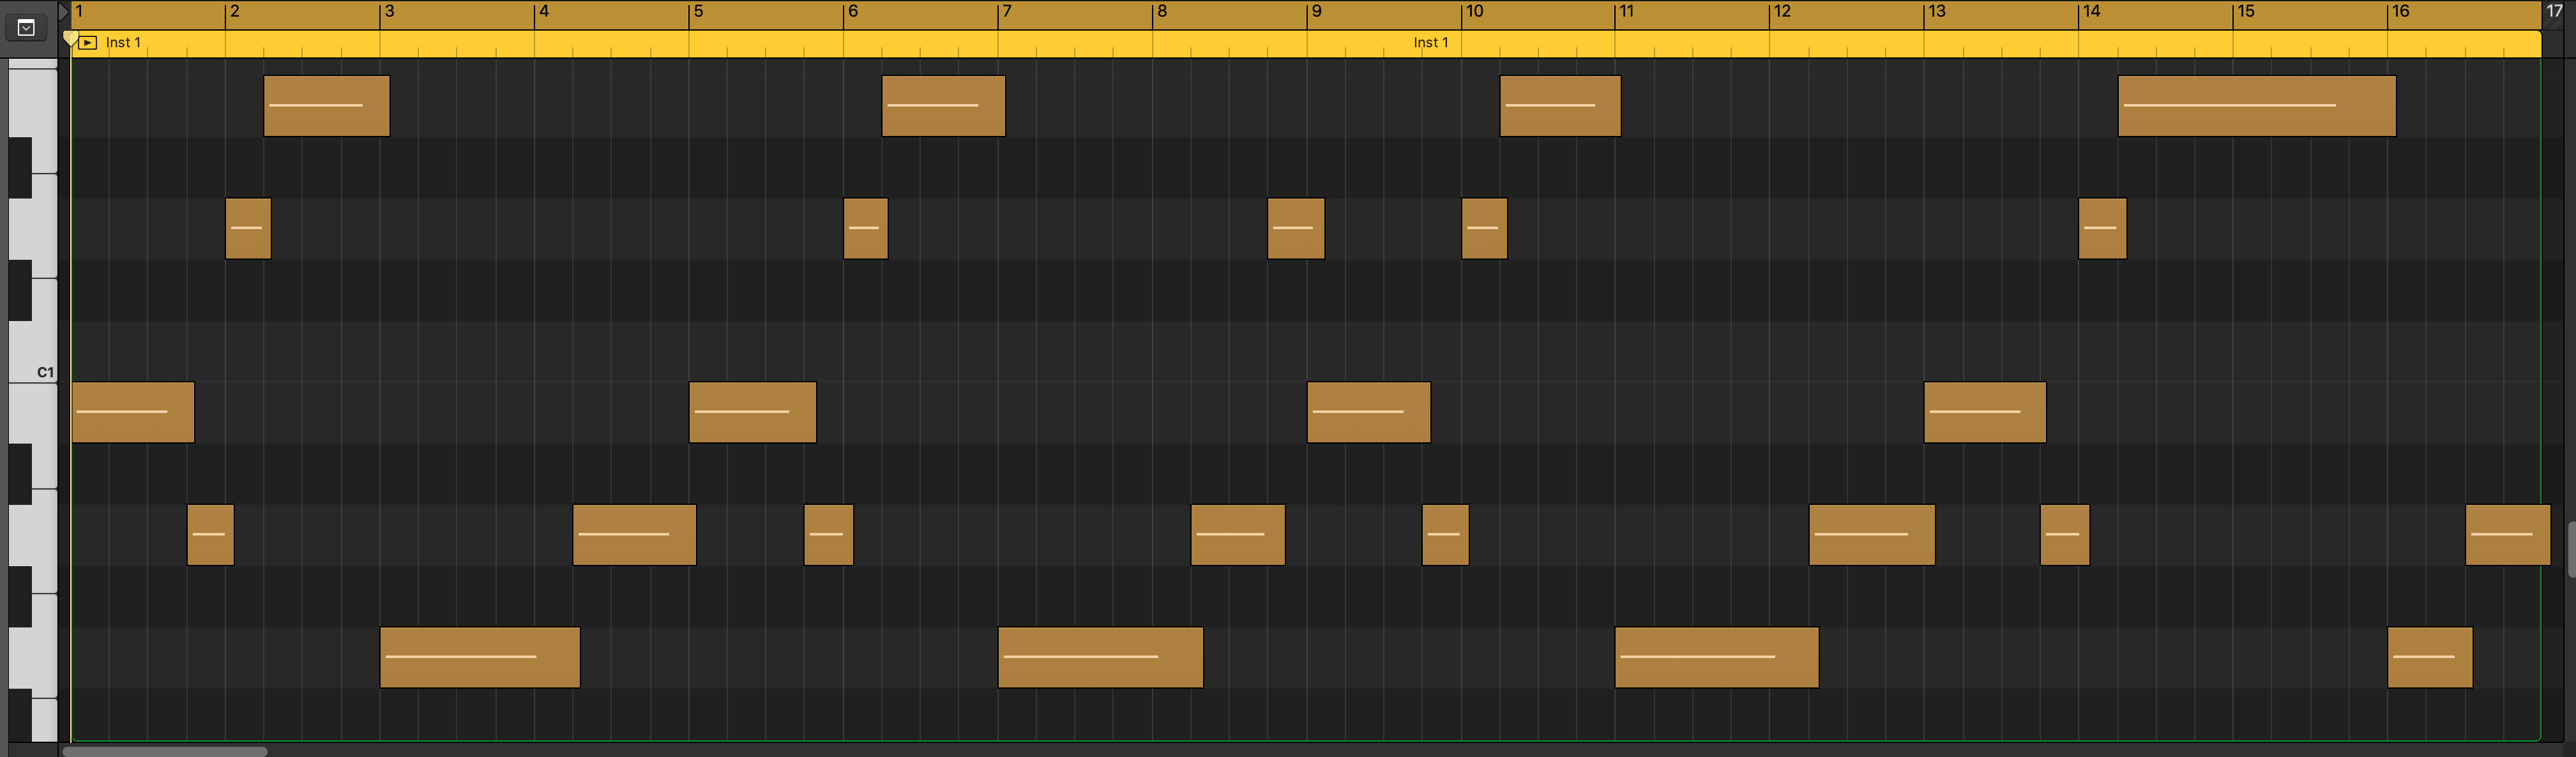
Download: Escape MIDI (Bass – 174BPM)
The part is played legato, meaning that it doesn’t rearticulate every time a new note occurs. This is partially a patch consideration, but the notes must overlap for the patch to be heard as legato.
Patch Notes
For this, we almost have to use Massive or Serum. They’re the kings of this sound, but you can accomplish it on most synths with (ideally three) decent-sounding wavetable oscillators.
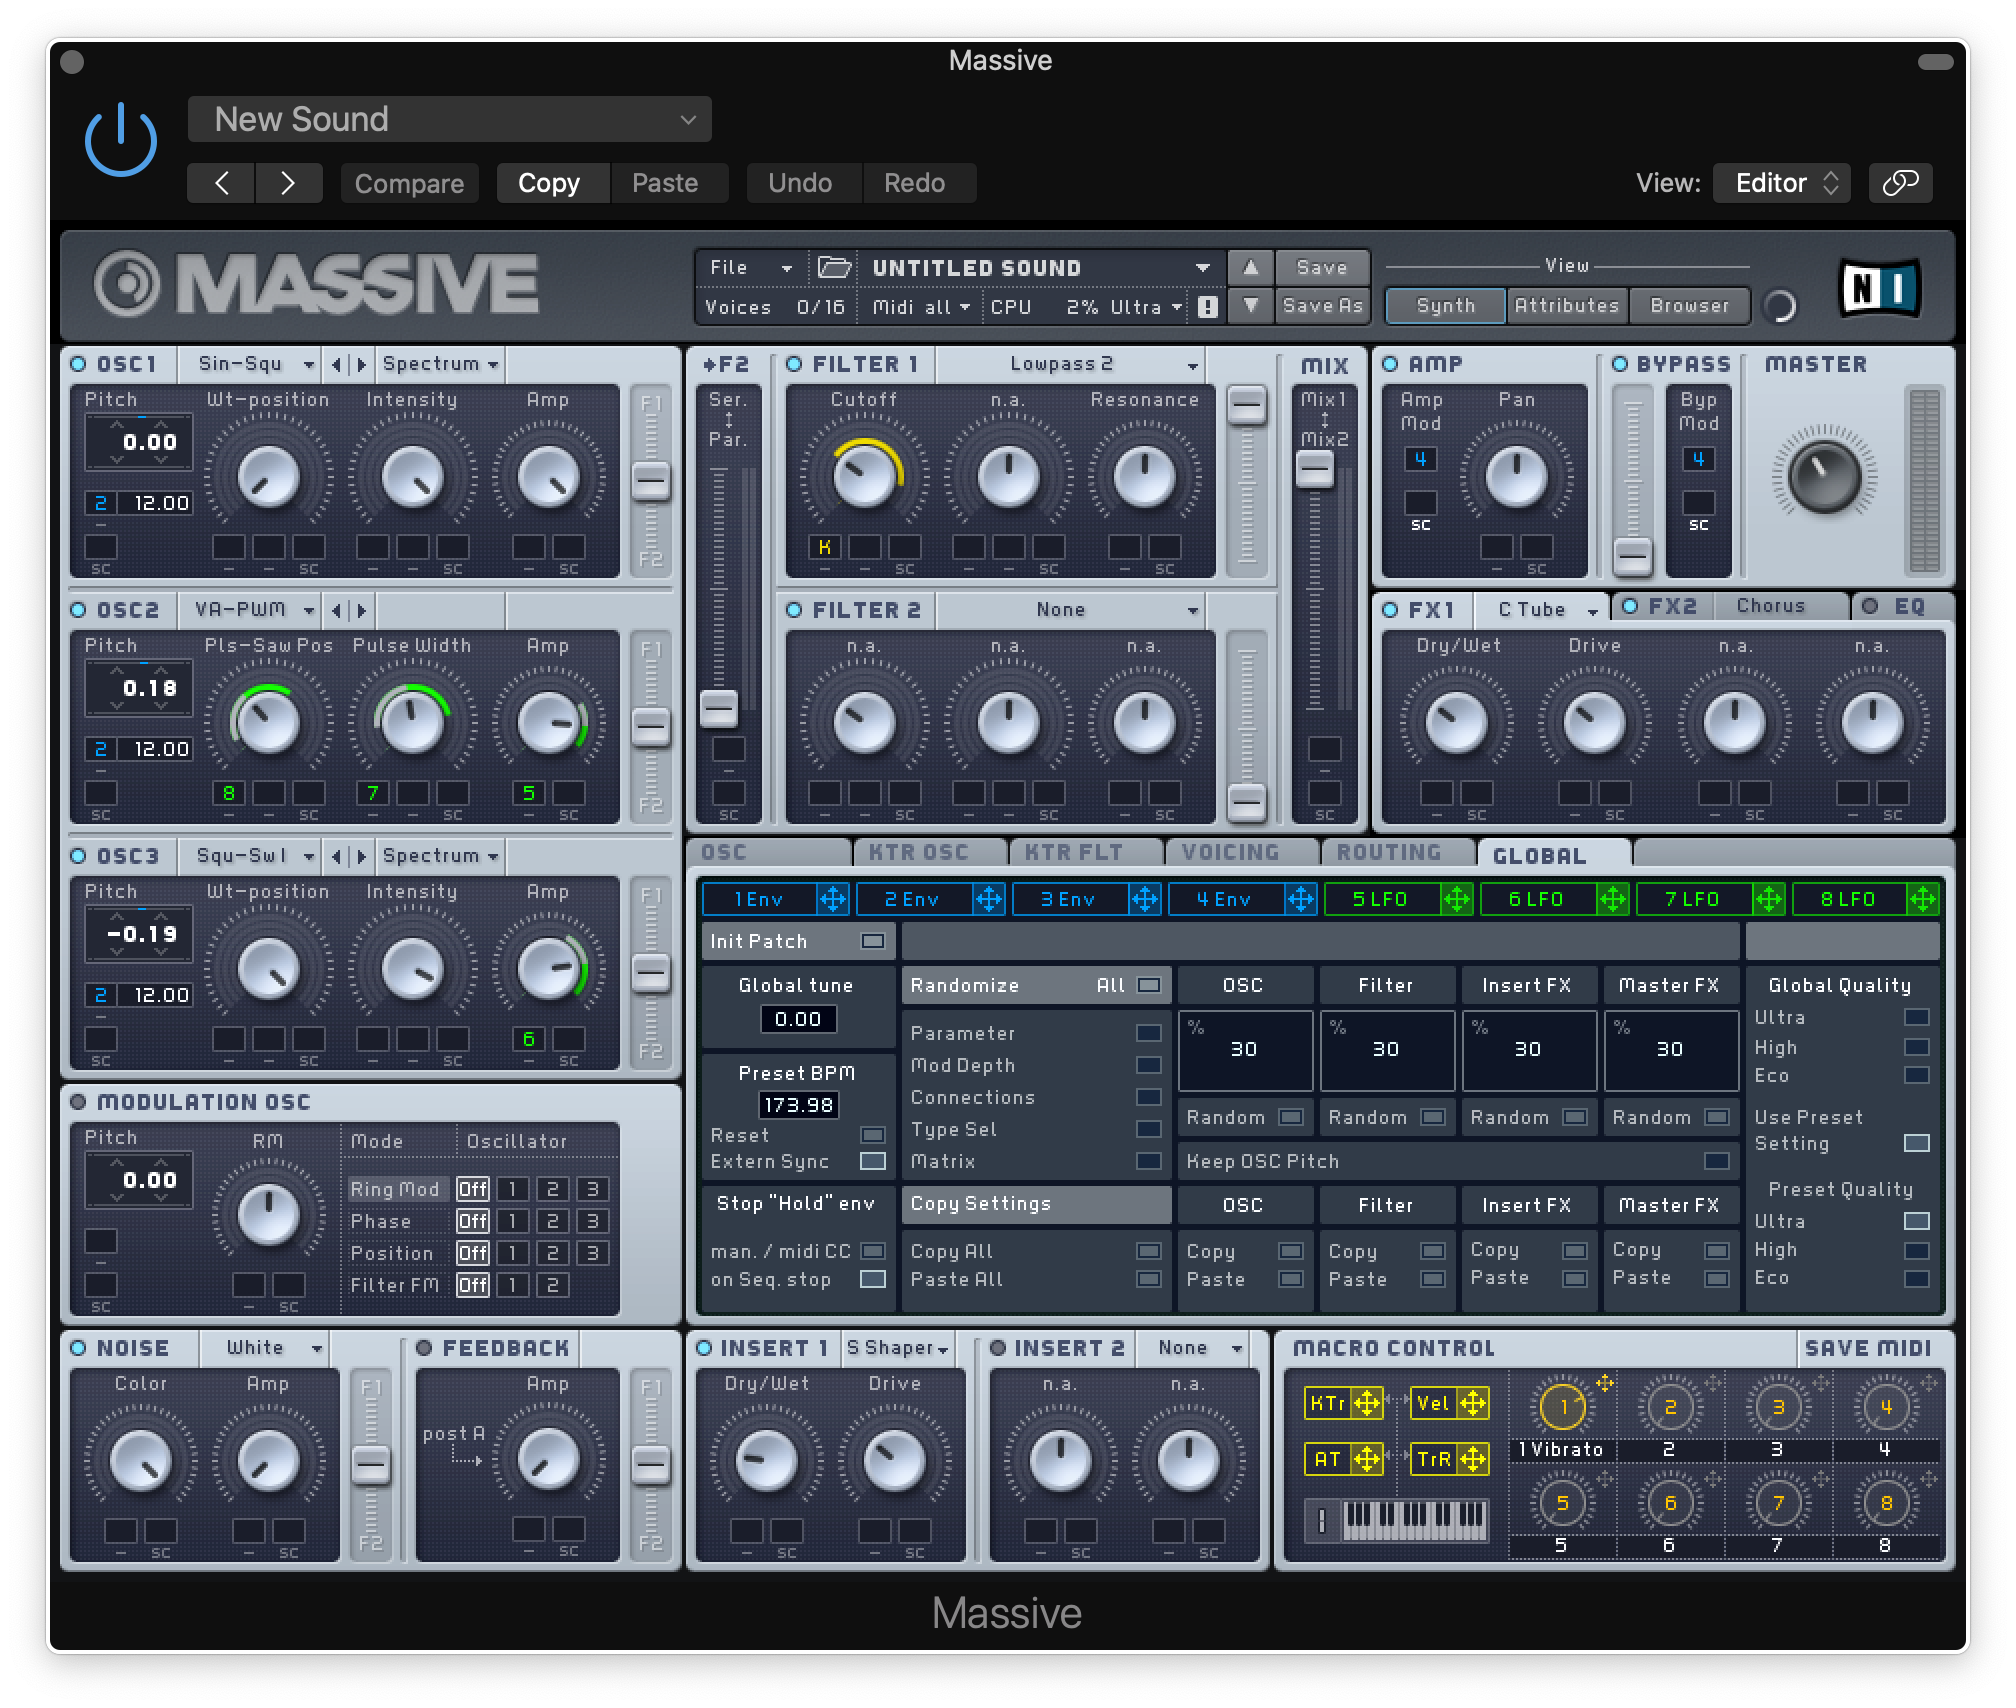
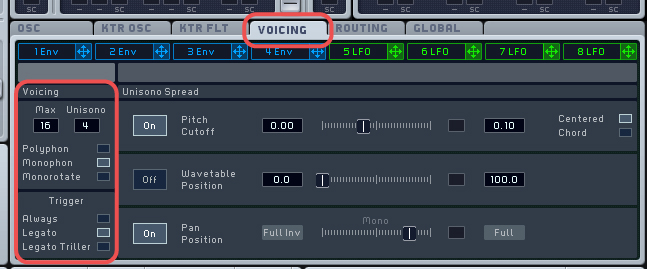
Voicing
First up, as we noted above, this patch is legato, so let’s head to the voicing tab and turn Legato on. While we’re here, let’s also change the patch to Mono (since it’s a bass) and set the unison (“Unisono”) to 4 to get that thick sound. We’ll revisit this page a little later in the patch, too.
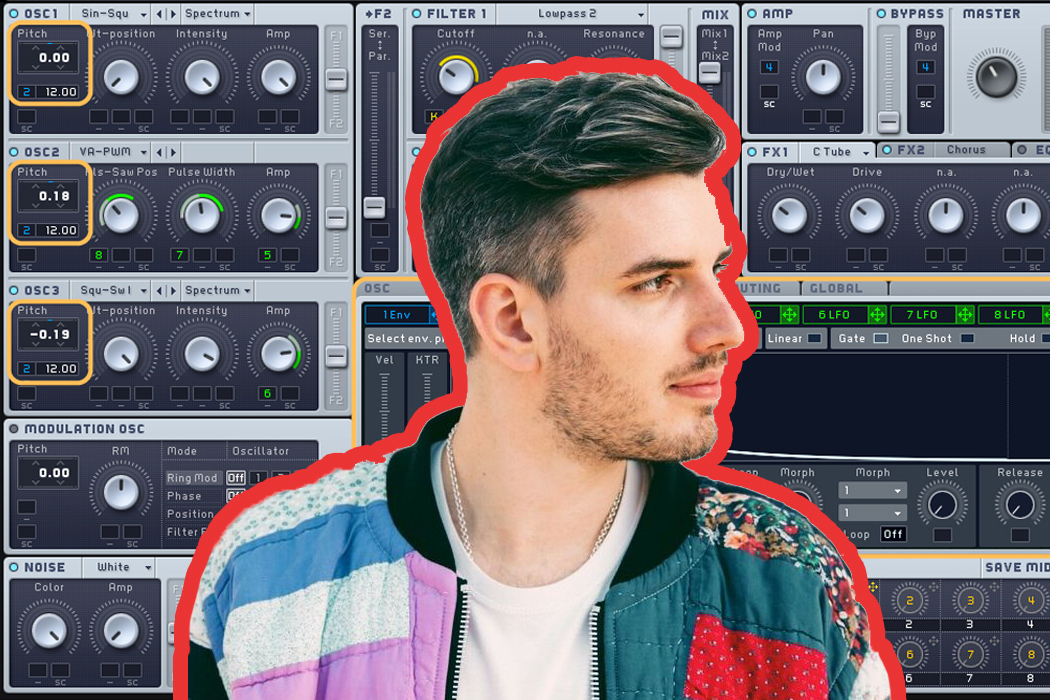
Oscillators
For our oscillators, we need to get that signature wobbly sound. Previously, we’ve detuned oscillators slightly against each other to create that kind of “beating” pitch effect, which will work here, as well!
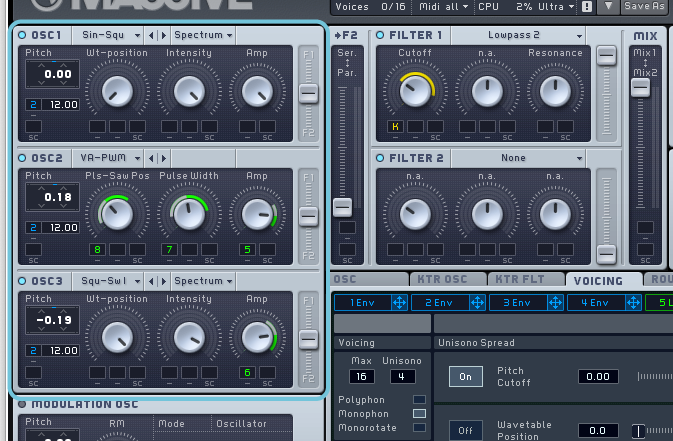
For our first wavetable, let’s cue up a sin-tri oscillator. If we turn the position knob all the way to the left, we get the sine sound. While the unison settings will create some wobbliness, these sine waves will reinforce the low-end of the patch and add some overall richness.

For the next two, let’s cue up a pulse-saw and a square-saw. We’ll tune one up .20 Hz, and the other down .20 Hz. When you play them all together, you should start hearing that Reese beating effect.
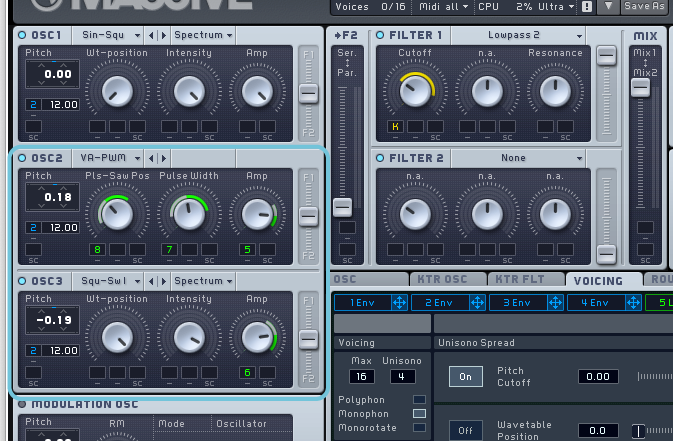
Make sure to turn the amp up for each! By default, they’re activated, but not sending signal to the filter.
At this stage, the patch doesn’t sound quite right yet. To get it even closer, let’s head back to the voicing page.
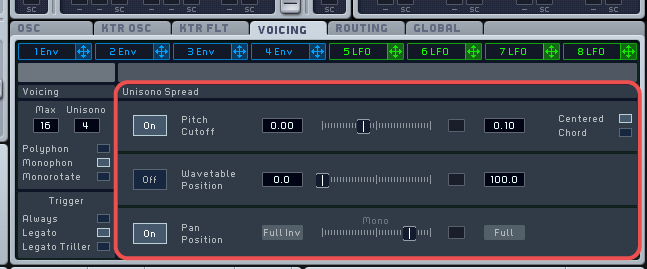
There’s this tab labeled “unisono spread.” This tab handles the specifics of the unison settings. Pitch Cutoff handles how the voices are detuned against one another. Wavetable Position varies the wavetable position of each oscillator, and then finally, the Pan Position spreads the voices out.
We can adjust the range of the first two faders. For pitch, let’s set it to about .10. We want it low enough that it’s not an overwhelming effect, but still helps the patch sound more natural. You can adjust this to taste.
Then, play around with the pan fader to achieve the spread of voices you like!
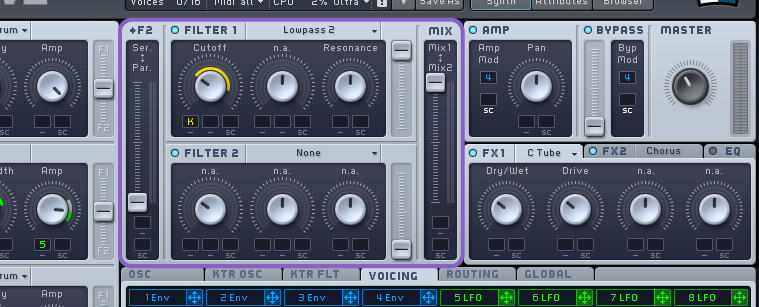
Filter
Now, let’s check out the filter. Definitely a dark sound here, so let’s use a low-pass. A two-pole should do the trick, but feel free to branch out and try out some of the other options. We can also add a bit of resonance to give the sound a little more growl, and some keyboard tracking so that the filter opens up more with higher-pitched notes.
Modulators
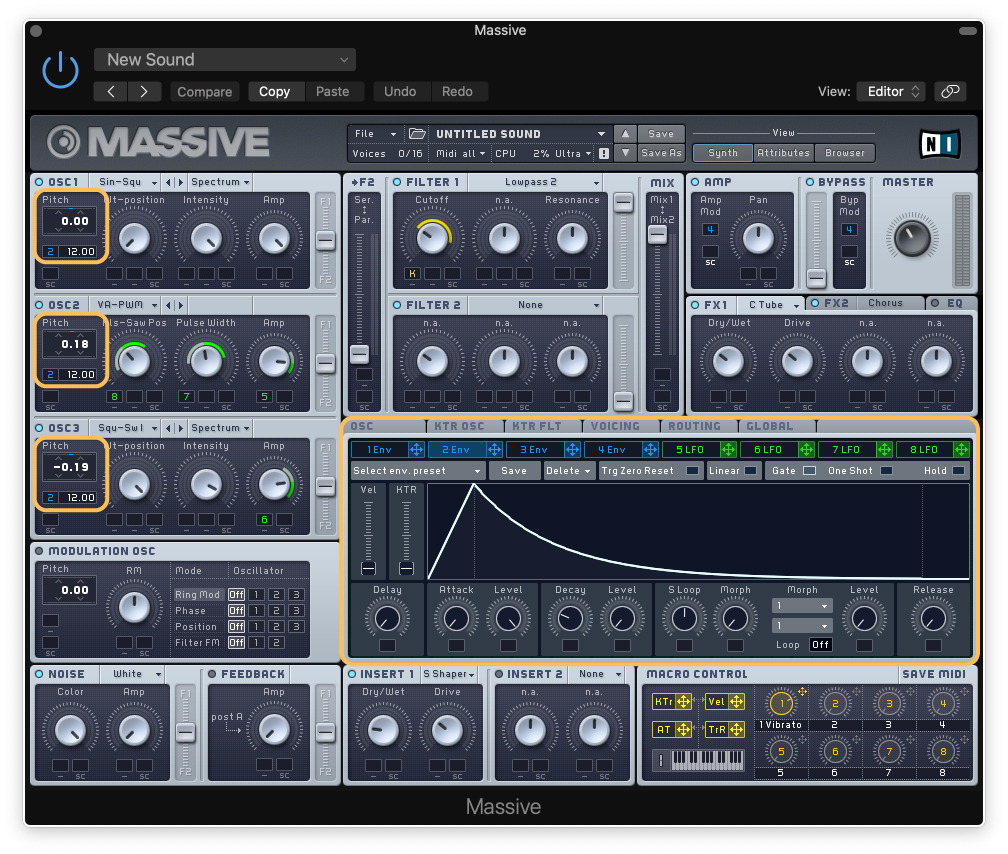
In terms of modulation, there’s quite a bit happening. For the main amp envelope, the sound attacks, has no decay, fully sustains, and has a very short release.
On the other hand, the filter has a more intricate contour — quick attack, pretty quick decay, then no sustain, and low release.

We can use this same envelope to add some pitch modulation to our oscillators. This shape is great for creating a quick sweep that will give the patch some nice impact when it rearticulates. This is a great trick for building kicks and 808s.
To add a little more interest to the wobble, let’s use LFOs 5 and 6 to modulate the amps of oscillators 2 and 3. This way, the beating is a little more inconsistent.
If we give them each a different rate, the effect will be even more inconsistent. What’s more, we can add key tracking to the rate of these LFOs to make the rate adjust dependent on the key that’s depressed.
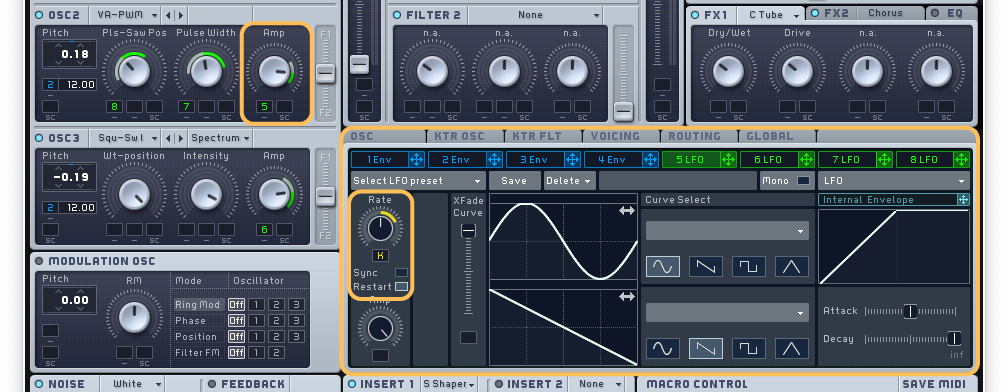
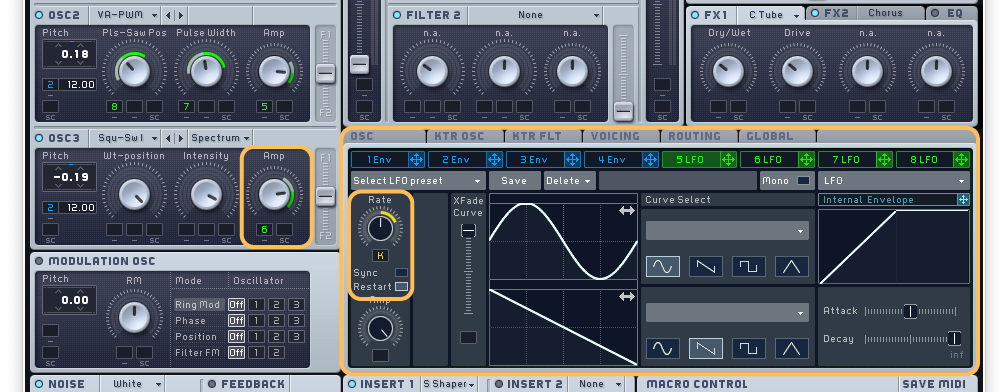
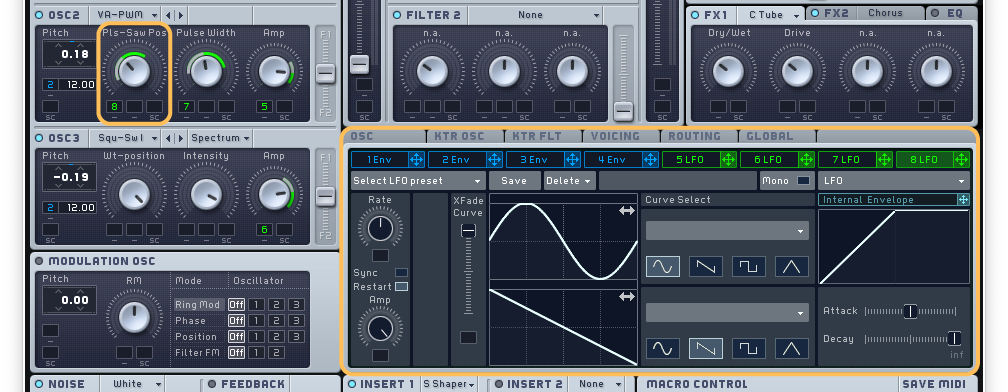
Next, let’s use two more LFOs (7 and 8, in this case) to modulate the pulse width mod and wavetable position. This will give the patch even more of that seething Reese vibe.
Post-Processing
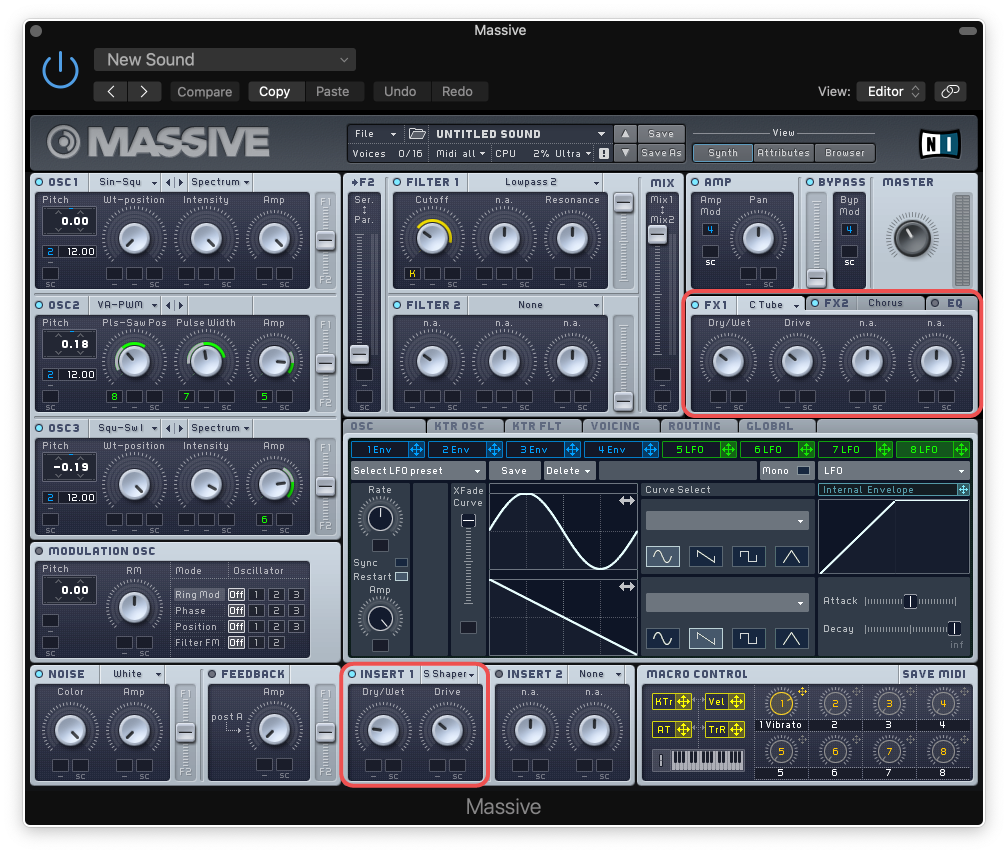
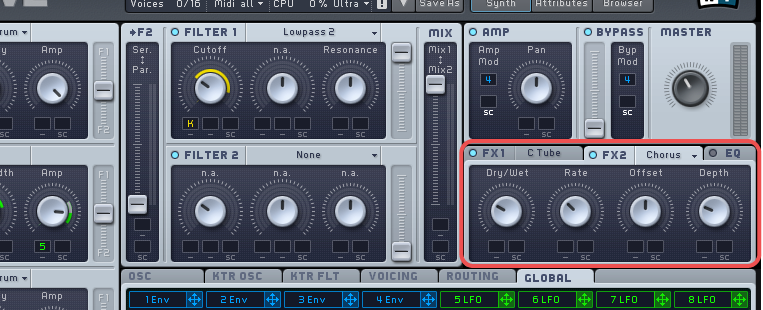
From here, it’s a matter of getting some distortion and chorus on this puppy. We can do some of this onboard, via the inserts and effects area of the synth. Here, we added the onboard chorus effect in addition to our distortion.
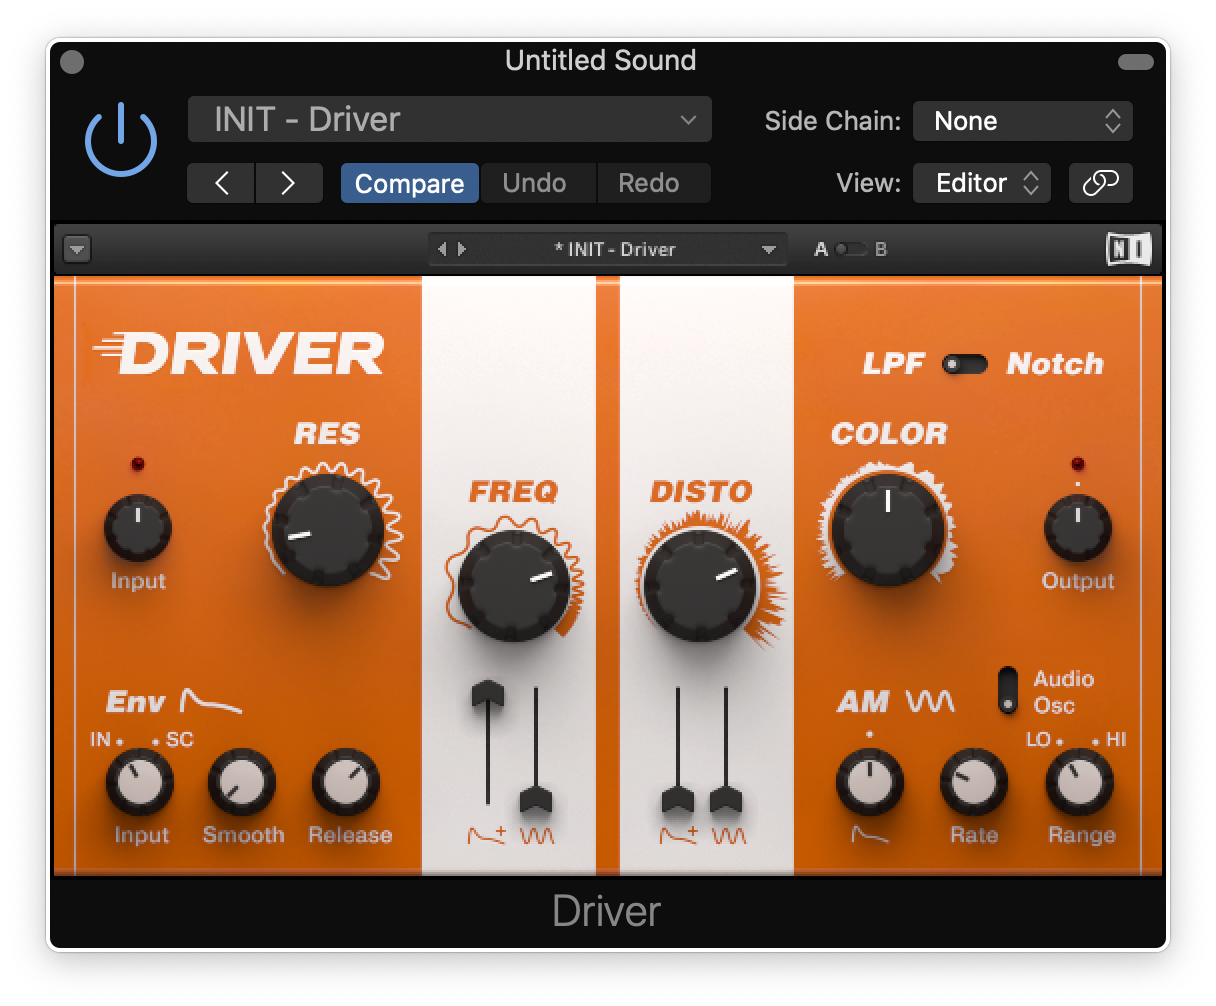
We doubled down on the grittiness, this time on our channel strip in Logic Pro, with an added distortion via Driver, from Native Instruments.
These patches are so useful for a variety of genres. Familiarizing yourself with the basics will definitely come in handy.
Continue learning about synthesis and patch design with Soundfly’s exciting new course, Advanced Synths and Patch Design for Producers. Preview the course for free today, and subscribe for unlimited access here.