+ Learning to record and mix at home? Check out Soundfly’s acclaimed online courses on mixing, production, and beat making — Subscribe for unlimited access.
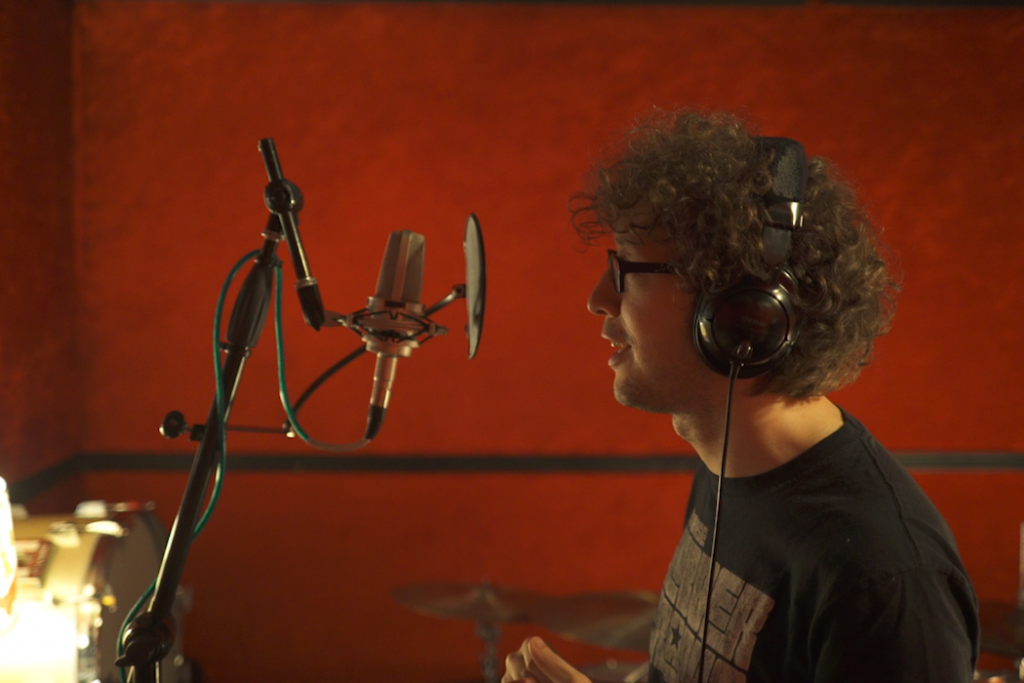
You just recorded the perfect take for your latest song with your band; it’s sure to be a hit! Uh oh, what’s this? Your bassist bumped the mic stand while singing harmony on the last chorus. That’s okay, you think to yourself, she can just punch in a new take of her re-singing that part. But wait a second, you can hear the same thump in everyone’s mics. Now you have to redo the entire section and now you’ve lost some of that magic. Darn!
This is one of the simpler examples of mic bleed issues, but it clearly represents how serious a problem it can potentially be. As with many such issues encountered during recording, it can be avoided, or at least greatly minimized, with a little forethought and planning.
Mic bleed is essentially the short way to say “unintended sound picked up by a microphone,” meaning unwanted sounds that seep into the microphone recordings along with the desired sound. It could include sounds from other band members in the room, noises occurring within the recording space picked up during recording, and reflected or echoed sound coming from the interaction of the desired sound source with the surfaces of the recording space.
Mic bleed can be avoided, or have its impact greatly reduced by taking three steps before you begin recording, let’s talk about them.
1. Choose the right microphone for the job.
There are many great articles available out there on how to choose the right mic for the right situation so we won’t explore it in detail, but briefly, there are three primary considerations when aiming to match up your sound source to the right microphone: Its pickup pattern, their response spectrum, and whether they’re dynamic or condenser.
A) Pickup Patterns
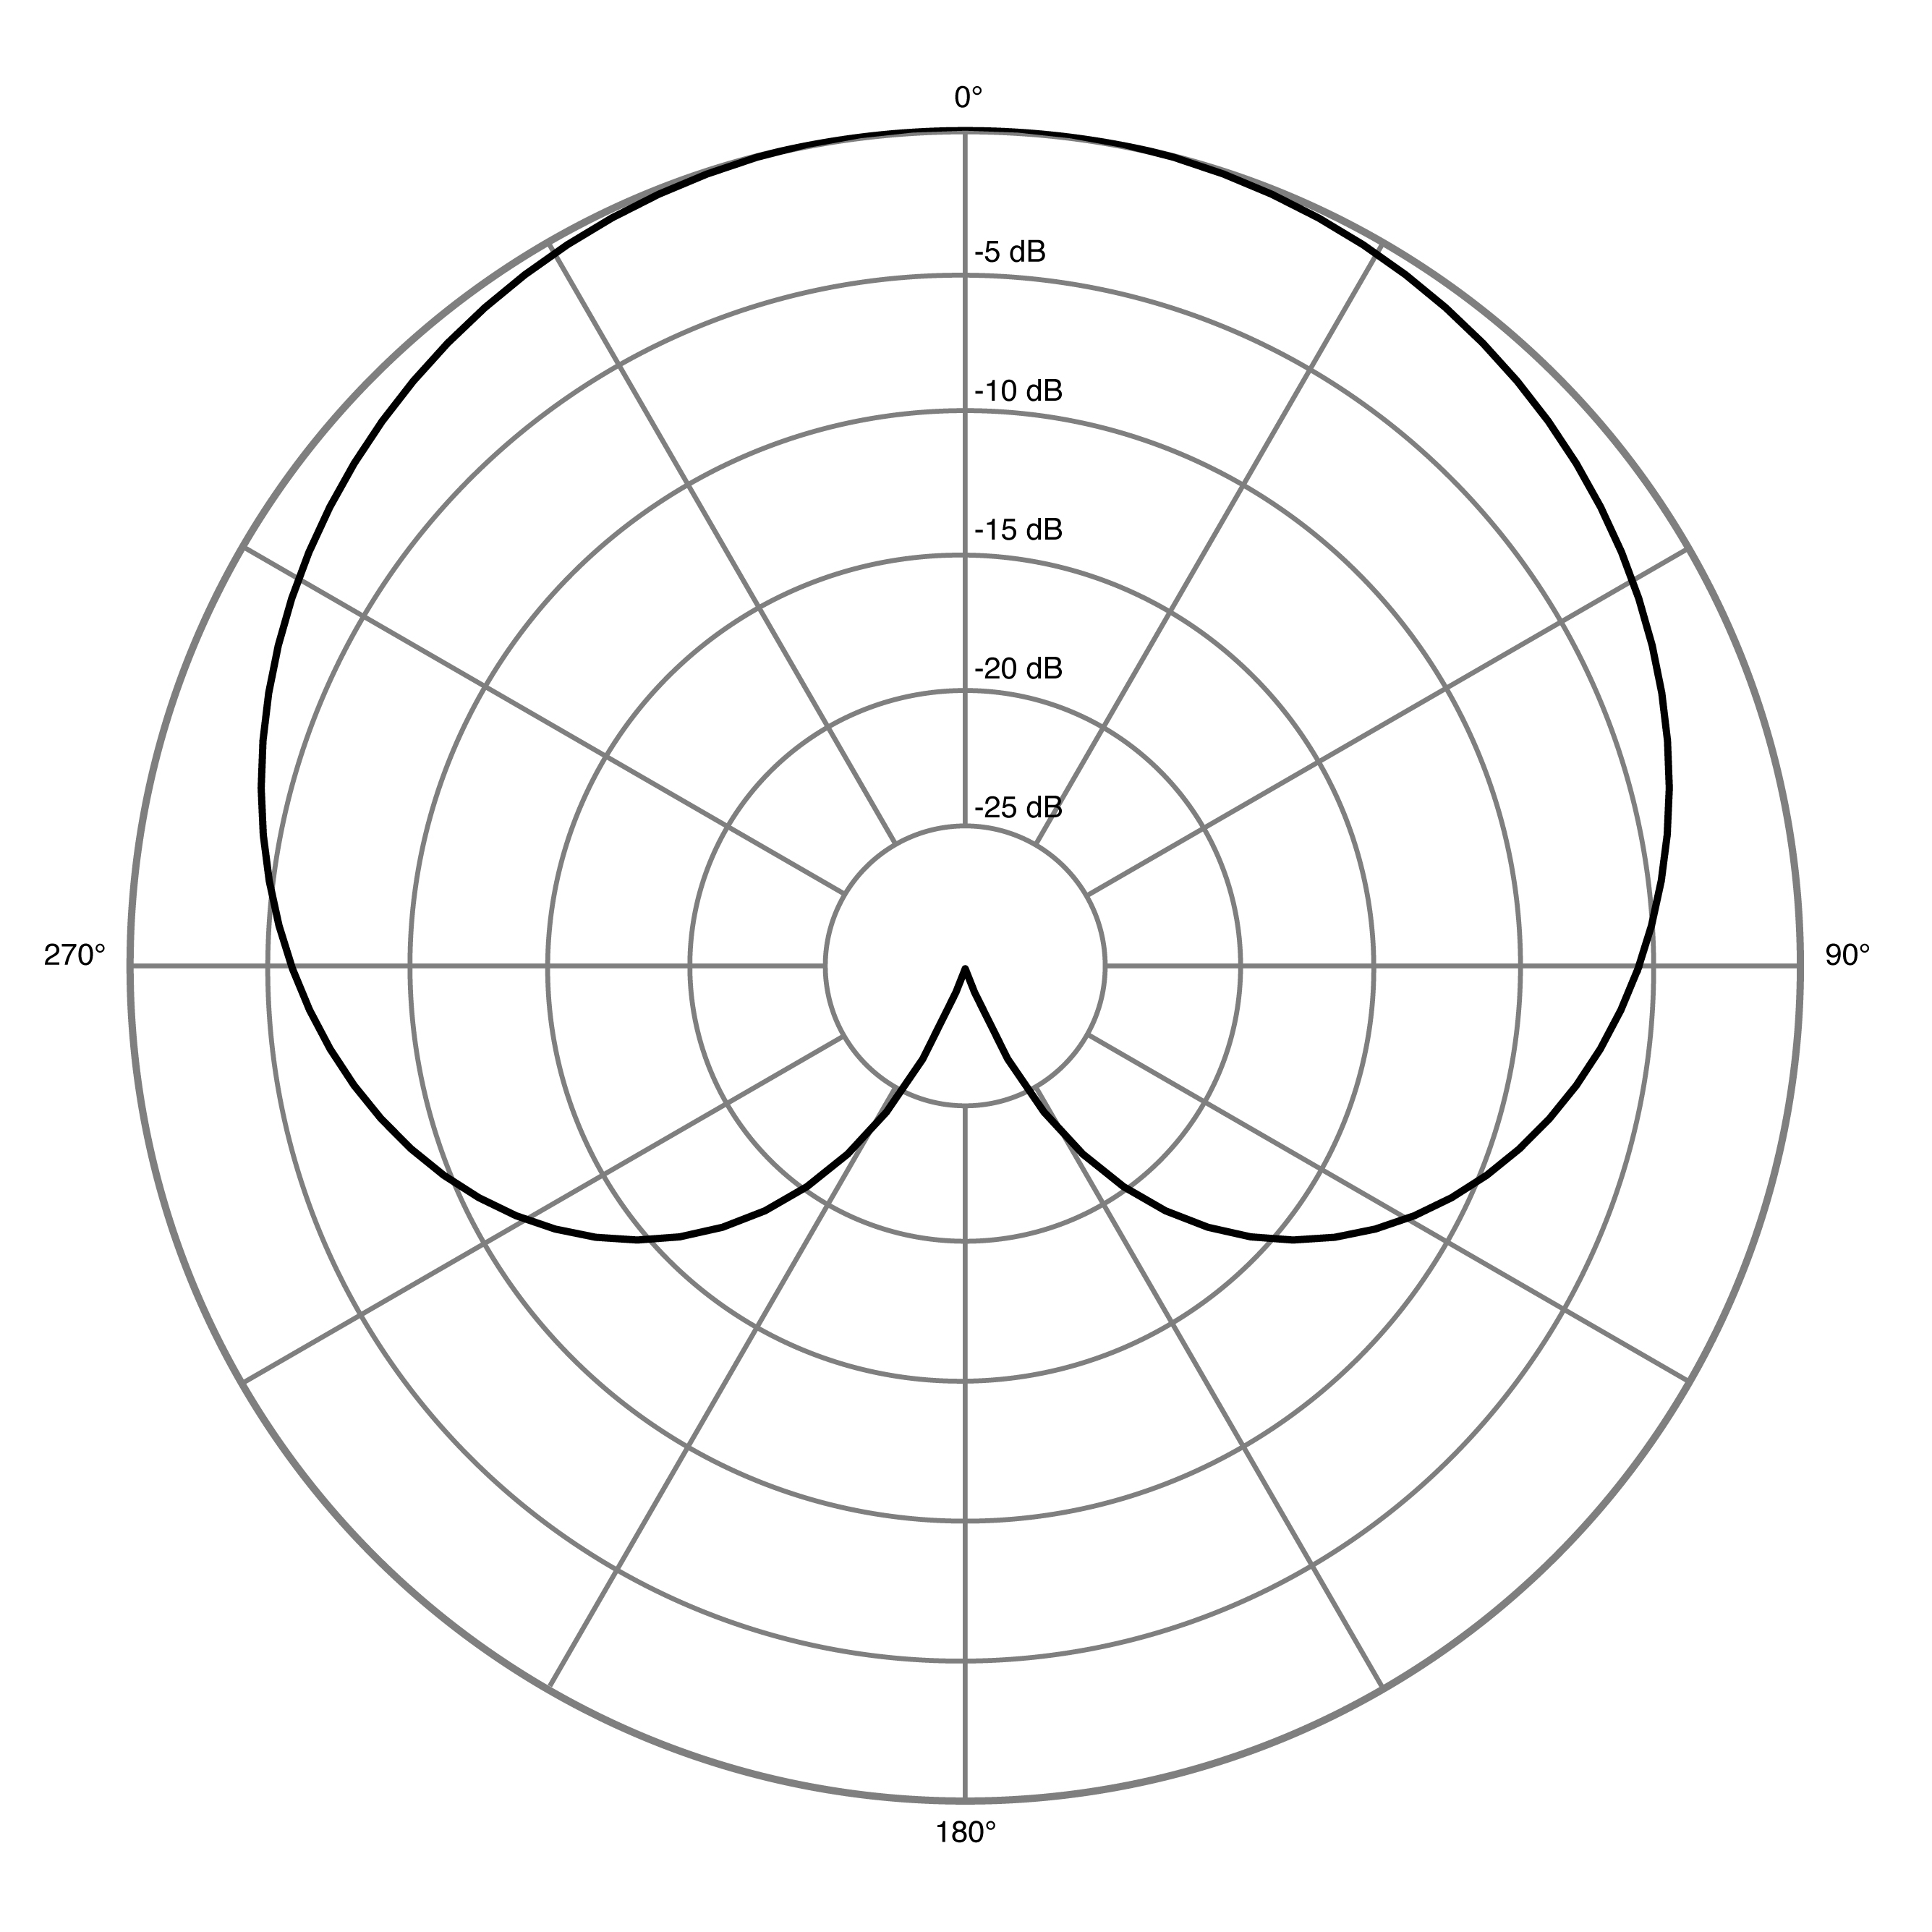
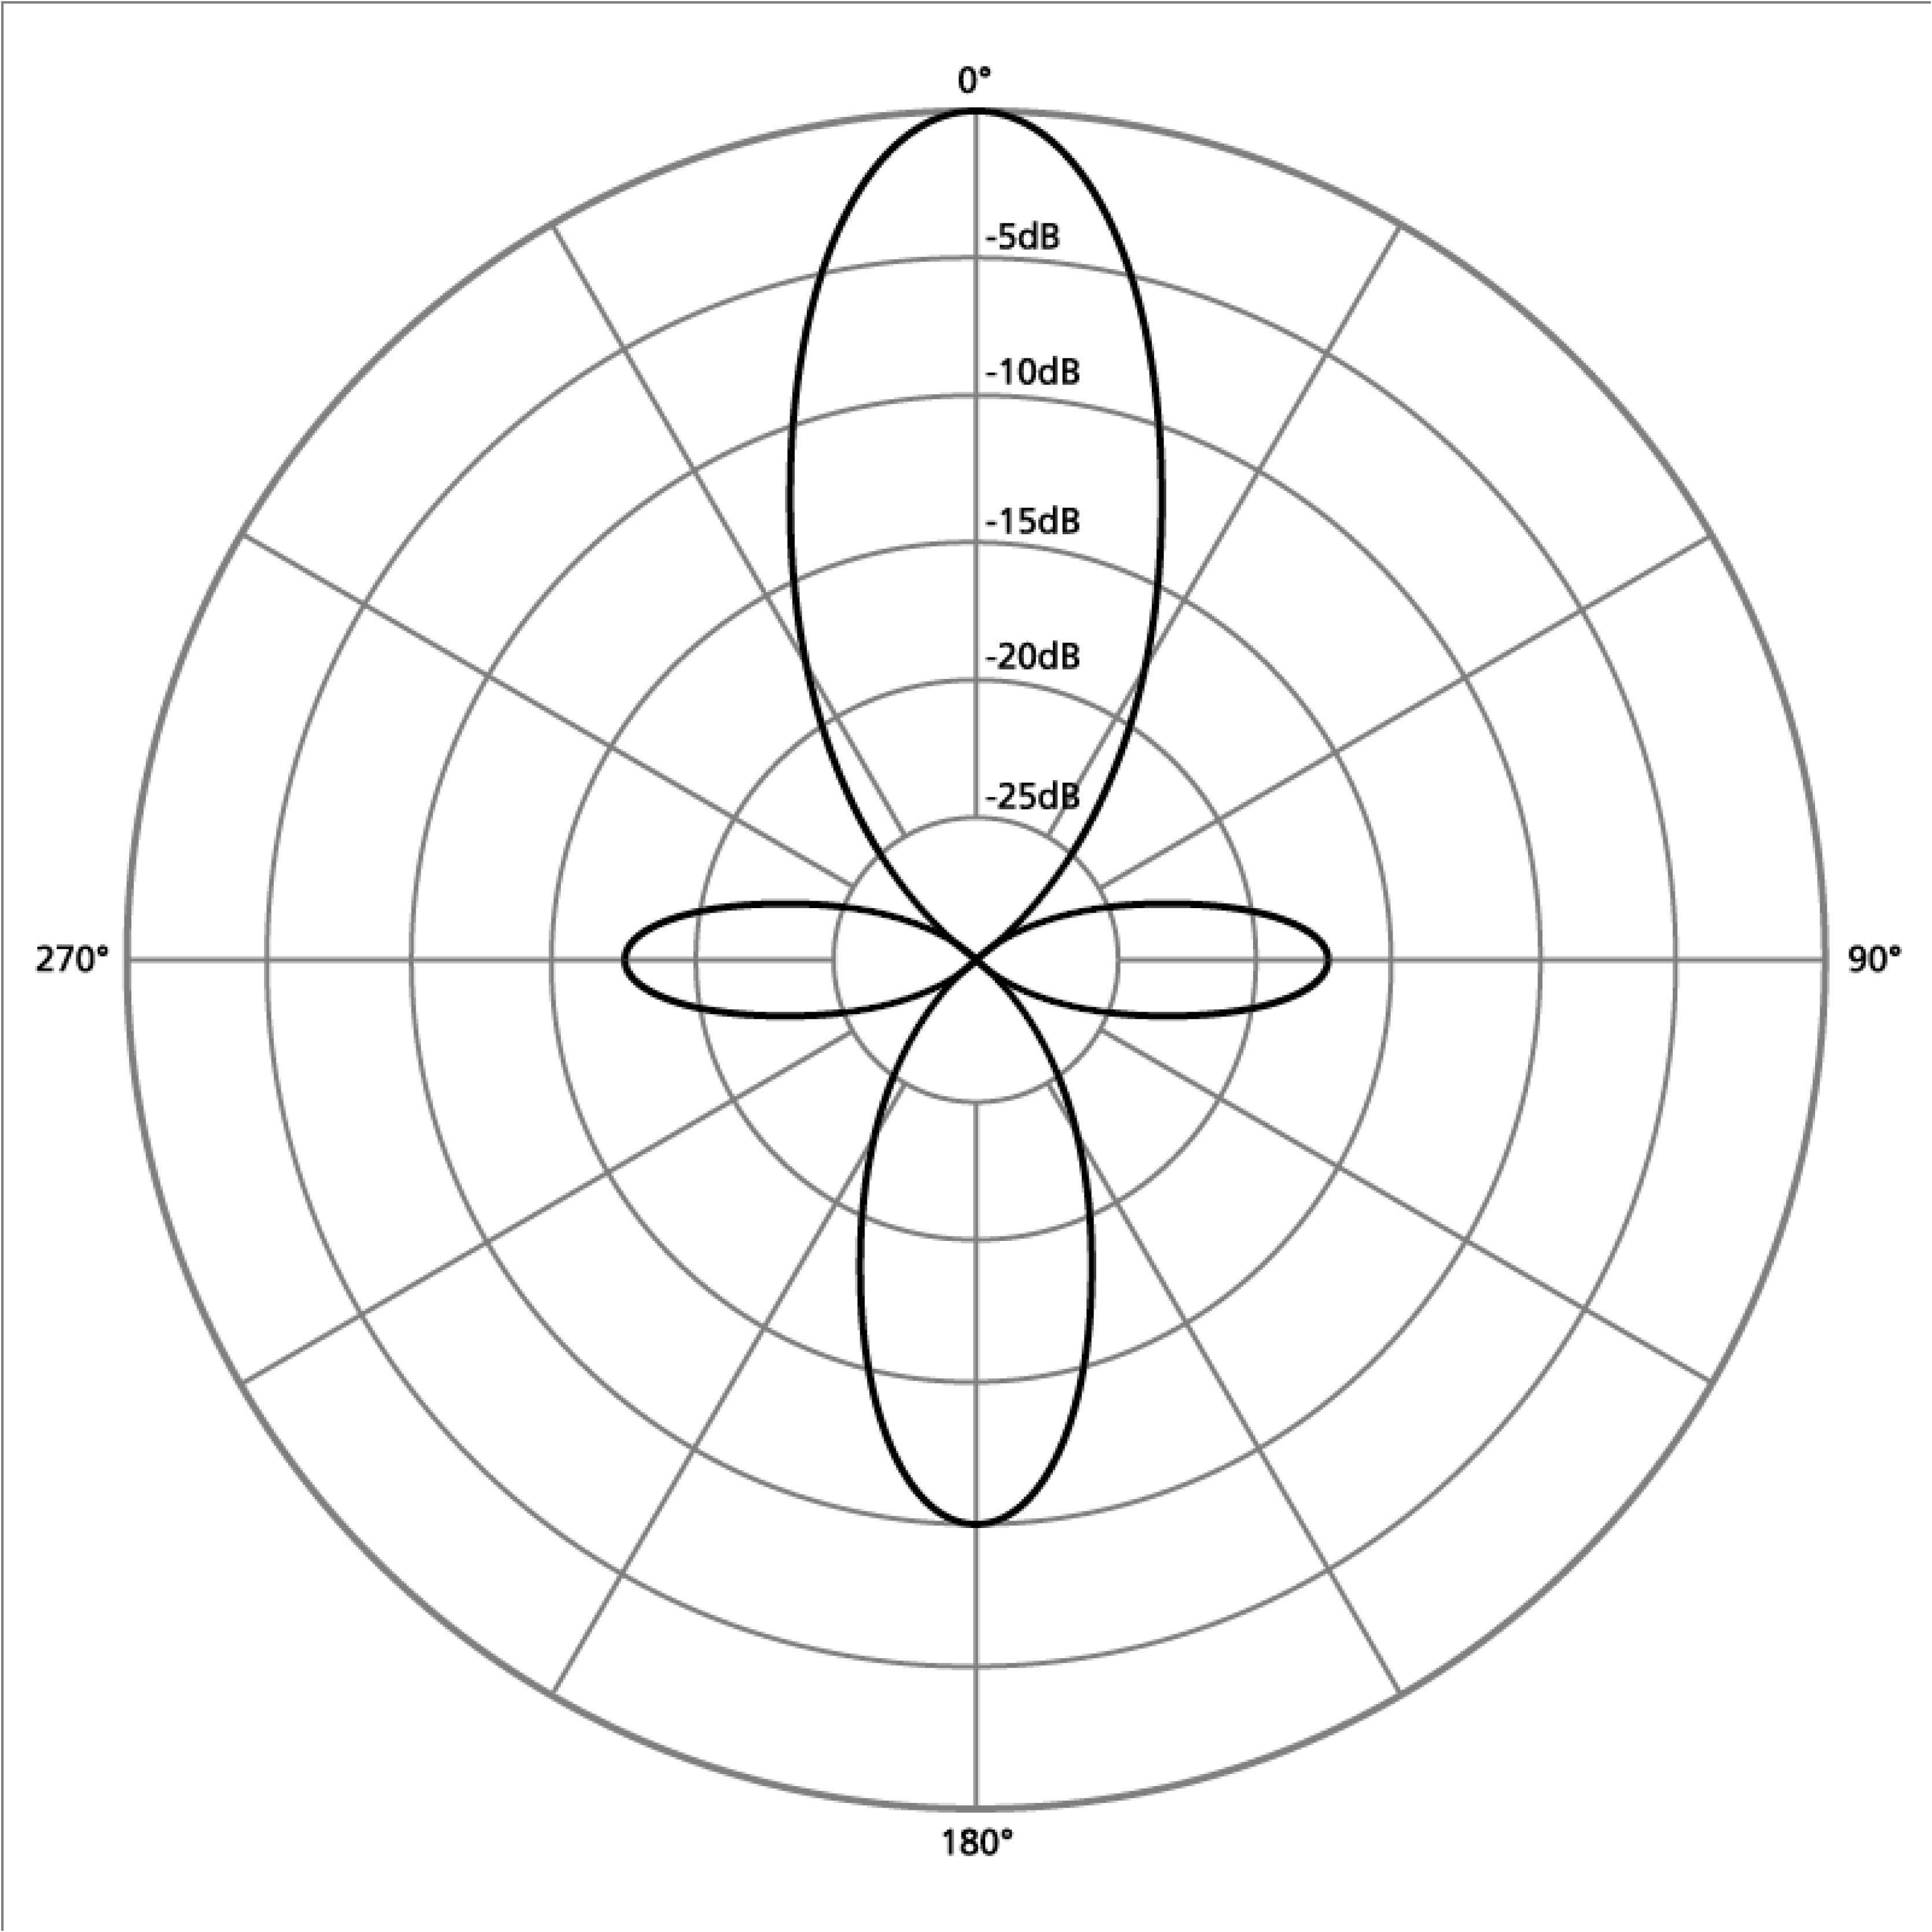
This is arguably the most important consideration in microphone selection where mic bleed is concerned. Pickup patterns define the region around the microphone from where it gathers sound. The most common types are:
Omnidirectional: Picks up sound equally in all directions.

Cardioid: Picks up sound more strongly in front of the mic, tapering off to less strong on the sides, disappearing to nearly zero pickup directly to each side of the mic, and a very small degree of pickup behind the mic.
Shotgun: An exaggerated directional pattern, with the vast majority of pickup happening directly in front of the mic, also sometimes known as a directional mic.
It may seem that we should always use a mic with a shotgun pattern, in order to maximize our ability to select only the sound source directly in front and minimize all other sounds coming from any other direction. There are certainly situations when this is an accurate assessment, such as when we’re trying to capture the voice of one person speaking in a noisy environment.
But, due to the extremely narrowly focused capture window of these types of microphones, the sound tends to be less natural feeling, as the overly strong relative magnification of the sound within such a narrow spatial band is quite different than how our ears hear the world. In the case of recording someone speaking in a noisy environment, it’s preferable to hear what they are saying, so we would accept any unnatural feeling in the sound in favor of the more intelligible results.
If we’re recording an acoustical music performance of several instruments we’ll want to reduce mic bleed between them while also keeping a more natural feeling. So, in this case the cardioid mic is often our best choice since it still is selective in its pickup pattern while not overly exaggerating the differences in sound coming directly from the face of the instrument, versus the portion of sound emanating from the sides, top, and bottom of the instrument. However, as cardioid pattern microphones will still pick up some sound coming from elsewhere, this may not provide sufficient elimination of mic bleed if the sound sources are too close to one another.
If you are in a situation where you need to record multiple sound sources that are positioned very close to one another, you might want to consider using a single omnidirectional mic and place it so it can evenly pick up all the sound sources at once, and simply disregard bleed all together, as well as phasing issues. This won’t allow you to separate the sounds in the mix, but if you are careful in how to place the microphone, you may have a great balance picked up by the raw recording, and it will certainly be the most natural sound in terms of matching what you would hear from a live performance.
B) Spectrum
In addition to pickup pattern, microphones also have a response spectrum associated with them. This spectrum describes which tones are more effectively picked up by the mic, and which it’s less efficient at receiving. Selecting a mic with a spectrum that’s well matched to our sound source can help us avoid picking up unwanted sounds that might lie outside of this spectrum.
As an example, the majority of the sound from human voices only occupies the middle of the audible range of sound, and some of the extreme lows and highs from voices can also be somewhat problematic in recordings. So, for recording human voices, using a microphone with a spectrum that’s slightly limited in scope is likely a better choice, and will help us both avoid the unwanted sounds from the voices, as well as limit pickup of any lower and higher sounds coming from other sound sources at the same time.
This holds true for each microphone we record. If we take the time to select a mic with a spectral pattern best suited to the sound source it’s intended to record, we can help reduce unnecessary bleed from sounds outside the pickup spectrum of each microphone.
C) Dynamic vs Condenser
While there are several differences in how things sound when recorded by condenser or dynamic mics, in terms of mic bleed it is the pickup sensitivity that is of greatest interest. Dynamic mics in general require a much louder input as they have lower sensitivity, making them a great choice for naturally loud sounds. Condenser mics tend to be very sensitive, making them the best choice for quieter sounds.
If we have a very loud sound source, it’s best to use a dynamic mic so that we don’t have to turn up our input gain very much and can still pick up our desired sound at a good level. By keeping the input gain down we’re less likely to pick up mic bleed from lower level sounds in the vicinity.
Conversely, if we have a quiet sound source we should use a condenser mic placed close to the sound source. The close proximity of the mic to the source will help ensure the primary sound is heard well, but other surrounding sources of sound will likely be too low in relation to the primary sound to be picked up noticeably.
+ Learn production, composition, songwriting, theory, arranging, mixing, and more — whenever you want and wherever you are. Subscribe for unlimited access!
2. Room acoustics and arrangement of sources within the room.
It’s important to remember that the space we’re creating our sounds in is also a contributor to what is picked up in recording. While your primary concern is certainly selecting the correct type of mic and placing it an appropriate distance from your sound source(s), you must also consider how the other sounds that may be present in your recording setup are impacting each microphone, as well as reflected sound from surfaces within the space.
The first, and easiest, thing we can address is the arrangement of multiple sound sources in our recording space. The simplest solution, if space allows, is to separate out different vocalists and acoustic instruments further away from each other. We can also try placing some kind of barrier between the different sound sources, such as a portable acoustic wall.
Alternatively, if we’re more space limited, we can try arranging our sound sources so they are faced back to back, effectively using bodies as barriers between opposing mics. Or, when it’s not possible to have the sources faced away from each other, if we’ve chosen microphones with cardioid or other directionally selective patterns, we can rotate the sources and their mics so they are aimed as close to each other’s least effective pickup range as possible. Referring to the pickup pattern diagrams for our mics will assist with this.
With our sound sources separated by distance or barriers, or placed at angles to each other, we should now consider the impact of reflected sound into the microphones. Imagine all surfaces of the space we are recording in as if they are made of mirrors and we want to avoid seeing any reflections of any sound source. To best control unwanted sound reflections at each microphone, both from sound reflections from other sources in the recording space, as well as delayed reflection sounds from our desired sound source, we will want to block those “mirror” reflections by putting absorptive materials on each surface at the points where those reflections would be seen at each mic.
Ideally the absorptive material would be professional acoustic panels or acoustic foam, but any soft, plush material will provide some degree of control.
3. Refine mic position and input gain.
We can now do some final fine-tuning of our mic positions and input gain to ensure everything is picking up only what it’s intended to capture, with little to no unwanted sound entering our recordings for each microphone. For each separate sound source that is being miked, look at the orientation of the microphone relative to the sound it’s intended to record. Can you potentially angle it or shift it so that it’s aimed more specifically for the most direct and strongest input only from the desired sound?
Even a small adjustment can make a difference.
After making this final mic angle refinement, it’s time to run a quick level check. In this test all performers should play or sing loud and full and move around just as they expect they will during the actual recording. If it looks like there’s room to place any microphone closer to its source, you should do this to help further favor pickup from its intended source and reject other sound sources.
It’s particularly important during this test that you watch the recording input levels for each microphone during the loudest portions of the performance. You don’t want the levels to run the risk of entering “the red” (i.e. overdriving beyond allowed volume level limits, which will cause clipping distortion), especially if you’ve moved a mic closer to its source.
If needed, reduce the input gain on a mic that appears to be nearing the volume level limits so that you can be sure your recording will remain clean. By setting all your mics as close as practically possible to their intended sources you greatly reduce mic bleed by increasing the percentage of direct sound from the desired source allowing you to reduce the input gain, further decreasing the level of any remaining unwanted sounds that may still reach the mic.
By taking the time to address these three steps for minimizing mic bleed, you will help ensure the cleanest recordings. All your potential sound bleed issues will be greatly reduced or even completely removed all together.
Want to get all of Soundfly’s premium online courses for a low monthly cost?
Subscribe to get unlimited access to all of our course content, an invitation to join our members-only Slack community forum, exclusive perks from partner brands, and massive discounts on personalized mentor sessions for guided learning. Learn what you want, whenever you want, with total freedom.