+ Master the tools and techniques of producing pro-level electronic music and audio in Ableton Live with Soundfly’s course, Intro to Music Production in Ableton Live.
While of course you can try to always record full vocal parts, whether lead or background, in one fluid take, an overwhelming majority of songs in modern pop music feature vocals recorded in multiple takes combined to make it sound like it was recorded in one go.
This process is called creating “composite takes,” or in short, comping, and it is one of the most fun and crafty parts of producing vocals. Essentially, the idea is to record the vocal parts line by line or section by section (such as a verse or a chorus), and then decide later which ones fit best together.
Comping is a much smoother technique than punching in single words or runs of notes, which might sound unnatural. Depending on how you tackle recording projects, it also might help elevate the overall quality of your recording and help prolong the stamina of the vocalist throughout a session as well.
And since the new Ableton Live 11 version has a comping feature — making the process of combining multiple takes much easier — I’d like to outline the process of comping in Ableton Live. But first, if you’re serious about learning the ins and outs of producing or recording pro-level music and audio using Ableton Live, check out Soundfly’s course, Intro to Music Production in Ableton Live (10 & 11) today.
Here is how to use the comping feature in Ableton Live 11
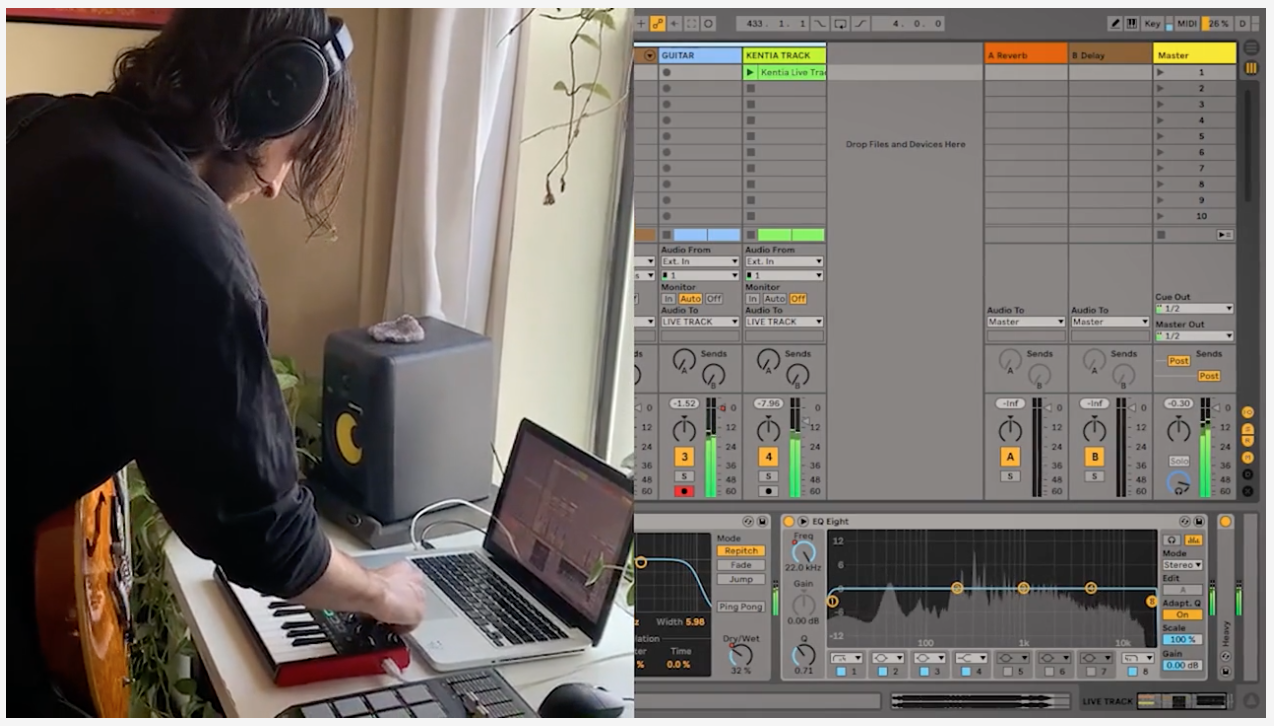
Step 1: Set up your recording device and create a new track.
Step 2: Activate the looping button on the top, and engage! Once you’re ready, hit the record button.
Step 3: Sing as many takes as you like and when you’re done, hit the space bar to stop.
Step 4: Control + Click (for Mac) on the track and click on “Show Take Lanes.” You can also access the “Show Take Lanes” with the Command + Option + U shortcut.
In the past, you would’ve needed to create separate audio tracks for every vocal take in Ableton Live, but Live 11 allows you to create “lanes.”
You will see that the top lane will be the “comp track,” and the newest takes will be in the bottom. You can click on individual tracks to listen takes separately..
Step 5: Once you find a section that you like, select the section and click enter. This will send the selected section to the comp track.
You can select your favorite parts from each take and highlight them with the pencil tool. This is a sweet feature that allows you to visually identify your favorite parts of each take, and allows you to combine them into one. You can also rename and change the order of the tracks based on your take preferences.
Of course, so far we have the individual clips in the comp track, but this does not mean they are all working with a smooth transition.
Step 6: In order to create a smooth transition between the various takes, create fades between each clip.
To create fades, all you have to do is bring two clips side by side and put your cursor on the upper or lower corners of one clip, and then gently pull one corner towards the other clip, which should give you a fade.
So there you have it!
This is how easy it got to comp vocal tracks with Ableton Live 11. The new comp feature functions similarly to the “Playlist” feature in Pro Tools. As with most producers working and producing vocals in Ableton, I’ve also been waiting for this feature for a long time, so I’m really glad they finally made this happen!
One last piece of advice: if you have just finished a lengthy recording session, I would avoid comping right away as your ears might be tired and it might be hard to hear the nuances of each performance. You don’t want to lose out on any good ideas because you’re distracted. I would rest a day or two and then jump into the comping session with fresh ears, a fresh mind, and a rested voice.
So, get started with recording some vocals and have fun comping your next big project!
Ready to Dive Deeper with Ableton Live?
If you’re new to Live and want to learn how to use the software and tons of new features, check out Soundfly’s all new online course Intro to Music Production in Ableton Live. You’ll learn to work with software instruments, record and process audio and MIDI, tackle the basics of mixing, and get your feet wet with Live’s incredible performance capabilities.