
+ Ryan Lott (of Son Lux) teaches how to build custom virtual instruments for sound design and scoring in Designing Sample-Based Instruments.
In the past, recording and mixing music was focused on getting the right flavor and balance of sound through choosing the correct instruments and microphones; and setting up to record your band in the best sounding space you can find. But, as advances were made in recording technology, bands and artists could begin to apply additional sound effects to their recordings to enhance the sound, after the fact.
Part of this development in sound effect technology was due to the introduction of methods to increase the overall volume level of the recording. Now with modern digital sound modelling options available, recorded music is louder than ever. So, how exactly do you go about achieving a really loud sound for your song?
Well, the first and best option is always to send your mix to a mastering studio and allow them to boost the volume for you in a professional manner. Mastering engineers know how to raise the volume level of your song while maintaining as much of the original, natural feel from your mix as possible, so leaving your mix in the hands of trained professionals is an excellent choice.
But if you decide you want to make your mix sound loud independent of any mastering work, don’t be tempted to just push your fader levels up louder. This can result in unwanted clipping distortion, which is the gritty, gravelly sounding sonic artefact that appears when the volume levels exceed digital maximum, and portions of the sound waveform get cut off.
To create a loud-sounding mix the right way, you will want to utilize these three steps:
- EQ the tracks in the mix to take advantage of psychoacoustic effects,
- Compress individual tracks to push everything more forward and present sounding,
- Add a compressor and hard limiter on the master volume fader to allow the waveform amplitude to be increased as much as possible without clipping.
Let’s talk about how to do these things below. But first, we absolutely must remind you that if you’re seeking to learn how to mix either your music or that of your artist clients, you can learn everything there is to know with Soundfly’s in-depth online courses, Modern Mix Techniques and Advanced Mix Techniques.
+ Enjoy access to Soundfly’s suite of artist-led music learning content for only $12/month or $96/year with our new lower price membership. Join today!

Step 1: Psychoacoustic EQ
Your ears don’t hear all sounds equally. They’re much more sensitive to sounds in the midrange tones, and don’t hear the very low and very high frequency pitched sounds quite as well. Our different degrees of perception of sound at different pitches is known as the psychoacoustic effect.
You can utilize the psychoacoustic effect to help boost the “apparent” volume level of your music by making adjustments to your EQ settings that give extra midrange power to the tracks in your mix. Your ears will notice this midrange boost more readily and your brain will perceive it as being louder.
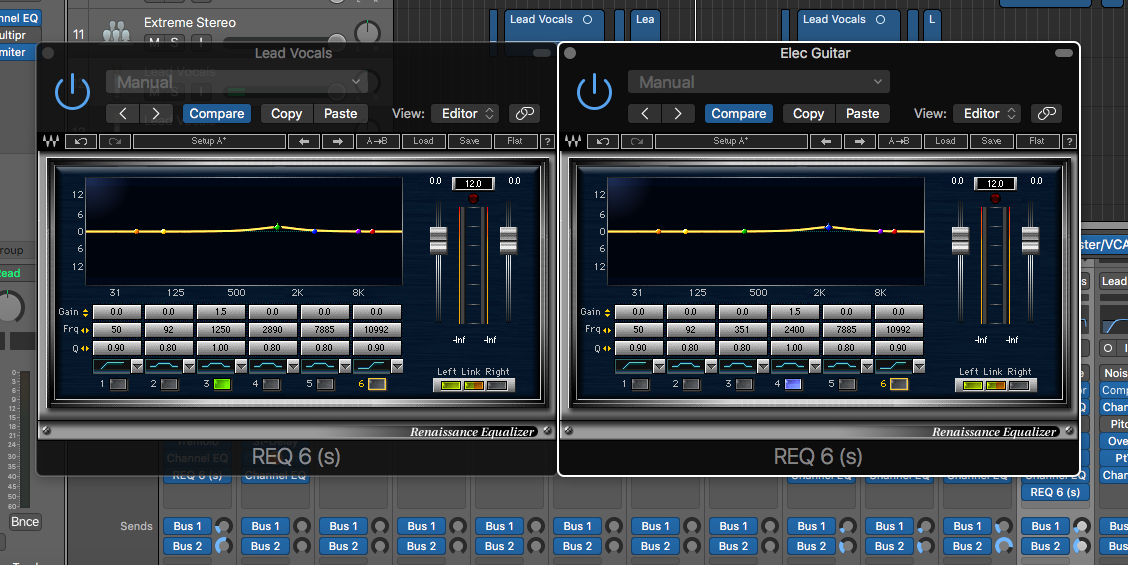
Care needs to be taken when applying midrange boosts in your mix, though, so that you don’t end up creating a hollow feeling or bullhorn type sound by overapplying midrange EQ. A small midrange bump added to select tracks, or to the master output, in your mix can help create the perception of increased volume level without having to actually boost the fader levels further.
For best results try applying a boost of about 1 to 2dB to some range of frequencies located somewhere between 500 and 4000Hz. Make sure you choose a slightly different frequency range within this region from 500Hz to 4000Hz for each individual track so that you don’t keep piling up more sound in the same exact range.
Step 2: Compress Your Tracks
Compression essentially punches down the loudest peaks within a track, thereby allowing you to turn its volume level up more without worrying about clipping distortion. By using this on each of your individual tracks, as well as on the master output channel, you will raise up the level of any quiet portions within your track and gain a consistently loud and present sound for your song.
Compression will tend to push the sounds forward in your mix, so take care not to overdo it. It can also cause things to sound like they’re being constrained or clamped down when overused. Grammy-nominated mastering engineer Joe Lambert talks about this very issue in this video, courtesy of Soundfly’s Faders Up: Modern Mix Techniques course.
However, when applied with care and attention to the balance and feel of the sound, and utilized in combination with EQ adjustments, compression can greatly increase the overall volume level of your song.

Applying a compressor to the master output channel is also a good idea to give a final volume push to the overall combined sound in your mix. For your individual tracks and the master output channel, try starting with a threshold of about -14dB, a ratio of 2.5:1, and an attack speed of 8ms. Then adjust from there for each specific track as needed.
Use the makeup gain adjustment on each compressor to add the new increased volume level your compressor has opened up for you.
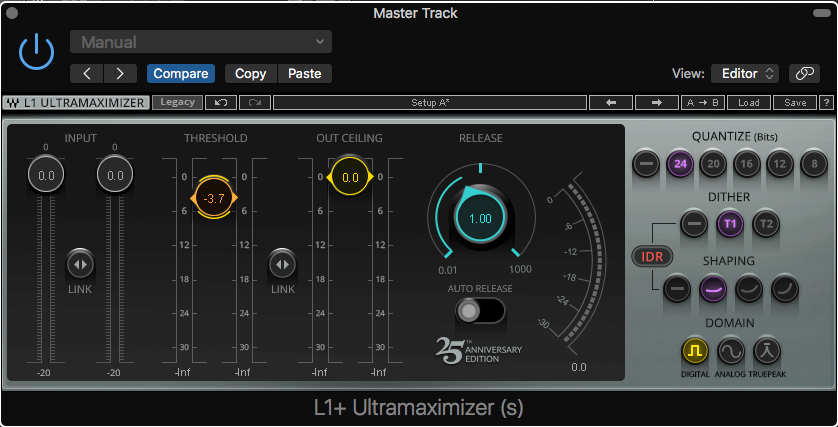
Step 3: Add a Master Fader Limiter
Now that you have increased the midrange EQ and added compression to your individual tracks in the mix to raise all their volume levels across the board, plus added a compressor to the master output channel to give an additional overall volume level boost, it’s time for the final volume level push on top of all this that will really give your speakers a workout.
By adding a limiter as your final plugin on the master output channel you can add another potentially 2 to 4 dB more sound output, without worrying about clipping distortion or other artefacts. In fact, if you’ve also used compressors on your individual tracks and the master fader channel, you can now push your limiter as far as possible to gain as much volume level as you would like.
Use your ears while you gradually decrease the threshold level in the limiter and listen for when things begin to sound like they’re breaking down, or getting gravelly sounding, and then pull the limiter threshold level back up just a hair above that. Make sure the limiter’s output level stays set at 0dB — this gives you your maximum loudness limit while still maintaining a good clean, clear sound.
LUFS and RMS
Over the years there have been many ways in which engineers have attempted to quantify the loudness of a mix, starting with the classic VU meters, which display a time averaged signal (RMS) of the audio waveform. These readings could help the engineer visualize both the maximum and typical loudness range of the analog audio signal, but they weren’t good for catching quick peaking signals or at summarizing an overall loudness level for a full song.

Later on, with the advent of digital platforms, it became easier to measure a song’s overall average decibel (dB) volume level compared to the maximum possible level allowed in digital audio files, producing a number less than zero, with louder signals being closest to zero (smaller negative values). During this era it was common for mixing engineers to aim for average dB levels for their songs that might range from -20dB to -10dB, typically speaking, depending on the nature of the music.
But, a major pitfall of this method is that it doesn’t account for the psychoacoustic effect in which the human biological auditory system does not hear all tones as being equal. Various adjusted dB measurements have been used to try to correct for this over the years. But, it wasn’t until the adoption of the Loudness Unit (LU) that the audio engineering world has finally settled on a standard agreed upon by everyone is a good measure of loudness that does a good job of correlating audio file amplitudes to the human auditory system.
Today, most DAWs and audio editing applications provide a way to read the LUFS (Loudness Units Full Scale) of sound, which measures the LUs relative to the maximum possible level allowed in digital audio files, similar to the average dB readings. Because this consistent standard is now used across the industry, it’s a good one to use for your own loudness measurements of your mixes.
When aiming to “make your mix loud” you will want to shoot for a number with a smaller negative number. However, don’t overreach in your attempts to make a song extremely loud since many audio player applications, streaming services, and radio stations today will automatically boost or reduce the volume level of your song anyways in order to match its level to better fit with other songs playing in rotation through the same system. This means they may undo some of your efforts to make it louder in order to quiet it down to match other songs, or that they may boost your sound somewhat to make it as loud as other songs.
So trying to hit a precise volume level may not be as critical as it once was. Ideally, let a mastering engineer choose a volume setting for your music that best fits your genre, song specific sounds, and your intended audience (see above video).
Yet, while your best option for pushing your loudness in your mix is to let an experienced mastering professional apply the proper settings for you, it’s still possible to get a surprisingly loud sound from your mix through careful but deliberate application of the three steps we highlighted above.
Ready for even more?
Check out Soundfly’s variety of courses on songwriting, mixing, beat making, recording, composing, and more, led by artists like Kimbra, Com Truise, Jlin, Kiefer, The Pocket Queen, and RJD2: From Samples to Songs.