
+ Learn to create and arrange original, instrumental hip-hop music from sampling pioneer RJD2 himself in his new course on Soundfly, RJD2: From Samples to Songs.
Adding sampled drums to a loop is one of the biggest reasons that DAWs like Ableton Live were invented, and why we’ve got two entire courses geared towards Music Production in Ableton Live and Beat Making in Ableton Live. Today, however, we’re taking a closer look at sample-based production in our other favorite DAW, Logic Pro X.
And speaking of Soundfly courses, since we just released a brand new course on sampling taught by the pioneering producer, RJD2, we’re going to take a similar approach to producing beats with sampled drums in Logic as RJD2 does with his Akai MPC sampler. And if you’re curious to learn more about RJ’s techniques and processes, definitely check out his online course to improve your sampling skills:
Alright, so because this process is quite similar across many DAWs, even if you don’t have Logic, it’ll be worth watching how the process goes down below.
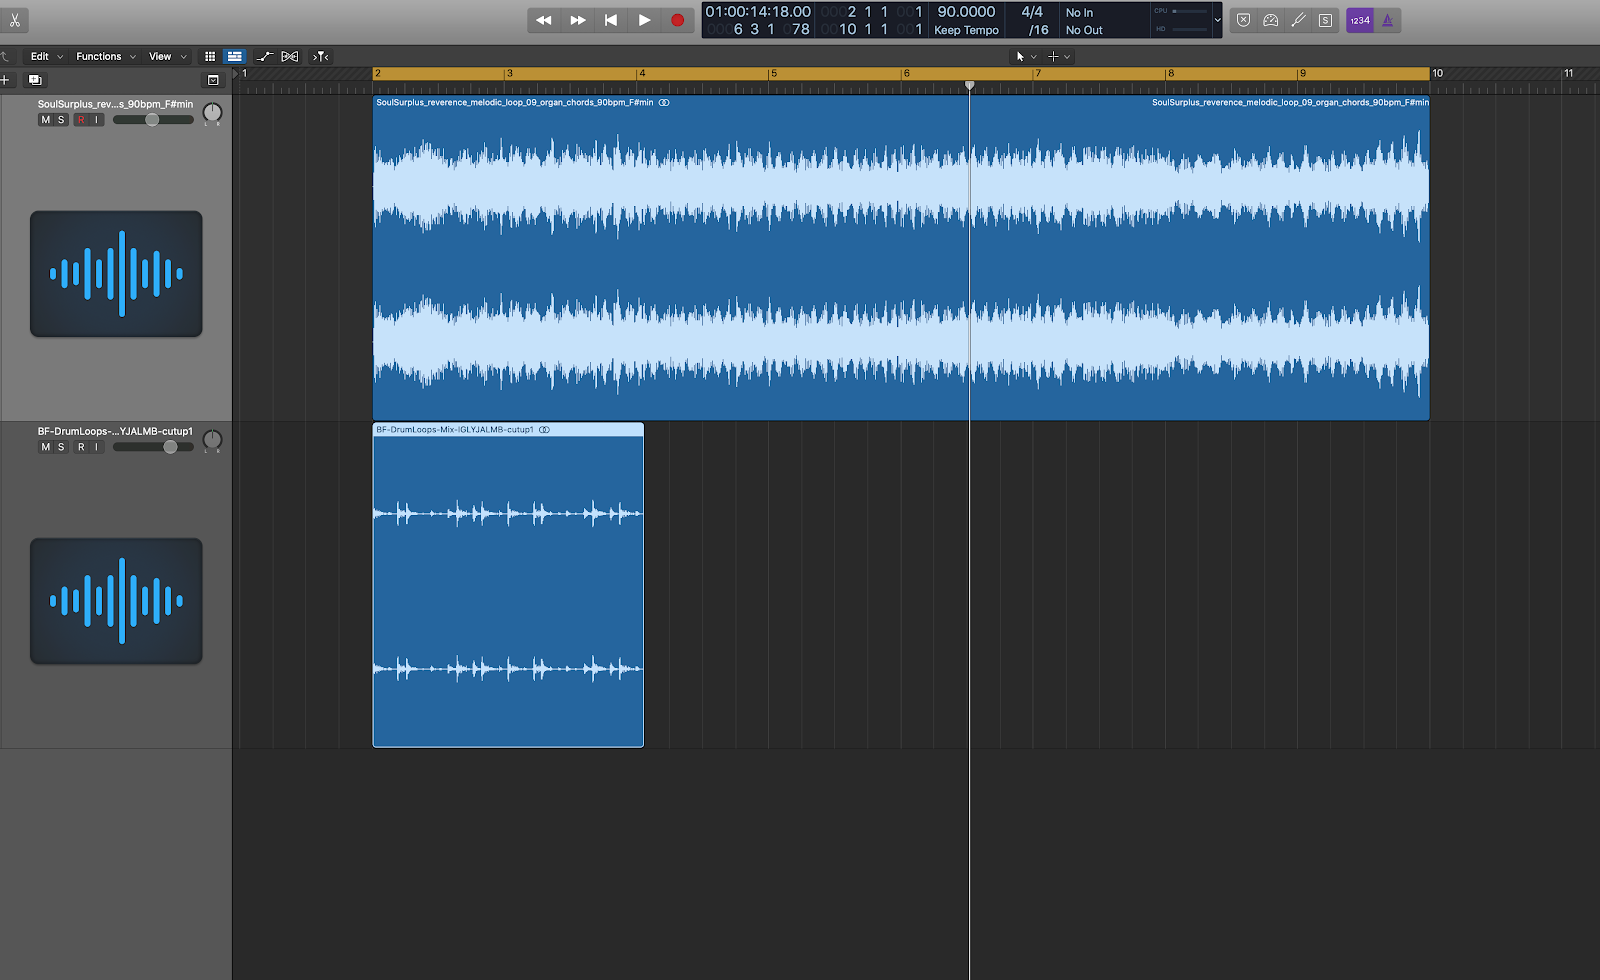
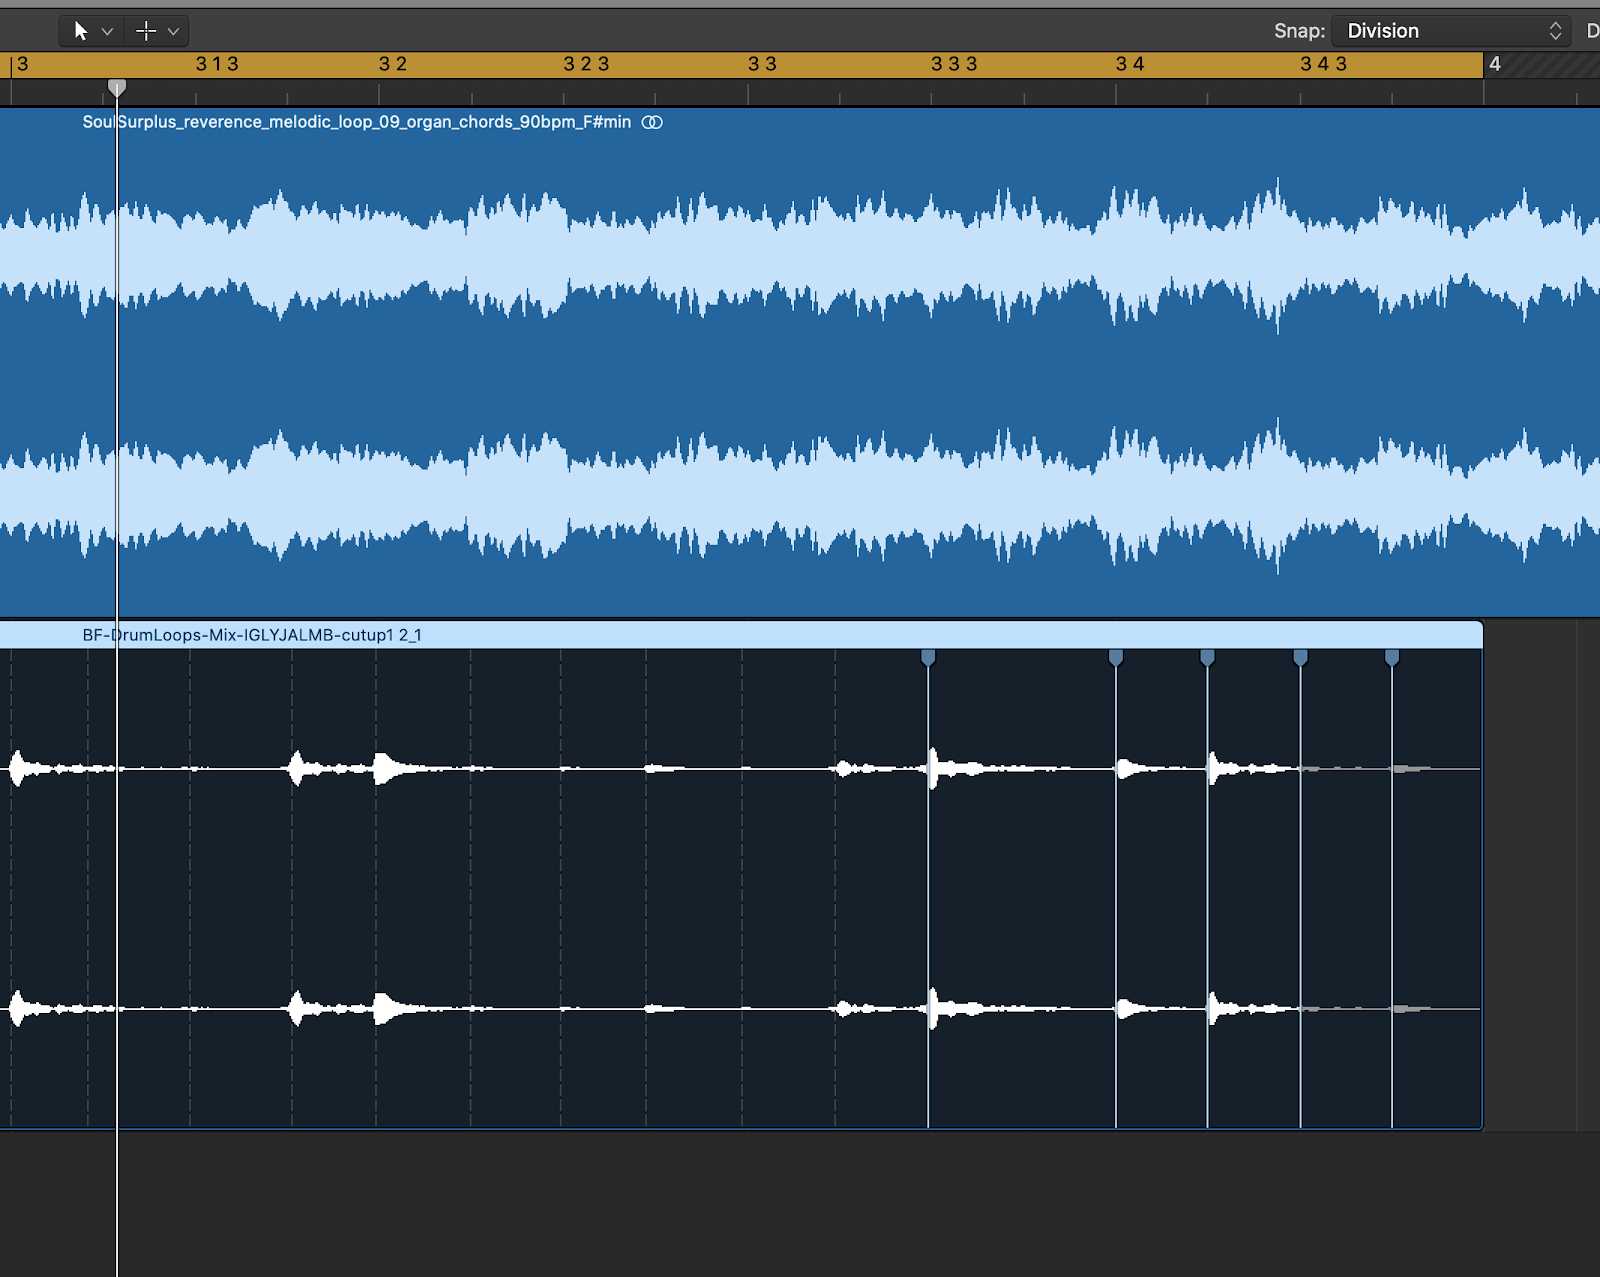
There are essentially two ways to record or import a two-bar drum break loop into Logic Pro X. In this case, we’re using a re-recorded version of the classic drum break from Barry White’s 1973 hit, “I’m Gonna Love You Just a Little More Baby.”
For this example, we’re using a sample with a tempo of 90 BPM, so we’ve set our session to match. Now, we’ll need to bring in our drum loop, makes sure the loop is cut cleanly to start and end in the right places, and make sure the tempo of the drums aligns with our session.
Clean-Cutting the Sample
Start by dragging the drum sample onto a new track in our session — very similar to creating a new track on the MPC.
We’ll open up the waveform editor and zoom in closely to see where the sample really starts. Luckily, in this case, the sample starts right on the downbeat — this work has been done for us already.
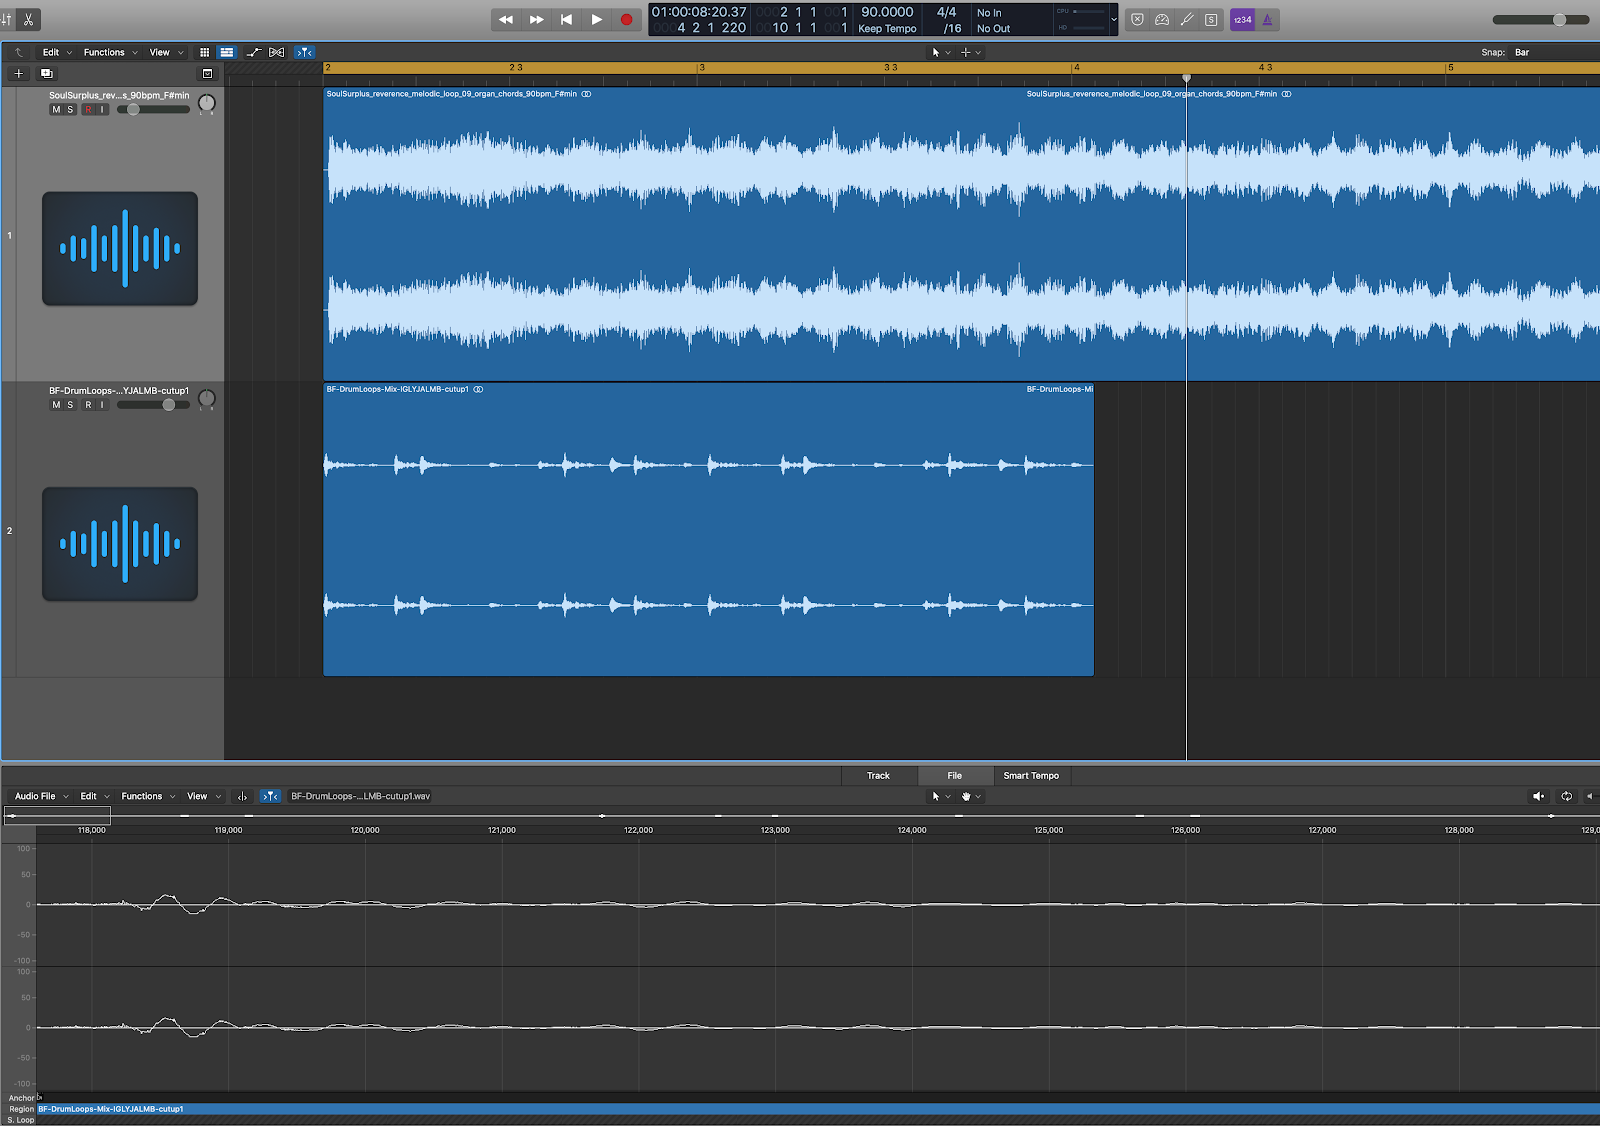
If we loop just the drum file and solo it, it also sounds like it’s already been cut to a perfect two-bar loop. However, it’s a bit longer than two bars at our session tempo, so our next step is to get the drums to match the loop of our session.
In Logic, as in many DAWs, there are many more technical ways to achieve this than were available in the MPC in the early 2000s. We’ll take a look at a few different ways to achieve the same end-goal.
1. Pitch Adjustments in the Wave Editor
Let’s look at the process of adjusting the sample’s pitch, just like RJ does inside his MPC. Inside the wave editor, under the Functions menu, we have the option of a Time and Pitch Machine… perfect!

In this window, we can adjust both the timing and the pitch of the sample. In this case, we want those two to be linked, so we’ll want to select “Classic” mode — this means that any pitch adjustments to the sample will alter the timing of the sample as well.
Free mode will allow us to adjust both the timing and pitch of the sample independently of one another — the magic of modern technology!
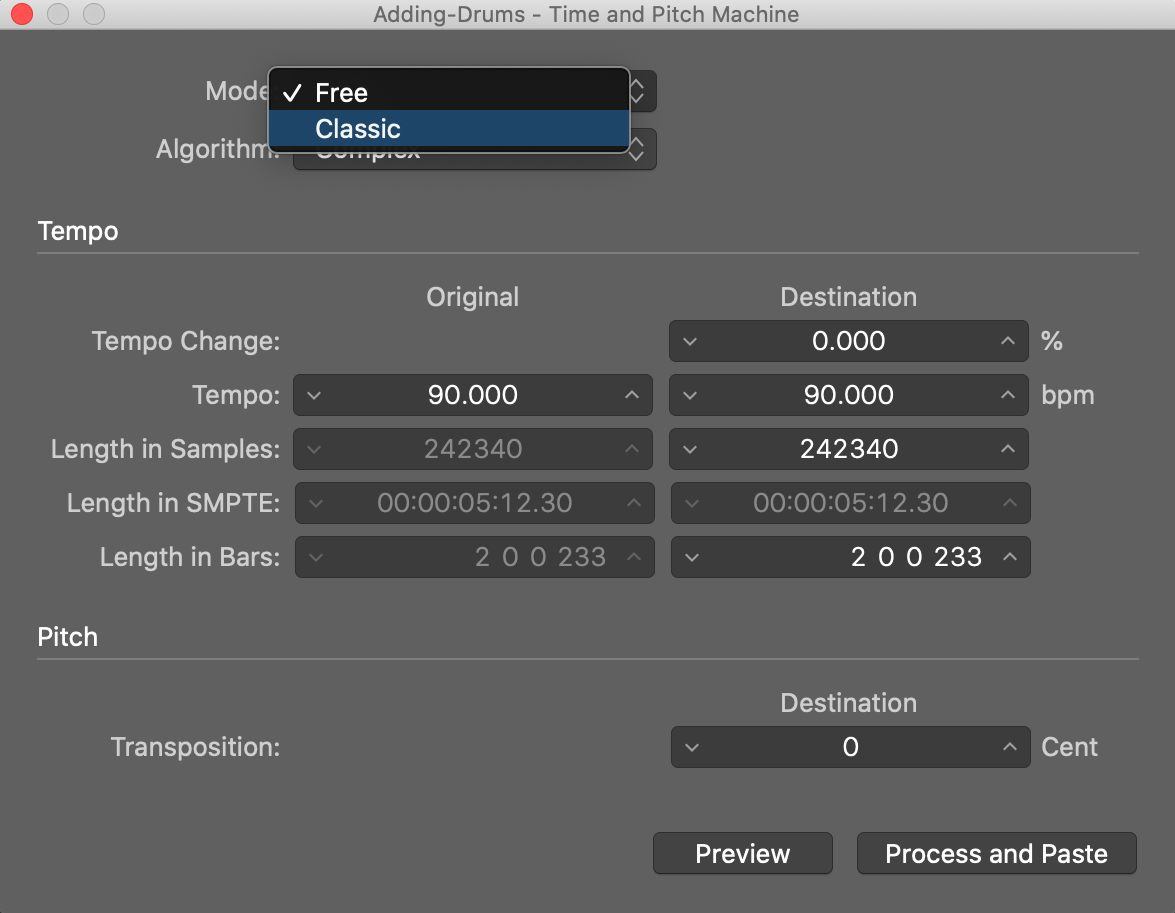
Unfortunately, these adjustments have to be applied in order to be heard — so we’ll have to guess and check! In this case, we want the sample to play faster, which means pitching the sample up just a little bit.
After some guess and check, we’ve landed at an increase of 51 cents — almost exactly one half-step up, musically — to get the drums feeling good at 90 BPM. Once we’ve got that in line, we’ll loop it several times to match the full length of the loop.
2. Time Compression/Expansion
As we mentioned, in modern DAWs, the timing and pitch elements of a sample can be independently manipulated. Ableton Live famously has many algorithms for this, and many other DAWs have instituted similar algorithms for different kinds of samples.
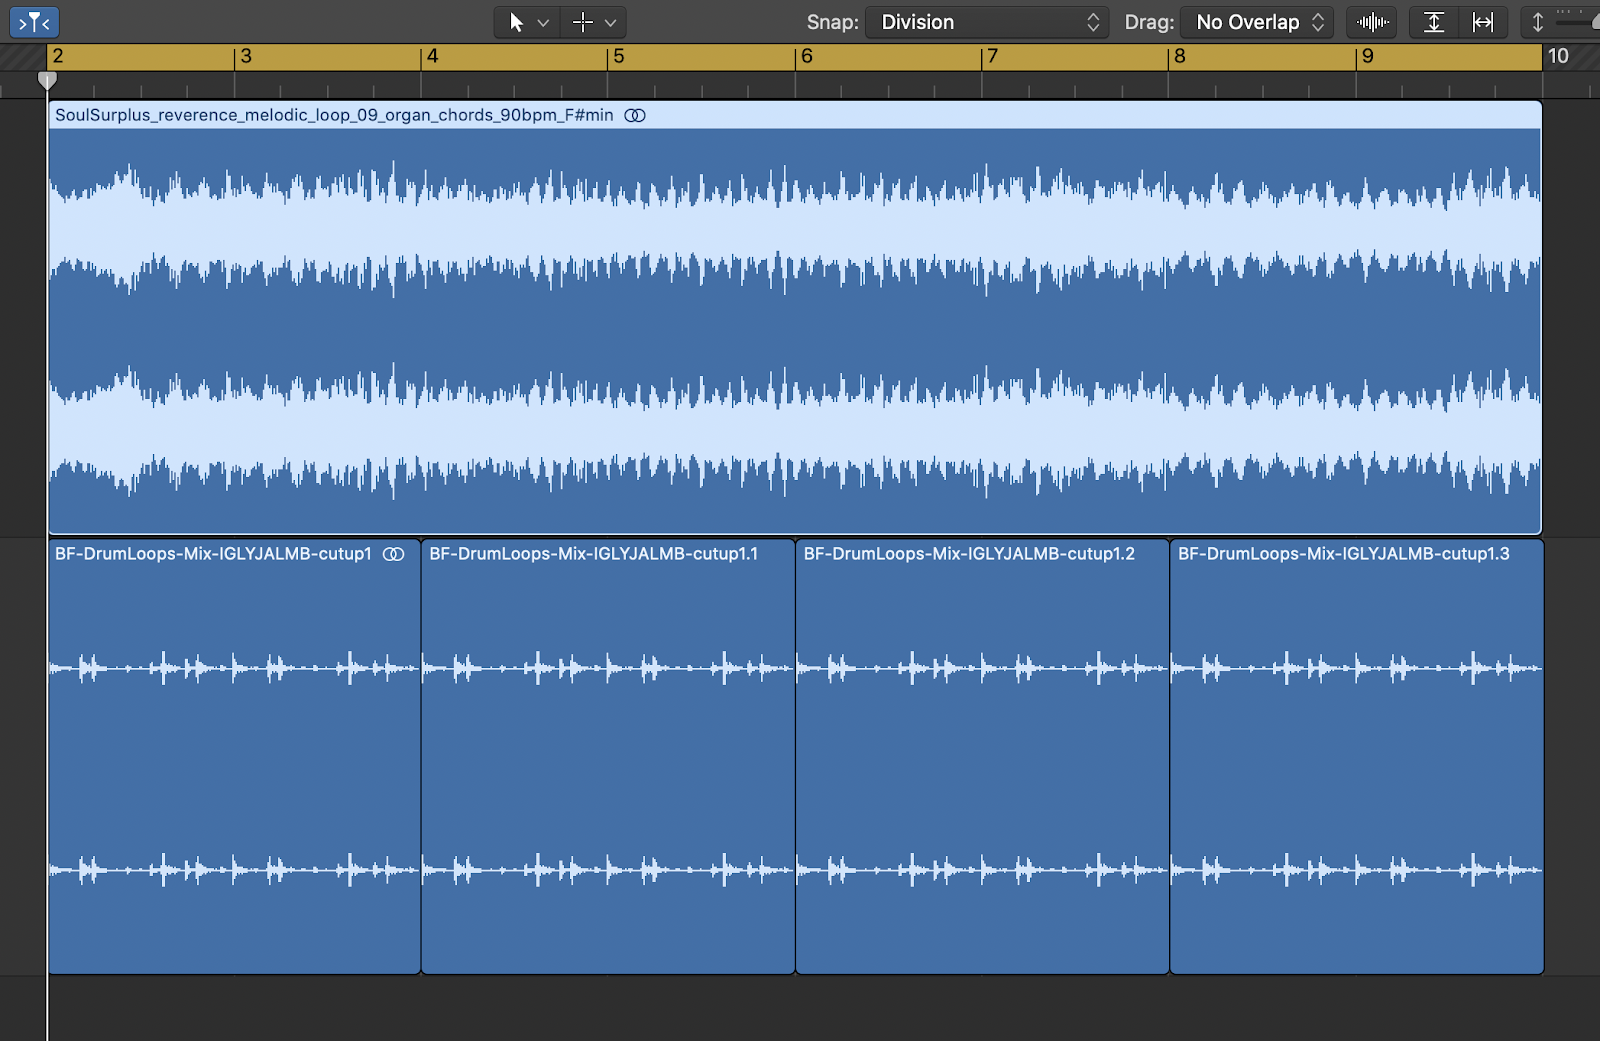
In this case, Logic Pro X has a function in the Arrangement window called Flex Time, with an algorithm specifically for drums called “Rhythmic,” that prioritizes maintaining the clarity of the transients in the rhythmic material.

From there, once we’ve selected the correct algorithm, we simply hover over the bottom-right corner of the region, hold Option, and with Snap activated, we click and drag the region until it aligns with the two-beat line.
The nice thing about this form of sample editing is that we can also edit individual slices of the beat, if they’re not feeling quite right.
For example, the last few hits of the loop feel a bit late, after the open hi-hat. With that little bit of editing, the loop is feeling ready to loop across the “sequence.”
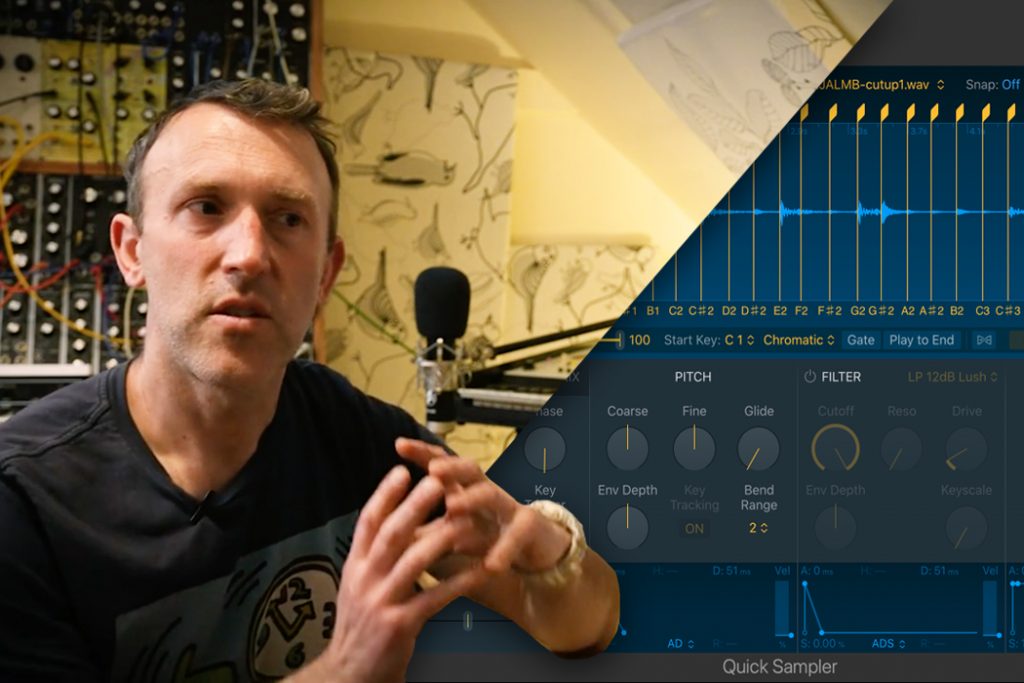
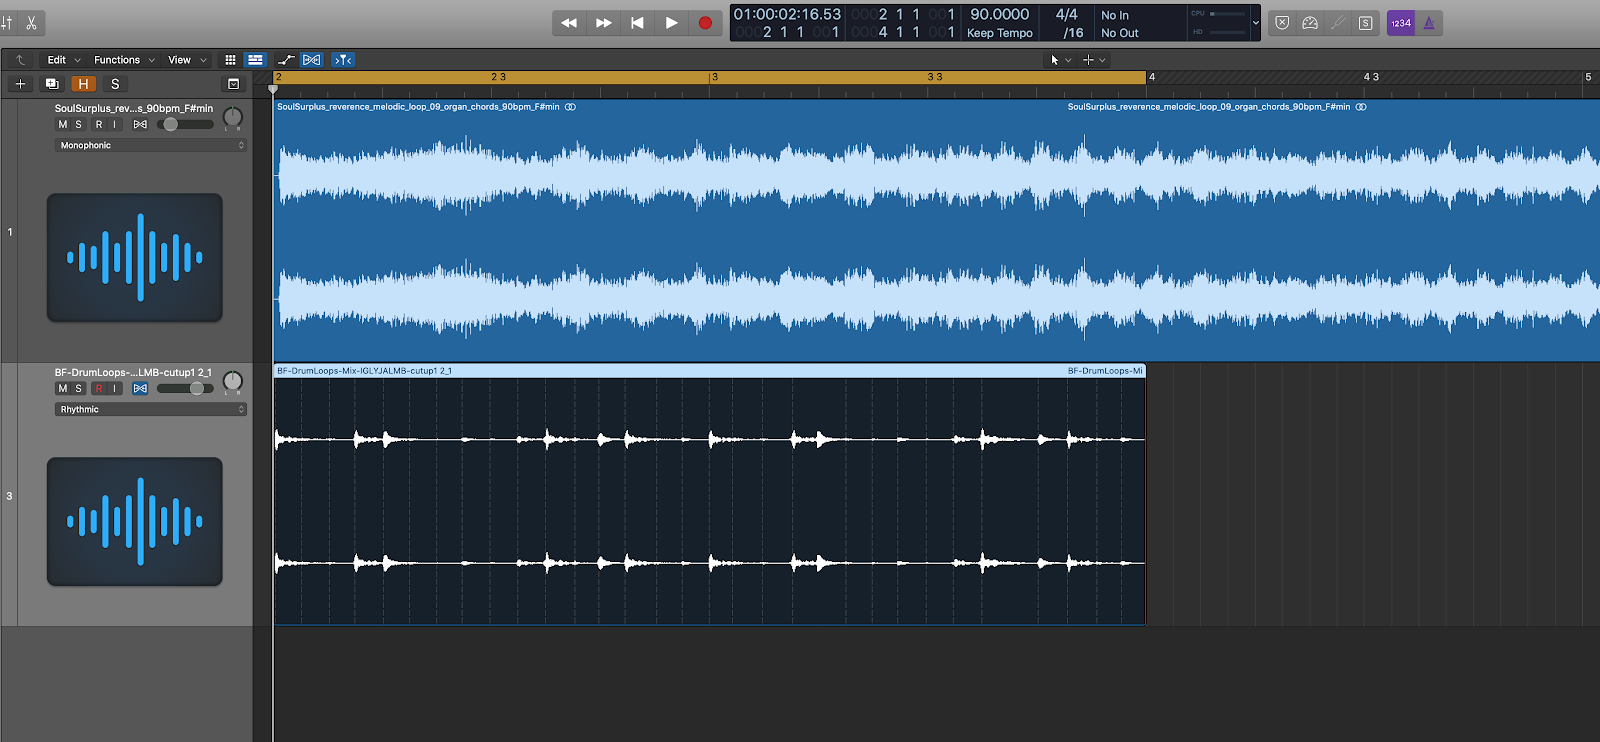
3. Within the Sampler
If we simply click and drag the sample of our choosing from a Finder window into the empty track space in the arrangement view (below our track header for our other sample), we can load the sample right into Logic’s Quick Sampler. In this case, it’ll auto-detect a rhythmic sample and select “SLICE” mode.
To better emulate RJ’s process on the MPC, we’ll instead select “CLASSIC” mode in the top-left corner of the sampler window.
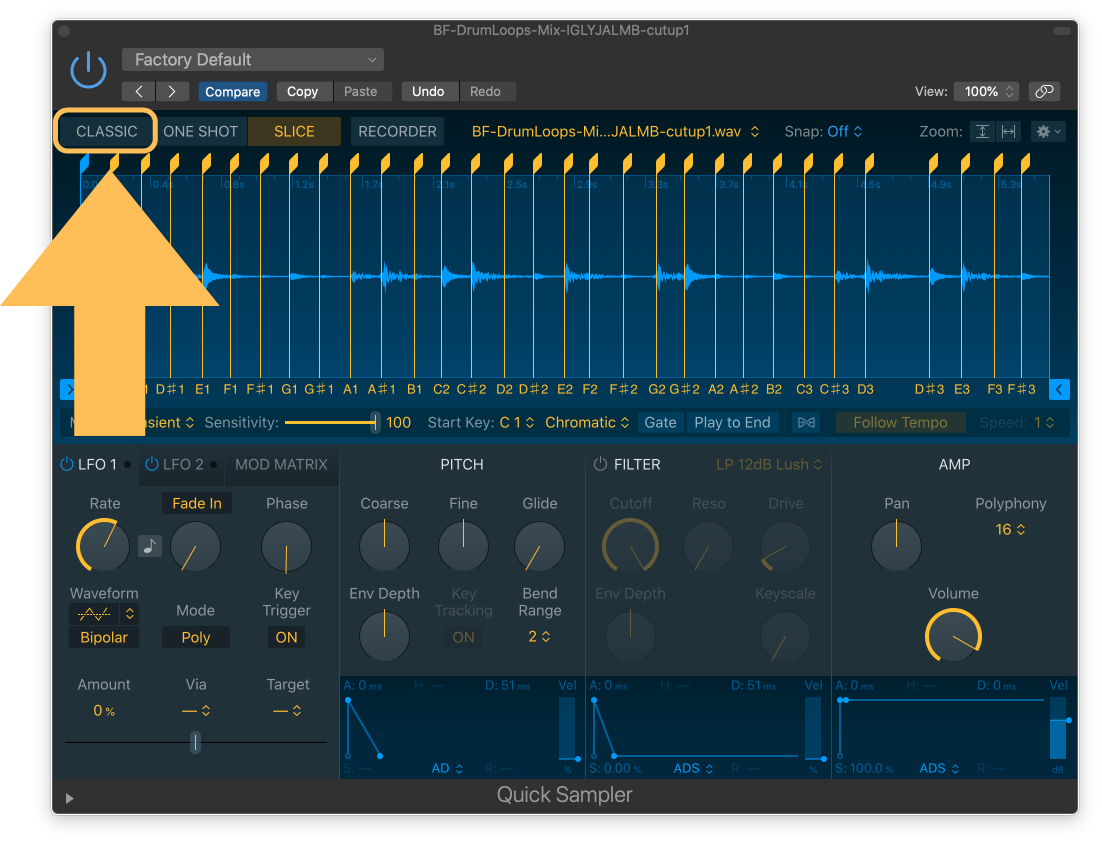
In this mode, we’ll just need to write in a MIDI note the length of our desired loop. In Logic, we’ll select our pencil tool to create a MIDI region. Then, we’ll double-click the region, and use the pencil tool in the MIDI editor to add a MIDI note on note C3, to match the “Root Key” of the sample.
This simply means the sample will play back at its original pitch.
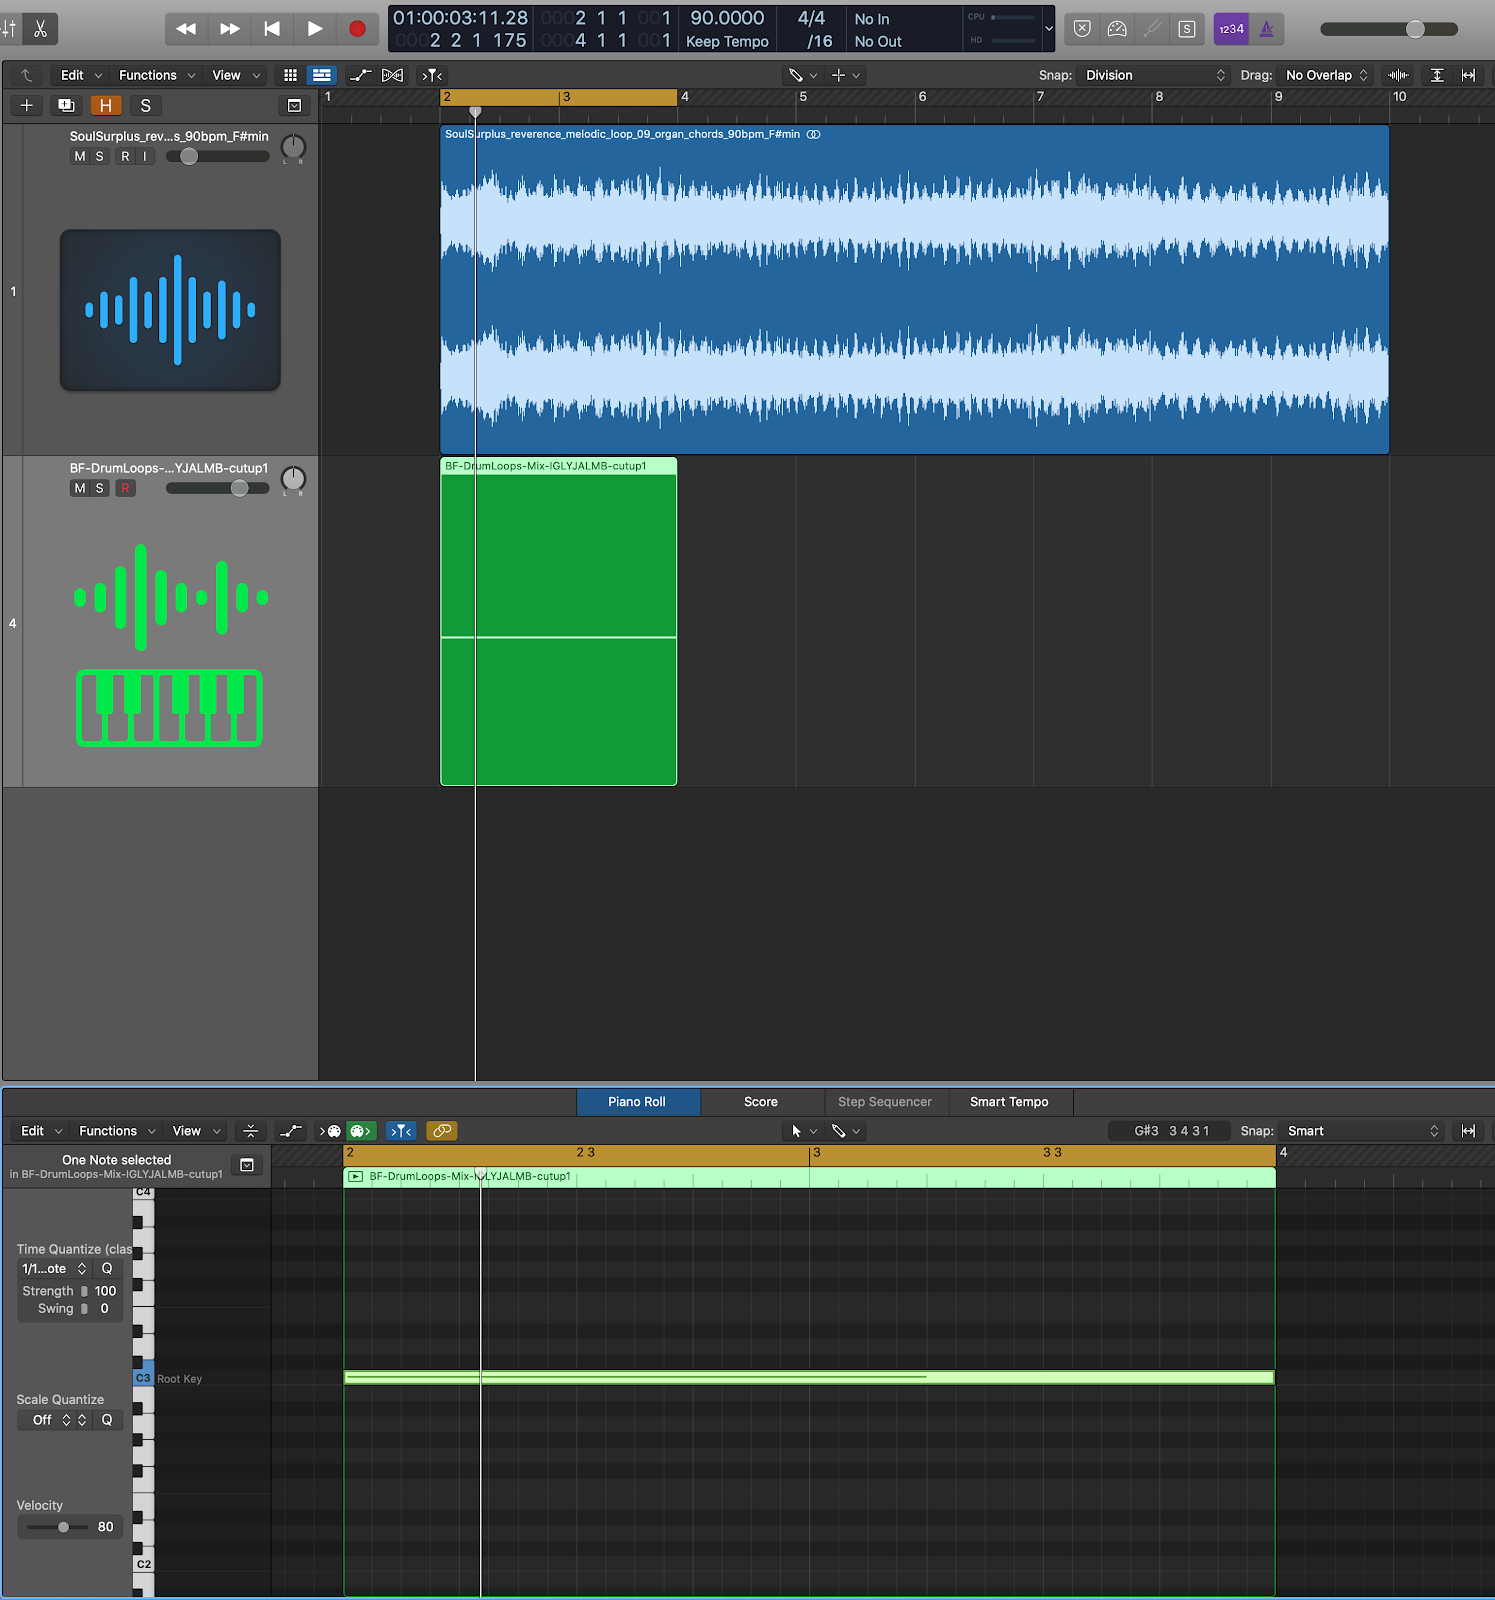
From there, we can solo the drums, activate the click track, and follow the same process that RJ might take in sampling directly in his MPC.
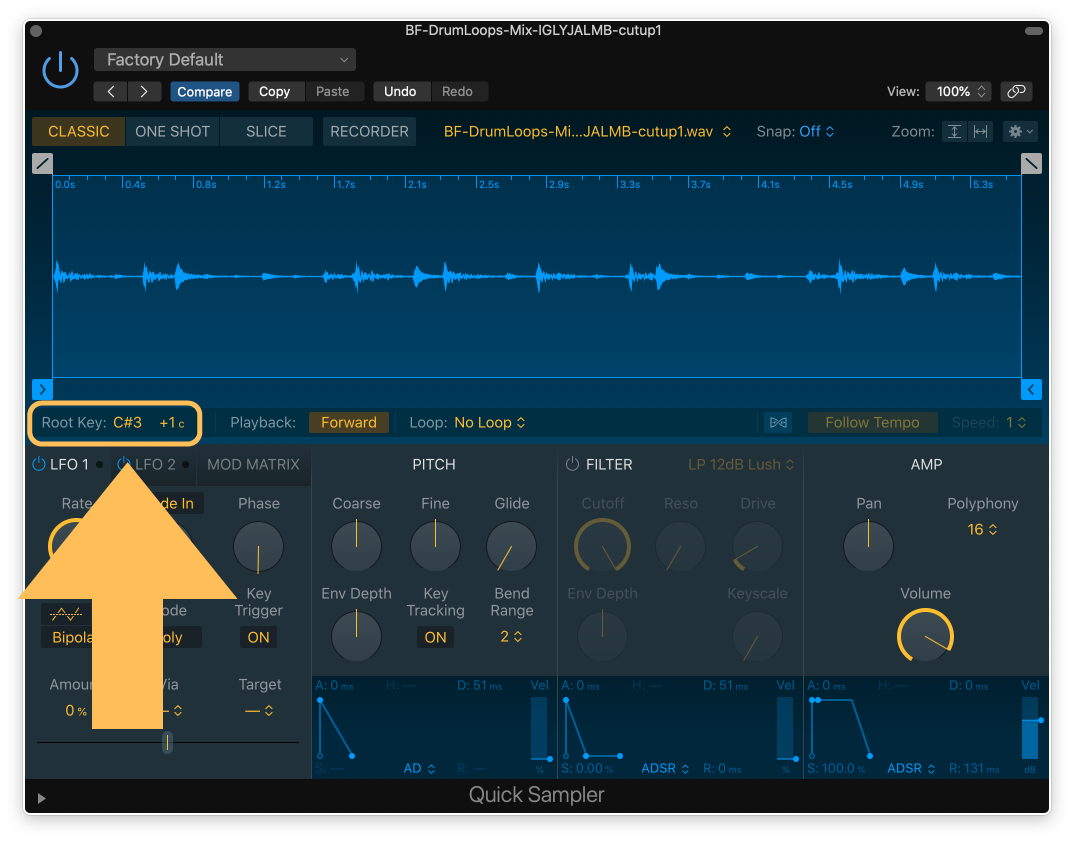
We’ll head back to the sampler and, while the sample and click are playing back, adjust the “cents” adjustment, next to the root key, until the loop matches the click, to our ears. Of course, since we’ve already gone through the guess-and-check, we know this will be 51 cents, or thereabouts.
In order to achieve this, we’ll need to first alter our Root Key up one semitone, to C#3 — this increases the pitch of the sample by exactly 50 cents — and then adjust the fine-tuning in the cents slider by +1 cents.
There we have it!
There are so many possibilities for altering the timing and pitch of samples with today’s technology, let’s reflect.

With so many modern options for matching pitch and tempo of digital audio loops, it’s really up to us to choose which method makes the most sense for our workflow. Take a moment to think through each option — which one feels the most fluid to your personal workflow?
- Classic pitch adjustments in the wave editor, or similar
- Time compression/expansion from flex-time, or similar
- Cutting and editing the sample inside a sampler
It’s certainly worth trying each to see how each method feels to you, in action, before committing to one. Reflect on it, and then give it a go, yourself!
Ready to Learn From RJD2 Himself?
Learn from instrumental hip-hop producer and sampling pioneer RJD2 himself how to write and arrange music drawing on the power of sampling records and a collage-based mindset. He’ll show you how he personally tackles new tracks with his trusty MPC, and he’ll open up sessions from some of his classic tracks to show how they were made. You’ll learn new approaches to sampling, songwriting, and arranging, and how to make instrumental beats that capture someone’s attention from start to finish.
Join RJD2: From Samples to Songs today.