+ The above video is an excerpt from Soundfly’s Advanced Synths and Patch Design for Producers course. To access the rest of this lesson, plus hundreds more videos and tutorials on production, songwriting, composing, mixing and more, subscribe here.
When we look at subtractive patches, there’s always the feeling that, with the right ingredients, you can remake pretty much any sound. Is the case the same for wavetable? Kind of? But you’d have to get pretty lucky to be able to recreate sounds exactly. To start, the endless potential for waveforms makes it pretty tough to get things sounding identical.
So instead of creating patches that sound exactly the same, let’s focus in on how to make patches that sound “similar,” which can serve the same function in your own productions. Think of these more like patches “in the style of.”
Let’s start with a sound that could have come straight from the PPG Wave 2 (learn more about that here) — this one from the Depeche Mode classic, “See You.”
But before we move on, if you’re interested in learning way more about synthesis than this post is going to cover, and how to rebuild your favorite artists’ patches in your own DAW, you’re going to love Soundfly’s Advanced Synths and Patch Design for Producers course. Check it out!

Composition Notes
This song is full of interesting synth parts, but we’re mostly focusing on the ghostly moaning choral patch that features prominently in the intro (and returns in the pre-chorus).
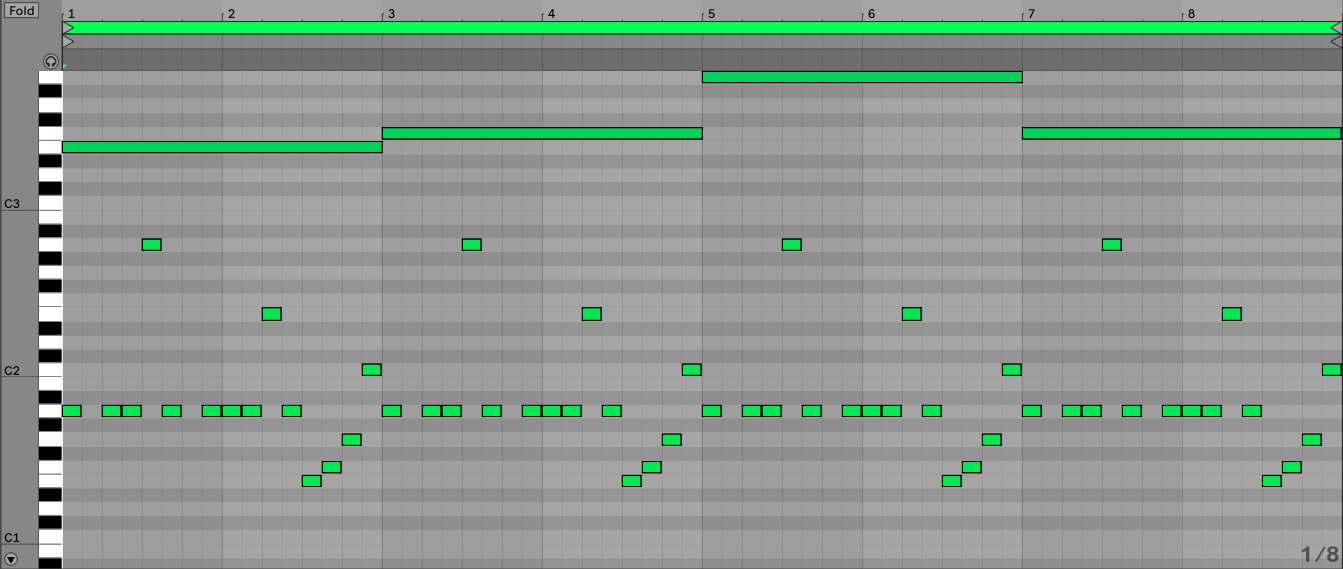
Download: See You MIDI (Pad+Bass – 140BPM)
This intro is wild. It’s got a bouncy bass ostinato that’s fast and rhythmic. It’s got two bell-like melodies that end up doing a call-and-response with each other. And then it’s got the choral patch that sounds almost like a wailing in the background throughout. The notes in this patch are sustained providing a moody anchor that contrasts with the bounciness of the other parts.
When the patch comes back in the pre-chorus, it’s slightly different. It moves a bit more, and takes on a particularly dissonant interval with the bass line below it. Check it out — we have a B on top and an F on the bottom.
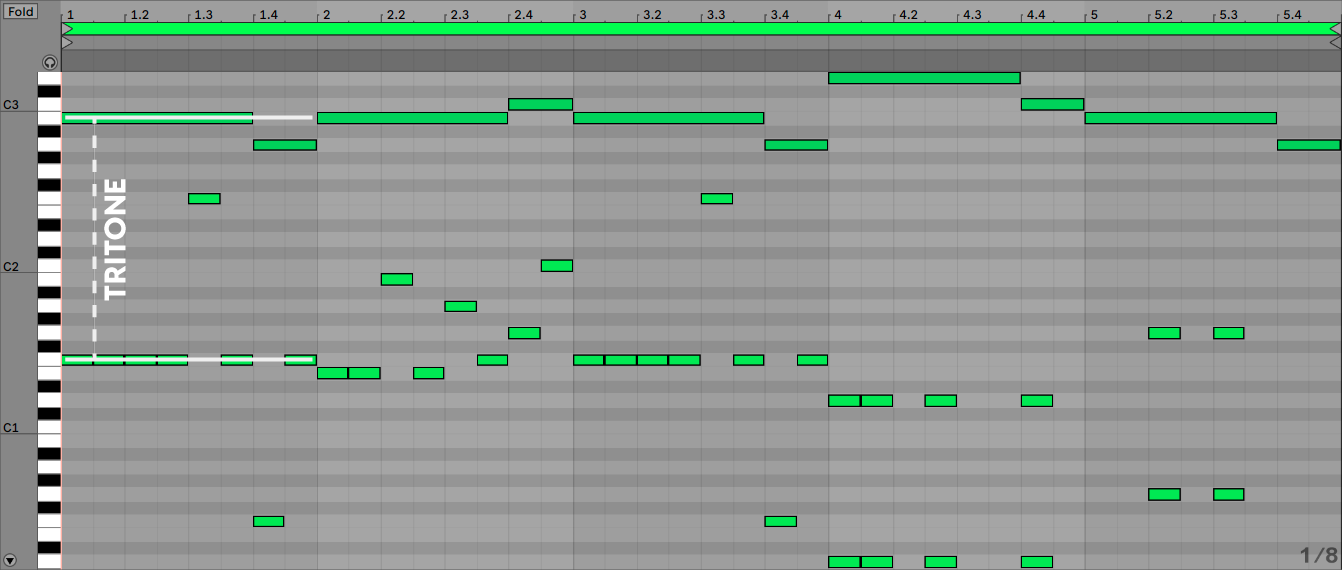
Download: “See You” Prechorus MIDI (Pad+Bass – 140BPM)
Those notes are exactly half an octave apart. This type of interval is often called a tritone, and it’s so peculiarly unsettling that it was once nicknamed “the devil’s interval.”
It’s an interval that sounds desperate for resolution. In fact, play or sing an F and then a B right now. Now, without thinking about it, play or sing the next note you want to hear. We can just about guarantee it was C for most of you. That’s because the top note of a tritone has an almost gravitational relationship to the note a half step above it — not unlike the relationship between the two characters in “See You.”
The patch here contributes to a generally unsettling vibe for the whole thing.
For more on how to use harmonic concepts and basic music theory in electronic music, check out Soundfly’s free three-course series, Theory for Producers.
Patch Notes
For the sake of really driving home how wavetable works, let’s make a unique patch using a choral sample. This is just the built-in Logic Pro sampler choir, singing the note E2.
Download: Choir Sample E2
Here, we’ll use Serum. You may follow along in other wavetable synths, but it might be worth grabbing the demo to try this out and follow along (heads up: The demo only works for 15 min, so you may want to read through first to be as efficient as you can). If the demo runs out on you, feel free to move past this one — you can always tackle more patch rebuilds in the course!
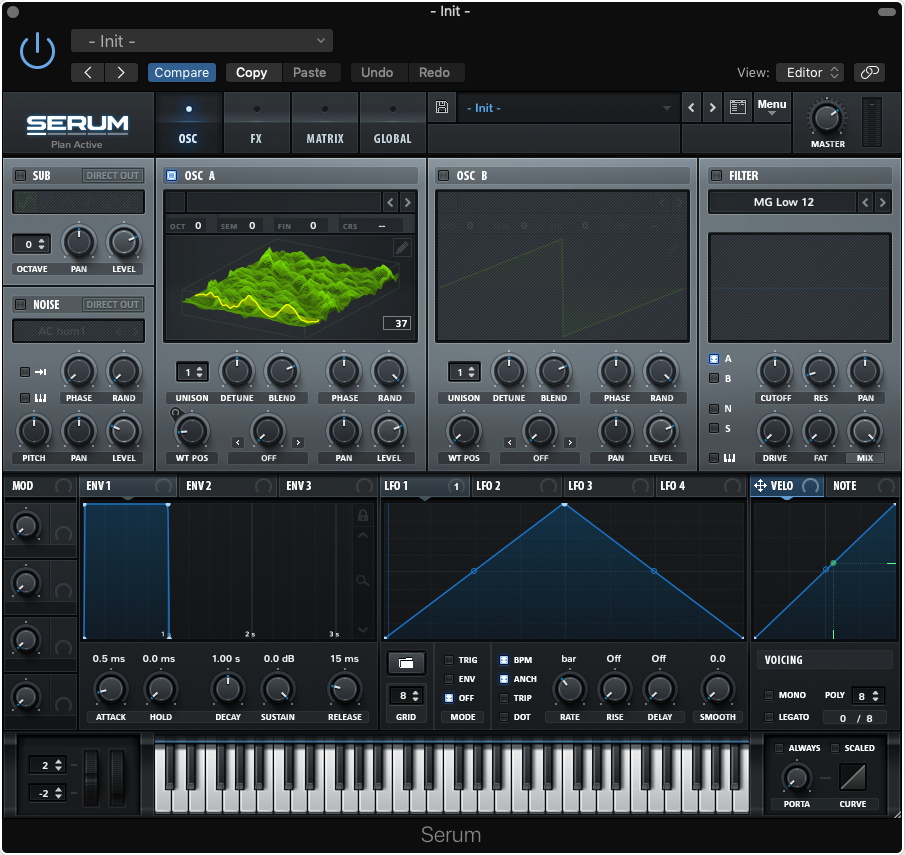
Oscillators
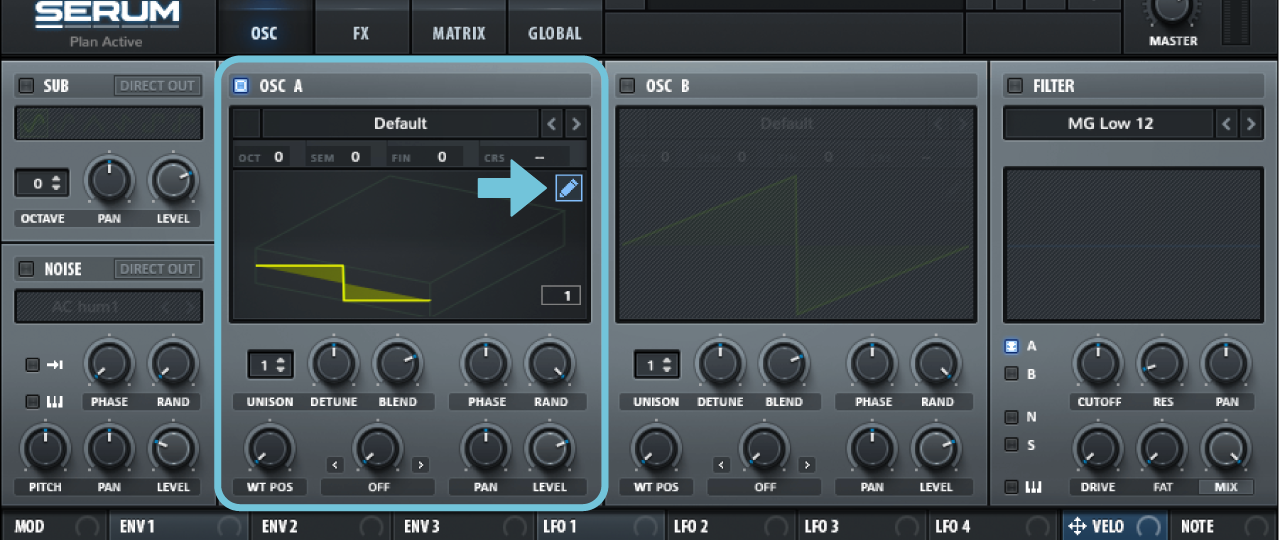
Click the little pencil icon in the top-right of OSC A. In the window that opens, we have the opportunity to enter a formula.
That sounds scary, but don’t worry. In this case, let’s just double-click where it says, “enter formula,” and type in E2. Let Serum figure out the rest.
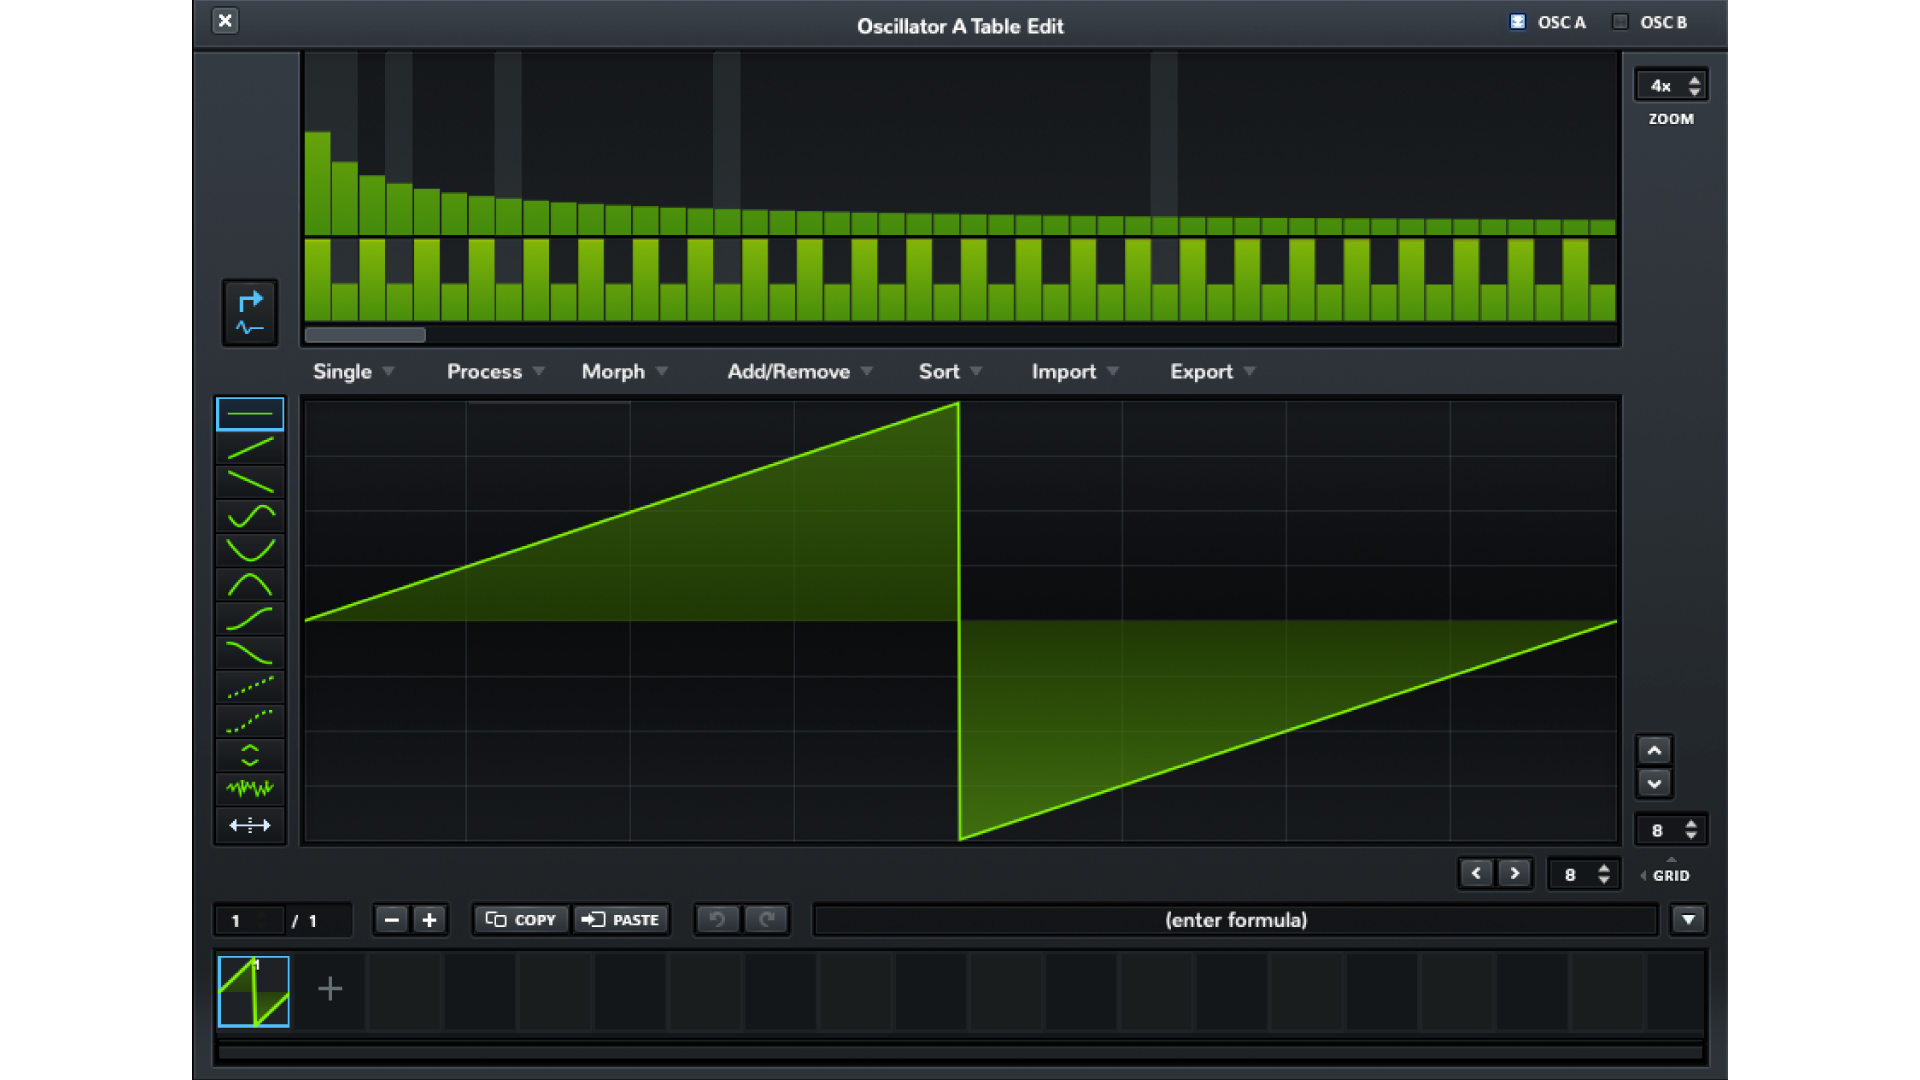
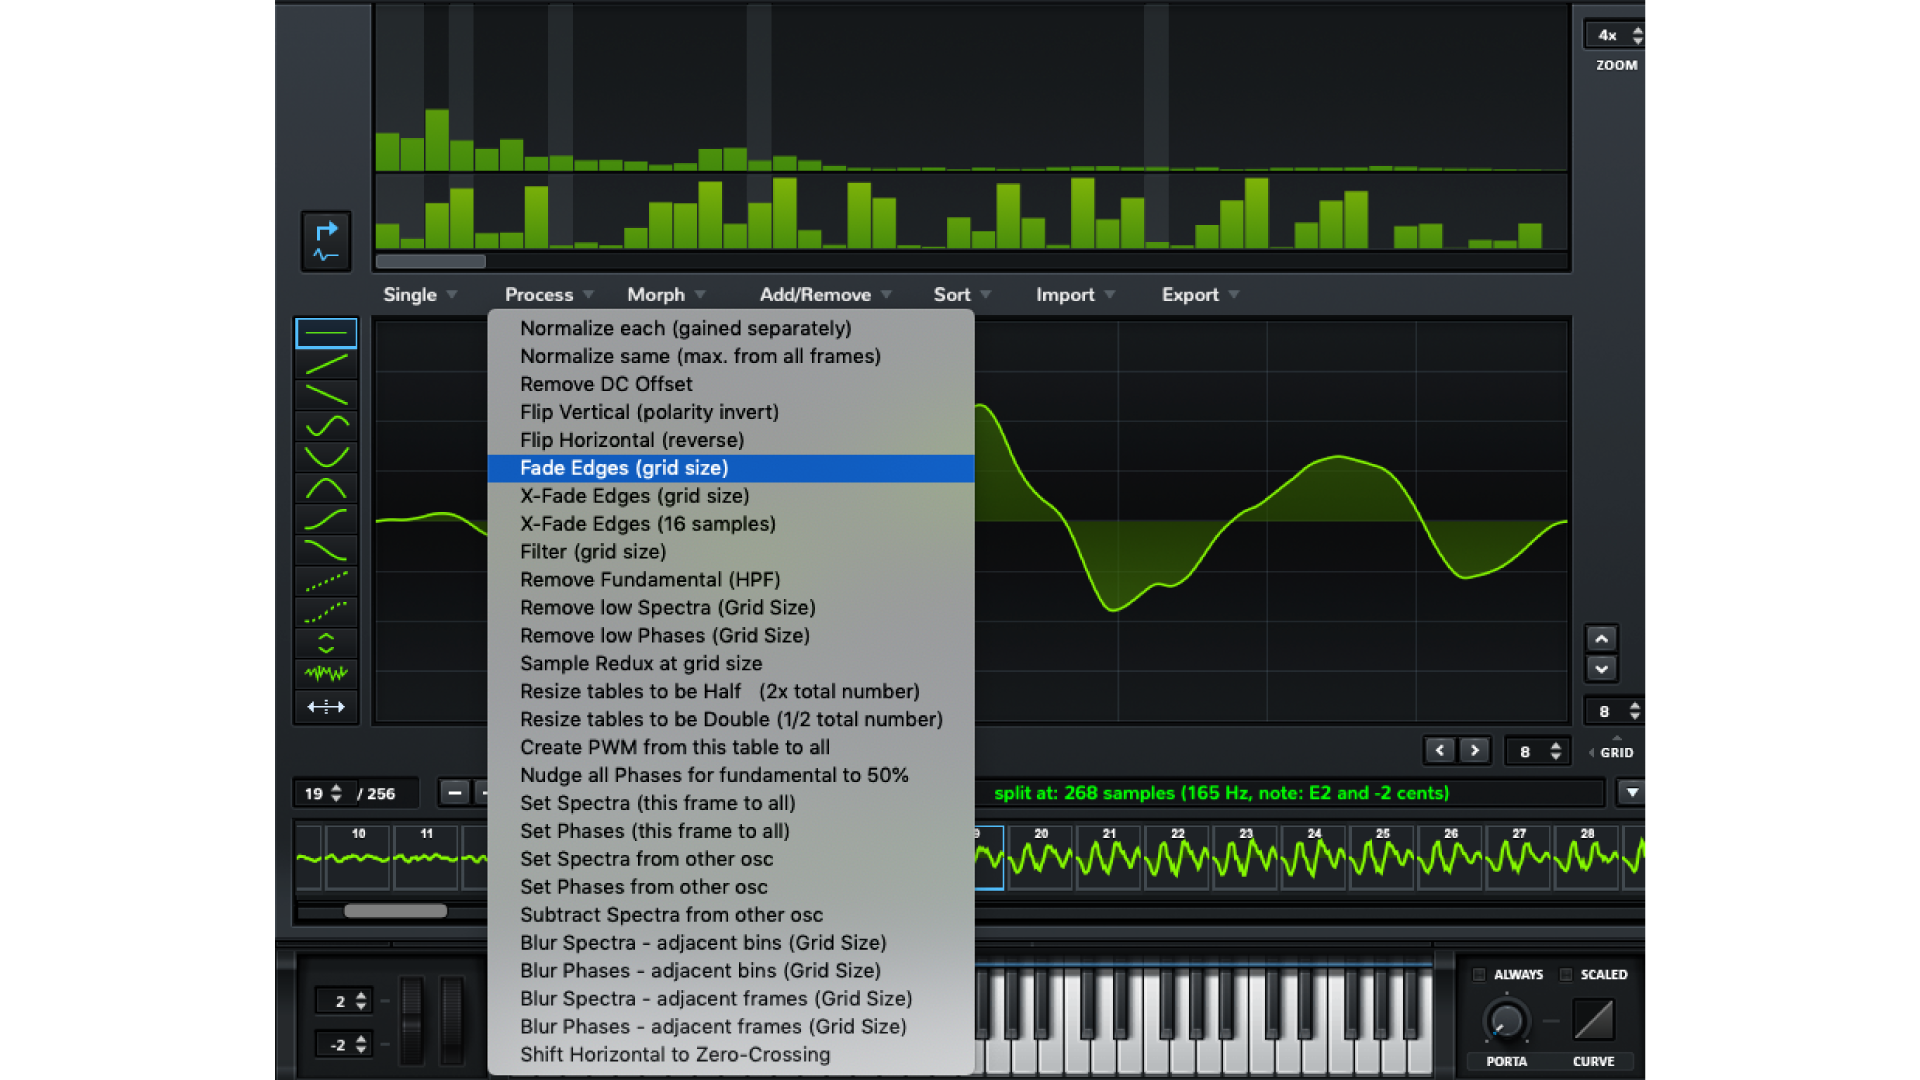
From here, Serum will do the math for us. Now, just drag the sample in and Serum will divide the sound up into 268 windows (a.k.a., wavetable positions)!
Click the “X” in the top-left to leave the wavetable editor.
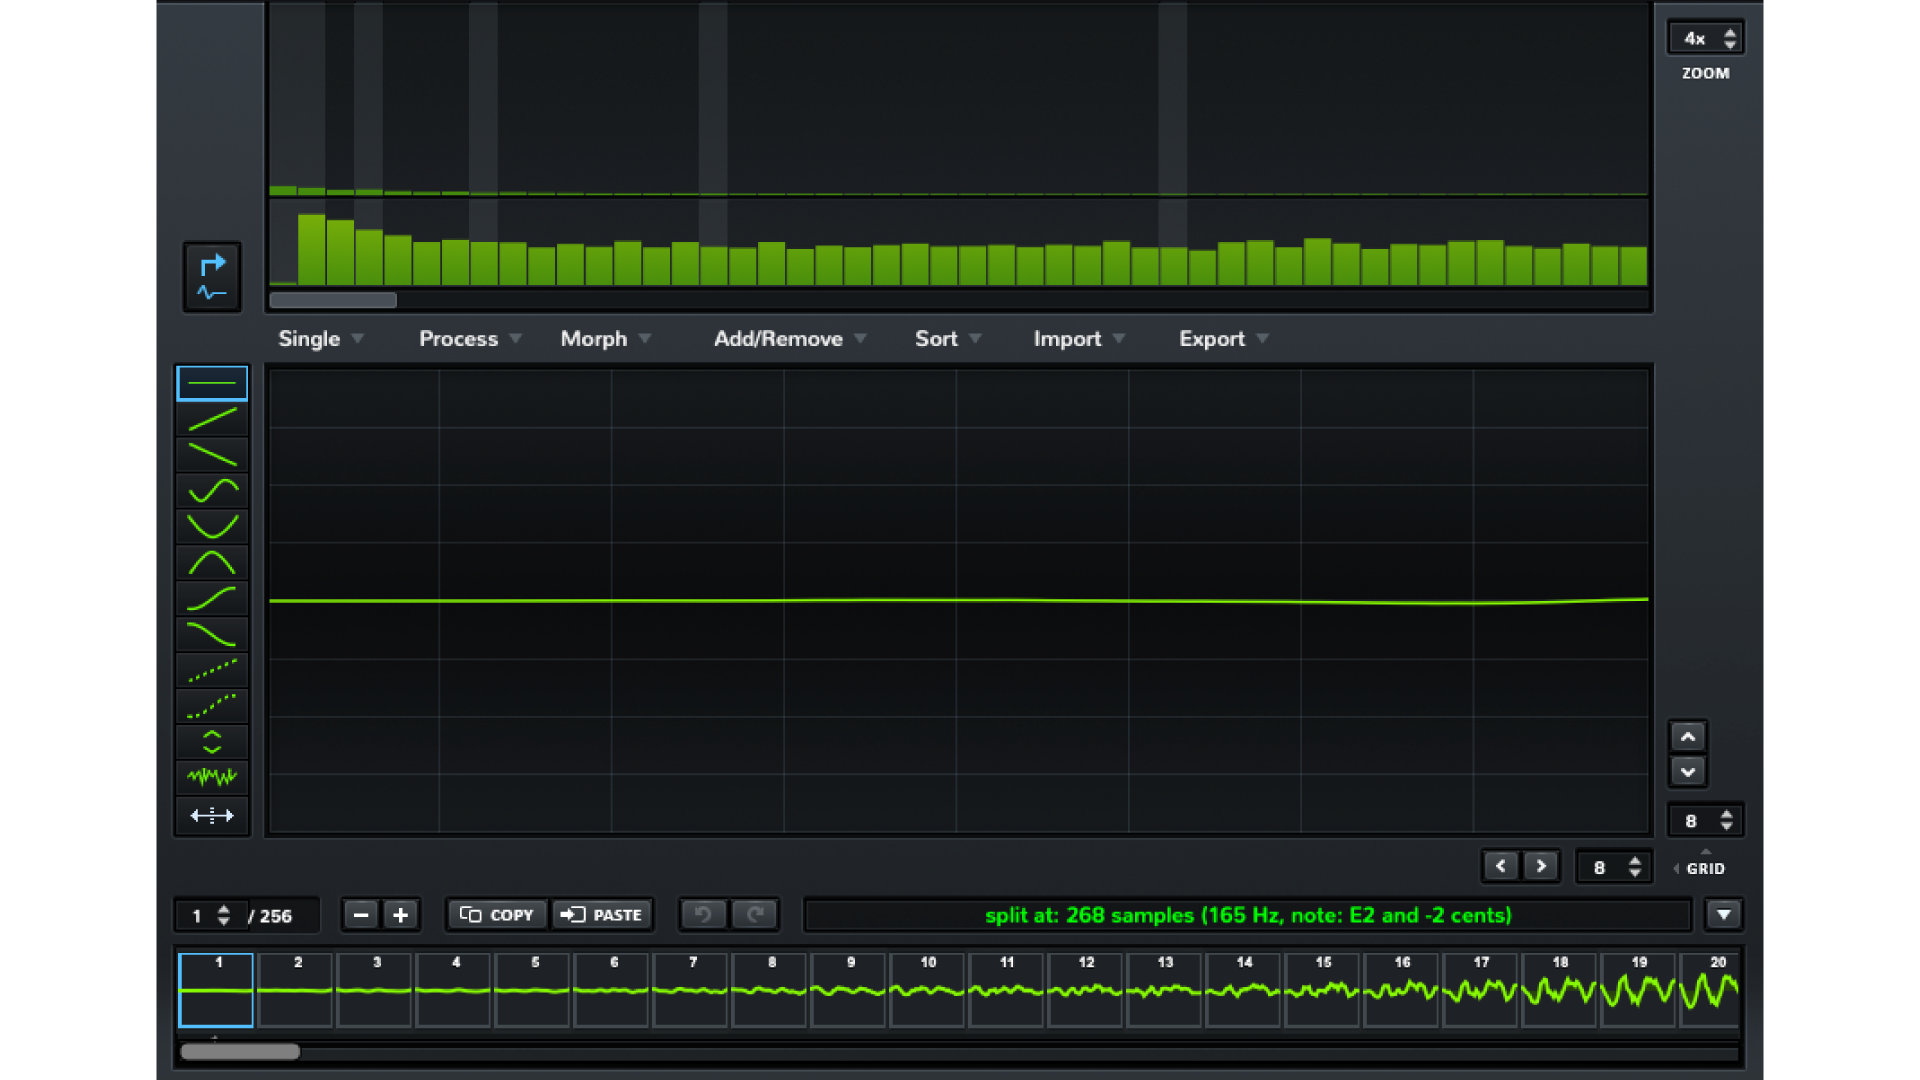
Let’s route an LFO that’ll let us “ramp through” the wavetable. To set this up in Serum, click and drag from an LFO’s label to the desired parameter — in this case, “WT POS” (wavetable position).
By default, it adjusts the depth of the modulation to be the maximum. This is great — we want to ramp forwards and backward throughout the entire table to get an effect similar to that of “See You.”
When we play a key, the LFO will cycle from the start of the wavetable and then back to the beginning (thanks to the default triangle LFO).
However, we can hear some odd click sounds we probably don’t want. These crunchy sounds are the waves starting and stopping at positions other than the start or stop of the wave (for my sound-nerds out there, those are pesky non-zero crossing points).
To fix this, we need to edit our wavetable a little further.
Head back to the wavetable editor, and click process, and select “fade edges grid size.” Now listen. No crunchies!
From here we just need to adjust the rate of the LFO, and finally, the amp envelope’s release so the sound doesn’t end so abruptly.

Making your own wavetables might seem a little daunting, but it can be really fun to play around. Try digging around on Splice or a similar platform for a bass or synth one-shot (a single note of a single synth sound) that has a pretty well-defined pitch and label.
- Open Serum’s wavetable editor, and try entering the pitch into the field where it says “Enter Formula.”
- Drag and drop your sample onto the editor’s main window.
- Process the file with “Fade Edges (Grid Size)” to eliminate clicks.
- Use an LFO with a triangle wave to modulate the wavetable position and check out your newly created wavetable!
If you don’t have Serum, this is a good chance to just play around with whatever wavetable synth you do have. Pick a random preset and add a triangle wave LFO to see what sorts of sounds you can get.
Remember, if you’re a Soundfly subscriber, you can always hop on Slack if you get stuck! Good luck.
In the meantime, continue learning about synthesis and patch design with Soundfly’s exciting new course, Advanced Synths and Patch Design for Producers. Preview the course for free, and subscribe for access here.