
+ Learning to record and mix music? Explore Soundfly’s acclaimed online courses on mixing, production, and songcraft — click to subscribe.
By Soundfly Mentor Andrea de Carlo
Like anything in recording, capturing a great acoustic guitar sound is largely subjective and depends on what you’re aiming to achieve. Are you going for the mid-range resonance of Extreme’s “More Than Words,” or the bright, metallic sound of The Eagles’ “Hotel California,” or perhaps the aggressive “picky” attack of Dolly Parton’s “Jolene?”
How do you even begin to figure out which adjustments need to be made in order to find these classic acoustic guitar sounds? Here are some elements that can affect the way your recording turns out, even before you take out a single microphone.
The instrument attributes: Tuning plays an important role, but so does the weight of your acoustic guitar’s strings, and whether they’re new or well worn. Generally, lighter-gauge strings will sound brighter and crisper, and heavier strings will produce a fuller tone — but they also affect the playability of the guitar, so it’s important to make sure the player is comfortable! A guitar’s body style and the choice of pick will also make a difference.
The room: Most recording engineers will try to avoid small and dead rooms, because the early reverb reflections might mess up the clarity of the sound. A larger room with a diversity of reflection points will help you capture a more complete representation of the guitar’s overall timbre.
The mic and pre-amp choice: A lot of this has to do with the quality of gear, but generally, condenser mics are preferred due to their heightened sensitivity. You may also experiment with ribbons and dynamics for funky results. Polarity-wise, omnidirectional mics can be used to get more of the room’s sound, and thinner-directional mics can be used to supplement with focused timbres (like the strings).
The mic position: Where and how do we place the mics? Where’s the “sweet spot?” Let’s find out!
Here’s a short list of some single and multiple mic techniques.
Single mic techniques

1. Place a mic about 8-9 inches away from the guitar, pointed at where the fretboard meets the body. With this technique, it’s easy to achieve a nice balance between body and string sound, but avoid pointing your mic directly at the sound hole, or you’ll end up with too much low end.
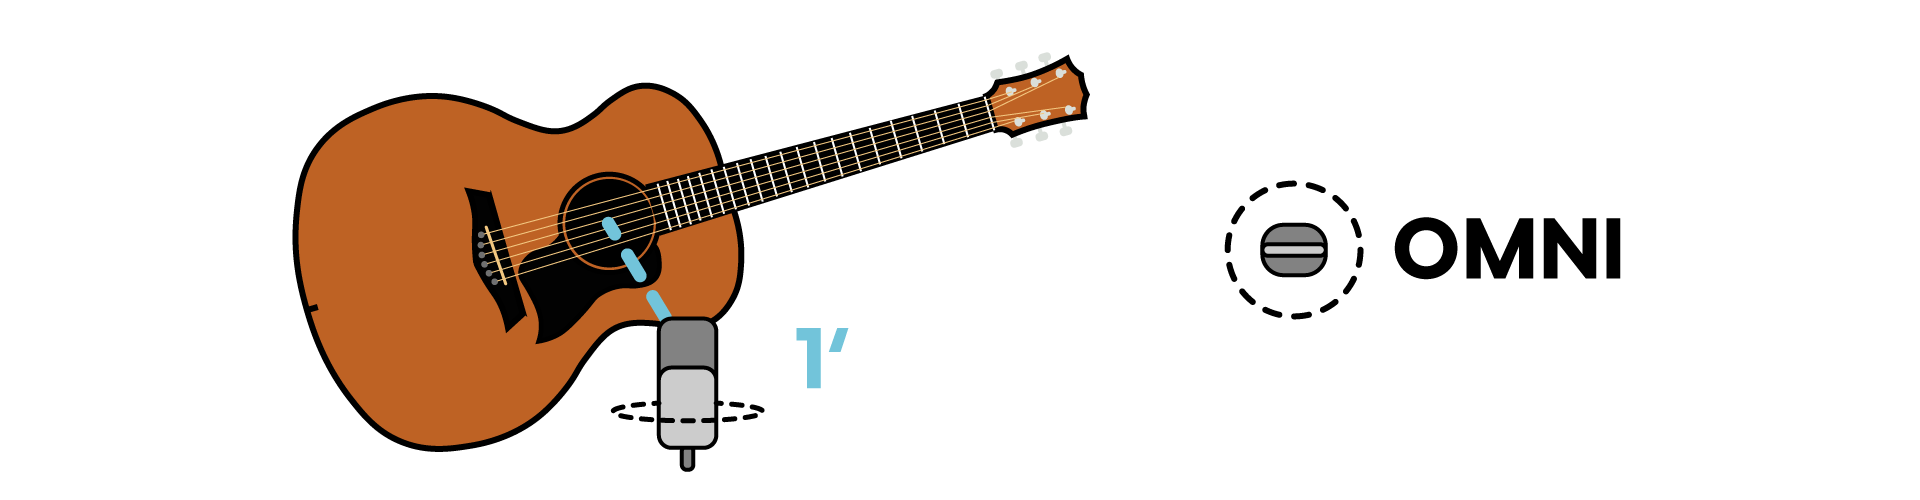
2. You can place an omnidirectional mic in line with the sound hole, about one foot away. Move the mic closer or farther away to change the tone and to balance the direct sound against the room sound (there is no increased low end with an omni pattern). A variation of this technique, favored by engineers like Steve Albini, Jim Scott, and Al Schmitt, is to place a mic horizontally in front of the sound hole, but move it around vertically.
“I don’t necessarily point the microphone straight at the sound hole,” explains Albini in this article in Sound on Sound. “Sometimes you want to get it up in the air a little bit, looking down at the guitar so you can get more of the strumming and less projection of the hole.”

Multiple mic techniques
When using multiple mics, always be sure to check the phase.
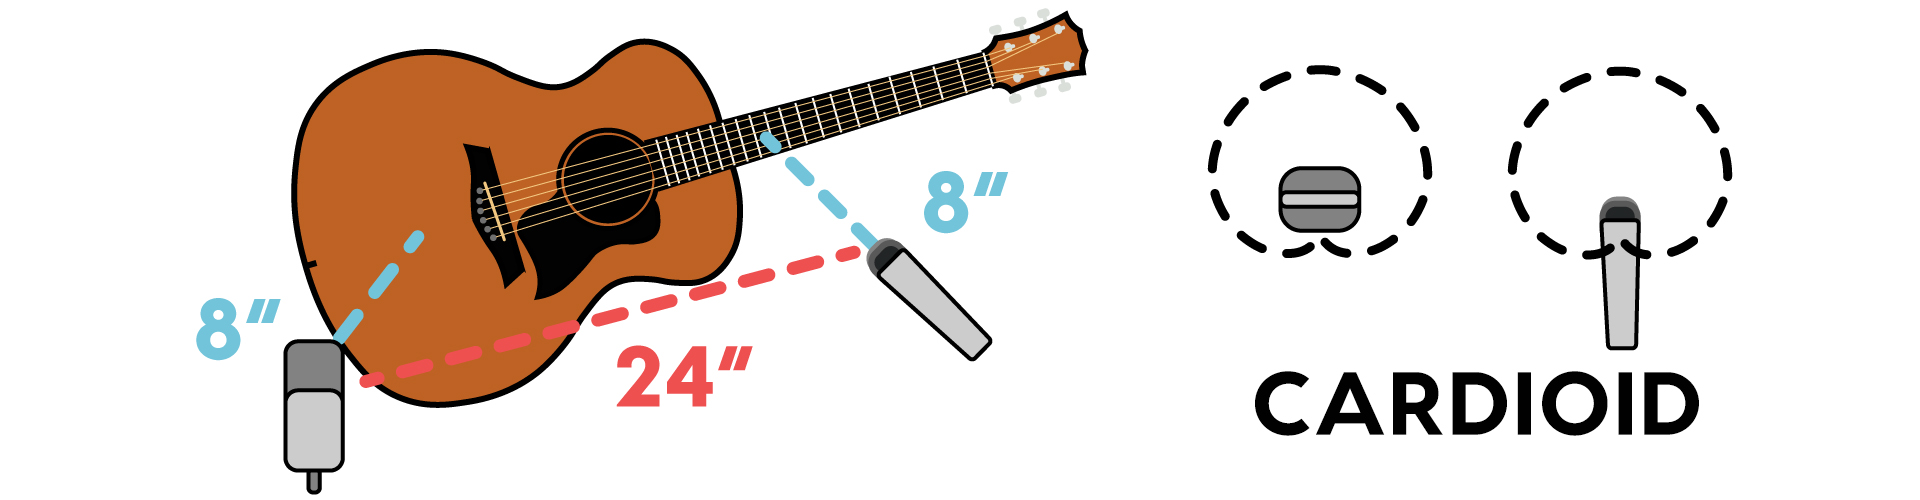
3. Place a small diaphragm condenser mic pointed at the 12th fret to capture the strings’ bright sound. Place a second mic, perhaps a large diaphragm condenser, about halfway between the bridge and the end of the guitar, pointed at the body. This mic should add the lower frequencies and body characteristics of the acoustic guitar. Pan these tracks separately so the resulting sonic image places the listener right inside the guitar!
To minimize phase cancellation, you can follow the “3:1 principle” — the distance between two mics should be at least three times the distance between each mic and the guitar.
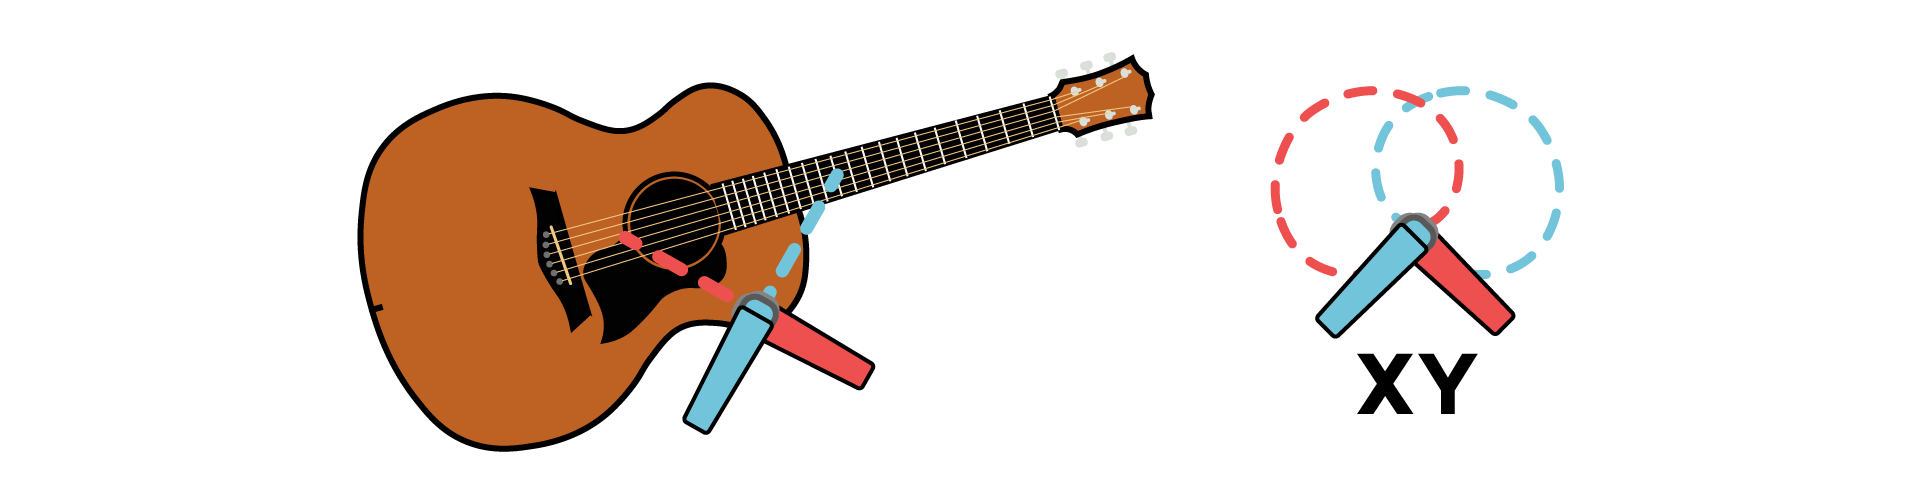
4. Place two small diaphragm condensers in an X/Y configuration, one aimed at the 12th fret and the other pointed more toward the body. This naturally minimizes phase cancellation and offers a great tonal flexibility. A variation of this, the vertical X/Y placement, is to place two small condensers vertically in an X/Y pattern and aimed pretty close at the 12th fret area, where the fretboard meets the body.
Once the two microphones are panned hard left and hard right, you will hear the strumming move across the stereo field.
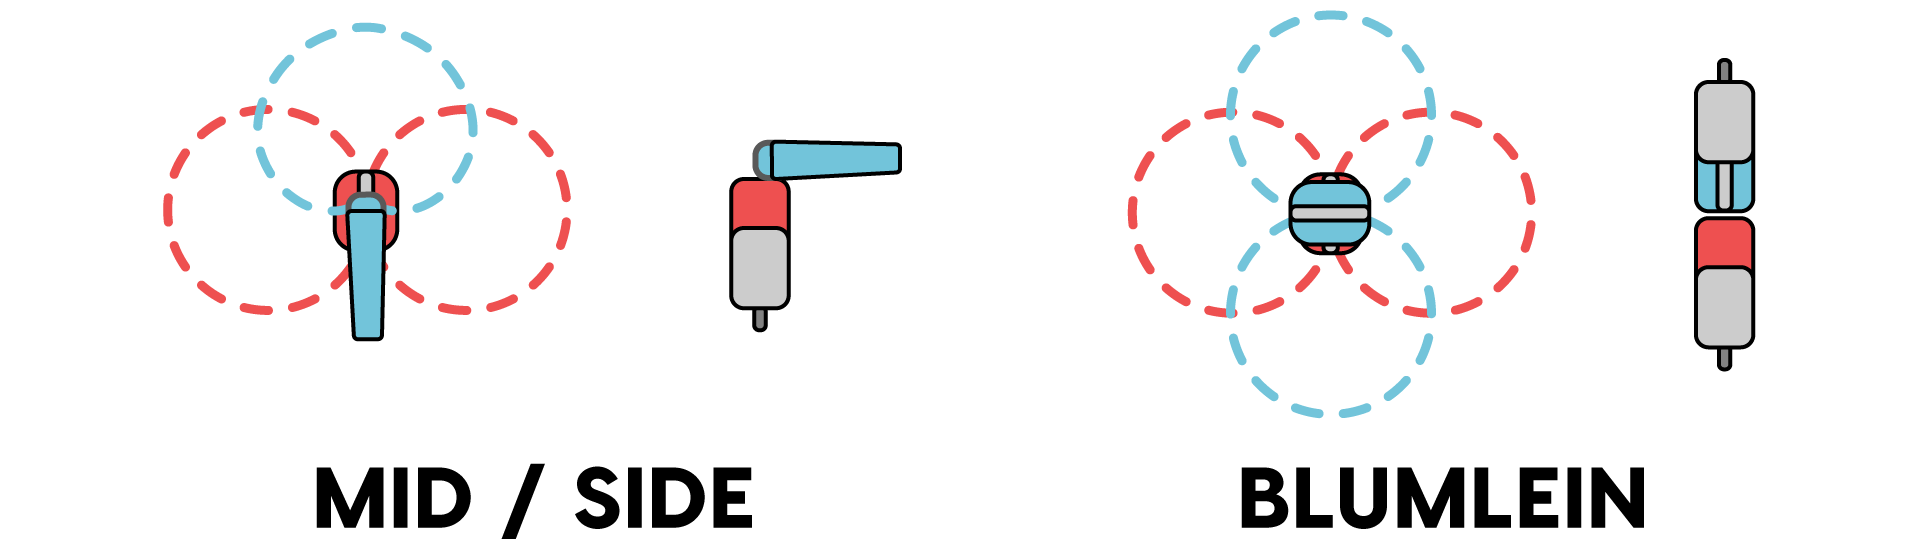
5. Don’t be afraid to try a mid-side or Blumlein configuration. These techniques yield interesting results that may end up sounding surprisingly wide and lush, which could fit your project.
Good luck experimenting!
Improve your music with creativity & curiosity on Soundfly.
Subscribe to our YouTube channel for weekly videos, or join Soundfly’s all-access membership to all of our artist-led online music courses, an invite to join our Discord community forum, exclusive discount perks from partner brands, access to artist Q&As and workshops, and more.