+ This is an excerpt from Soundfly’s Intro to Music Production in Ableton Live course. To access the rest of this lesson, plus hundreds more videos and tutorials on production, songwriting, composing, arranging, beat making, and mixing, subscribe here.
With MIDI, we have the ability to quantize our notes to improve their timing. But Live’s warping feature essentially allows us to do the same thing with audio!
For a primer on quantizing MIDI, head here. But in the meantime, we’ll be going through how to warp audio to our grid below, courtesy of Ableton Certified Trainer Claire Marie Lim’s course on Soundfly. Feel free to check out this course in its entirety to learn pretty much everything you need to get started producing music in Ableton Live.
Using Warping to Quantize Audio
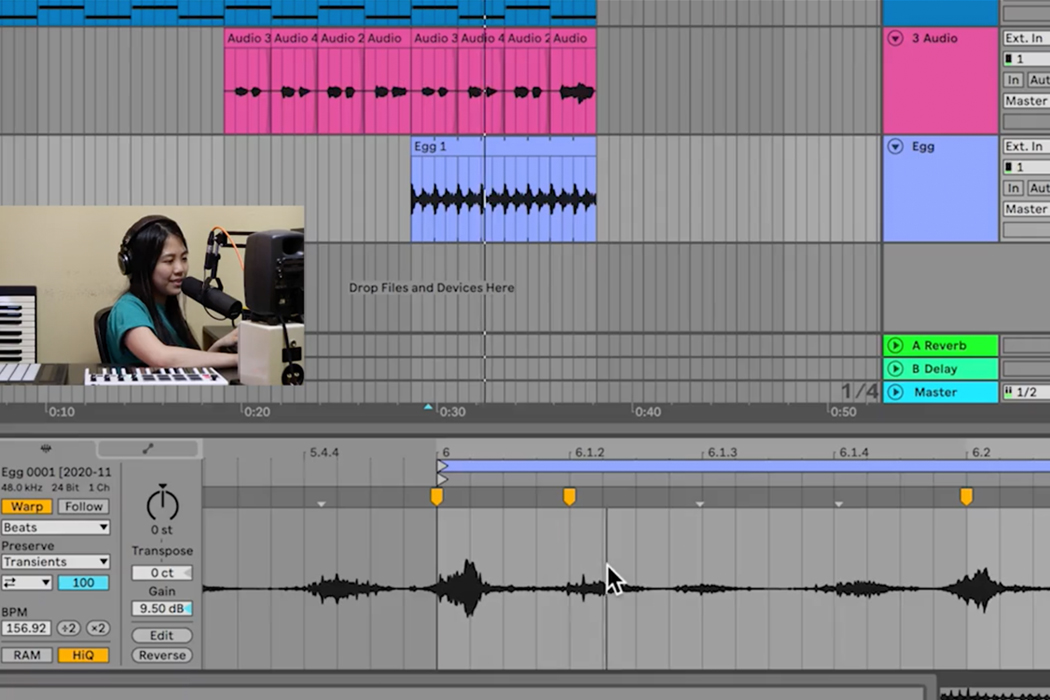
Alright, let’s say you’ve just recorded some audio, but it doesn’t line up to your grid just the way you need it to. Double-click on a clip you just recorded to check out the waveform in the Clip View.
We have the ability to use quantizing shortcuts to time-correct the contents of our audio clips, so our performance is perfectly on the grid. This can be a great way to sketch ideas and perfect the timing if you’re struggling with a particular passage.
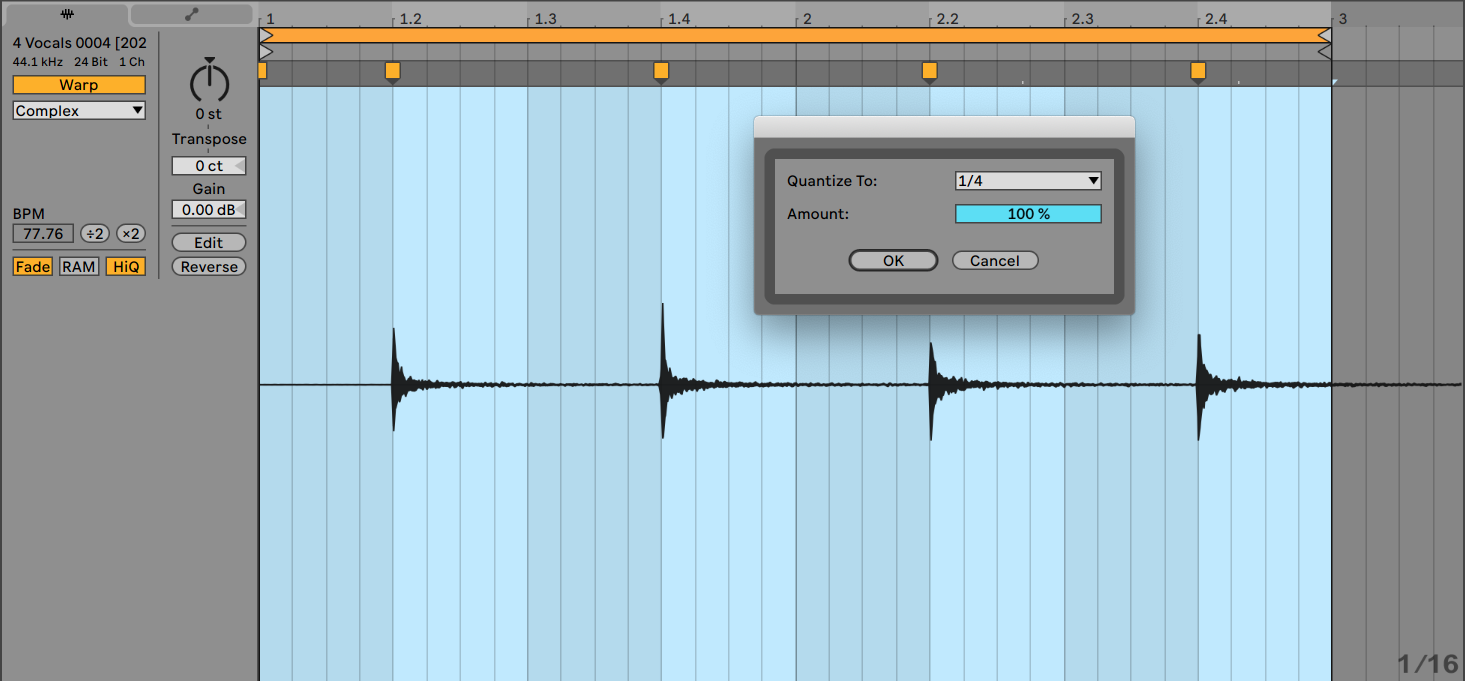
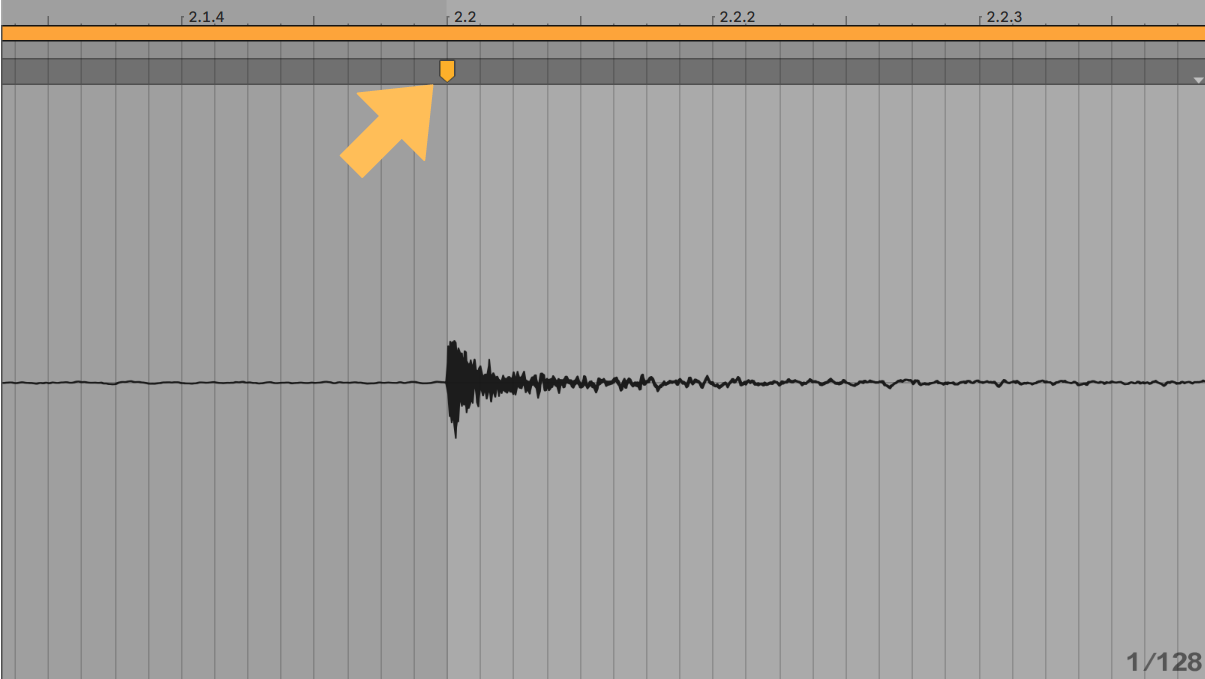
You can highlight portions of the file and use the shortcut: SHIFT+CMD+U (or SHIFT+CTRL+U on PC), to quantize by a specific grid value. When you click OK, you’ll see little orange warp markers indicating the moments in the file that are being quantized or re-timed.
Alternatively, you can also align specific moments by double-clicking warp markers and dragging them around the grid.
We’ll dig deeper into this below. For now, don’t worry too much about warping outside of the context of doing some basic quantization.
Now You Try
Try quantizing your newly recorded drum beats with warping. Remember to:
- Highlight what you want to quantize within the clip, or select the entire clip (CMD+A on Mac, CTRL+A on PC),
- Use shortcut CMD+U (or CTRL+U on PC) to quantize to the current grid, or SHIFT+CMD+U (or SHIFT+CTRL+U on PC) to specify a particular rhythmic value,
- Or try clicking and moving warp markers around to adjust timings of specific rhythms in your audio clips.
Next Level Warping and Pitch Shifting
Warping is perhaps what put Ableton Live on the map more than anything.
While we’re only going to push the envelope along a little further here, check out our free course series, Capturing and Warping Samples with Ableton Live, to find out some awesome techniques for working with warped audio to get started.
Now, here’s Claire Marie Lim in a video courtesy of Soundfly’s premium course, Intro to Music Production in Ableton Live, showing how to use warping to make precision edits to our audio that go beyond simple quantization.
Altering Time
Warping is how Live basically turns your audio into time-bending magic. When a clip’s Warp button is enabled (as shown to the left of Clip View below), it follows our session’s tempo.
For instance, here’s this drum loop. While it’s got a native tempo of 98 BPM, we can turn the tempo all the way up or down, and Live is still going to attempt to make it fit the tempo. (*The below videos have audio so make sure your volume is on.)
At those extremes, it might sound a bit whacky, but within a range of around +/-20 BPM, it sounds really good!
Time Correcting
Beyond the ability to retime audio based on tempo, warping also lets you meticulously time-correct performances.
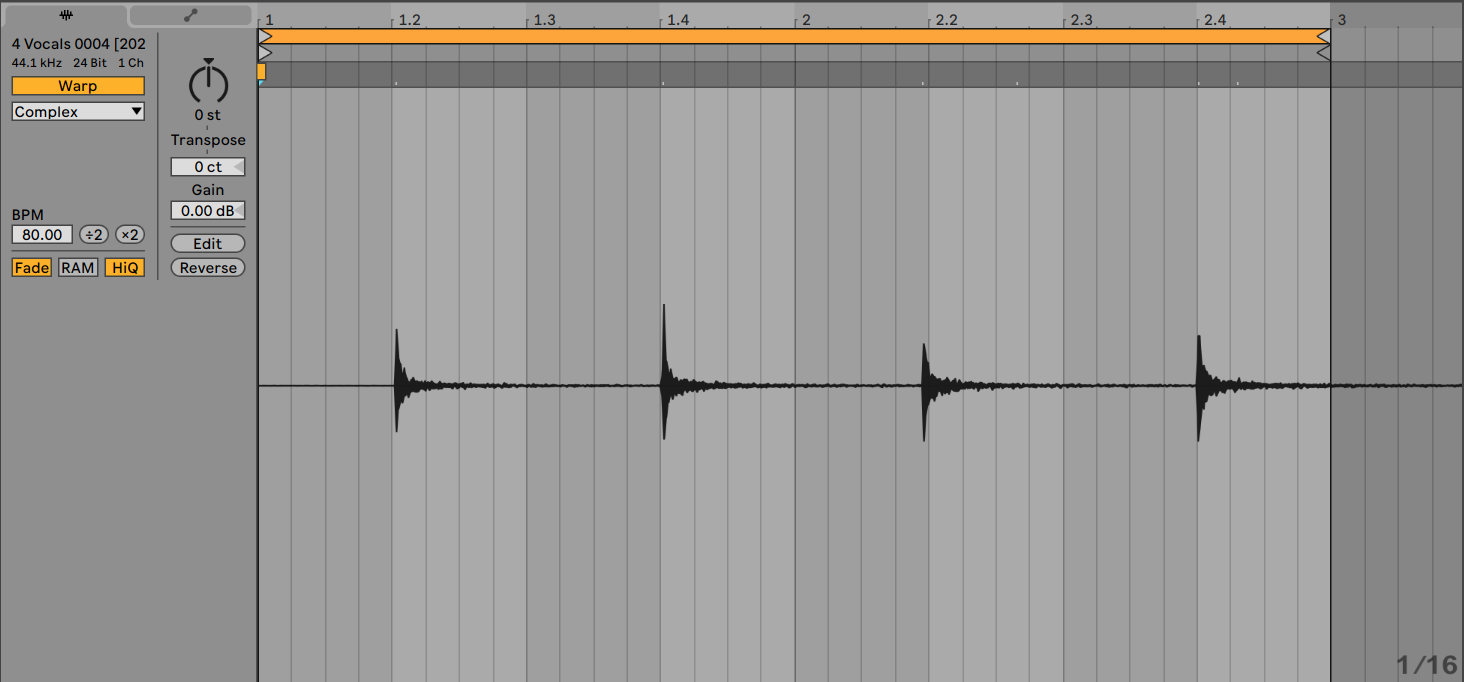
For example, here’s a simple guitar riff. Unfortunately, one note is a little early. I can add Warp Markers around the event by holding down CMD (or CTRL on PC) and double-clicking. Then, I can drag the Warp Marker to the nearest grid line and retime it to be exactly on the beat.
Just as easily, we can double-click to add Warp Markers as Claire demonstrated in the video above.
We can also use this same feature to quantize the entire performance if we want and utilize things like Amount to keep things a bit more human. We can even use the Groove Pool if we want!
Modes
Beneath the Warp button, there’s a chooser that lets us select a handful of warp modes. There are a ton of different modes included with Live. Each with a slightly different way of interpreting the audio and maintaining fidelity. Depending on what you’re warping, you may find that one works better than another.
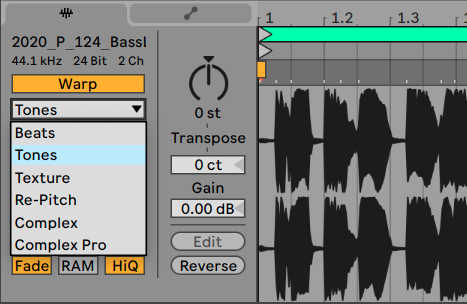
Beats
Ideal for drums and really anything made up of primarily rhythmic information.
Tones
Good for anything with a clear single pitch, like voice, bass, or other monophonic sounds.
Texture
Great for polyphonic sounds like pads, strings, or things with layered voices. Also, a very creative mode.
Re-Pitch
Makes your warped audio behave like a tape machine! This pitches the audio up when you speed it up, and pitches it down when you slow it down.
Complex and Complex Pro
These modes draw from multiple parameters to achieve the best overall sound, and is sort of the best all-around option when you’re not sure which one will sound best, and especially when you’re working with complex audio samples, like full song recordings.
The Pro mode is just a more power-hungry version of the Complex mode, with a couple of advanced parameters to help further shape the way it handles transients.
Now You Try
Test out one of the following warping methods on some audio clips of your own! Alternatively, feel free to try it out with the guitar or bass loop from this file, courtesy of the course.

Download: Warp TIO 98BPM
- Add individual Warp Markers to get a feel for how that works. Remember to double-click above the audio in Clip View to add them.
- Hold down CMD (or CTRL on PC) and double-click to add Warp Markers to adjacent transients, as well. This creates anchoring Warp Markers around the one you click on to help preserve the rest of the clip’s timing.
- Try quantizing your audio!
- Explore some of the different warp modes and see which one sounds best to your ears for the clip you’re working on.
If you’re a Soundfly subscriber, you can hop on Slack anytime to ask questions from the community if you get stuck. Or, just head back to the course and see if you can crack it yourself!
Ready to Learn More About Live?
If you’re new to Live and want to learn how to use the software and tons of new features, check out Soundfly’s all new online course Intro to Music Production in Ableton Live. You’ll learn to work with software instruments, record and process audio and MIDI, tackle the basics of mixing, and get your feet wet with Live’s incredible performance capabilities.