This is the second lesson in our multi-part course series, How to Make Your First Beat in Ableton Live. To follow along from the beginning, click here, or check out our Mainstage course, Beat Making in Ableton Live, for a more in-depth mentor-assisted experience!
Let’s start by familiarizing ourselves with the beat-making tools in Ableton. First, I’d like to point out that Ableton Live actually has two instruments designed for beat building.
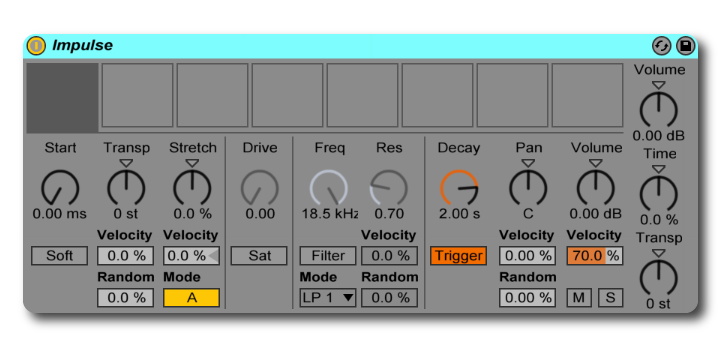
Impulse, released back in 2004 with Ableton 4, was Ableton’s original drum machine and still remains in the program. It’s still used by producers who appreciate its simplicity and elegance.
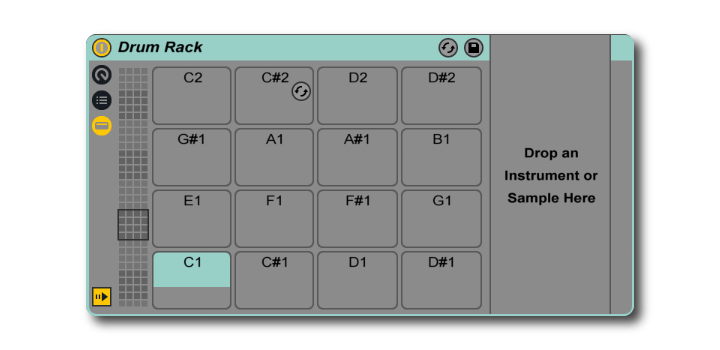
The instrument this course will focus on is Ableton’s Drum Rack. Drum Rack is available in each of the three versions of Ableton Live: Intro, Standard, and Suite. To really get the most out of this course, however, you should at least have Standard and consider investing in Suite to take full advantage of Ableton’s amazing beat-making possibilities.
Locating the Instrument
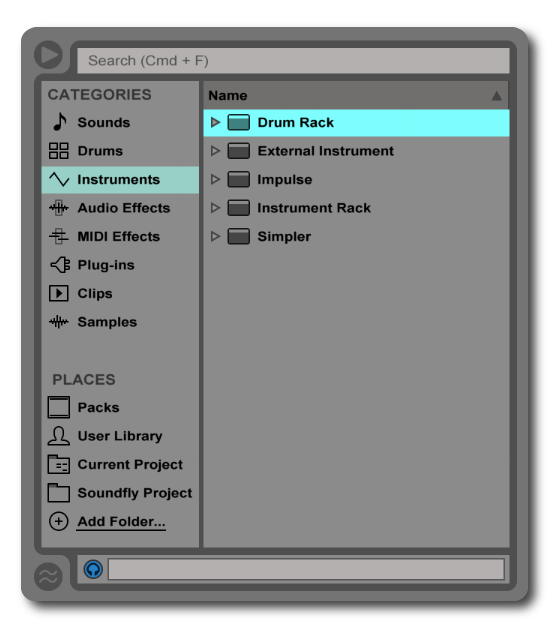
Step one: Find the Drum Rack. To start, mouse over to the arrow on the upper left-hand side that allows us to open Ableton’s browser window. When you open the browser, there will be two ways to access the Drum Rack. The first is in the “Drums” tab. You’ll find it sitting directly beneath the “Drum Hits” folder.
You can also find the Drum Rack in the “Instruments” tab in the browser.
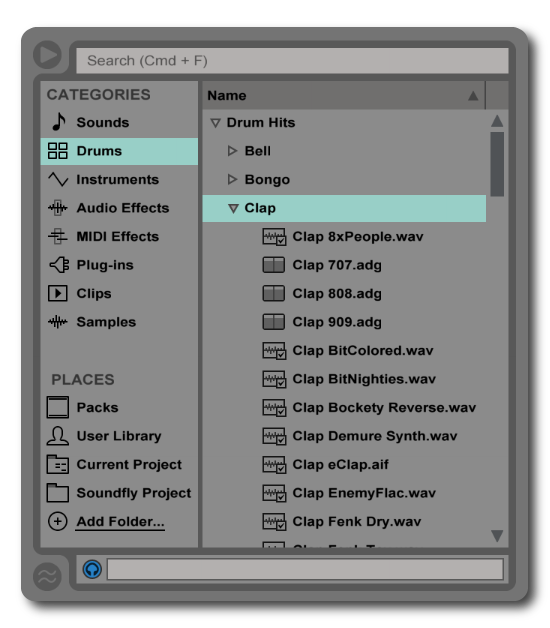
Let’s click back to the Drums tab again. If you press the arrow to the left of the “Drum Hits” tab, it will open to reveal a series of various types of drum hits. Let me explain what these are. If the file has .aif or .wav after it, it can be loaded directly into a cell in the Drum Rack.
We’ll be doing a lot of this in a bit. If the file has .adg after it, this stands for “Ableton Device Group.” In the Drums tab, these primarily contain Drum Racks that already have samples loaded into them.
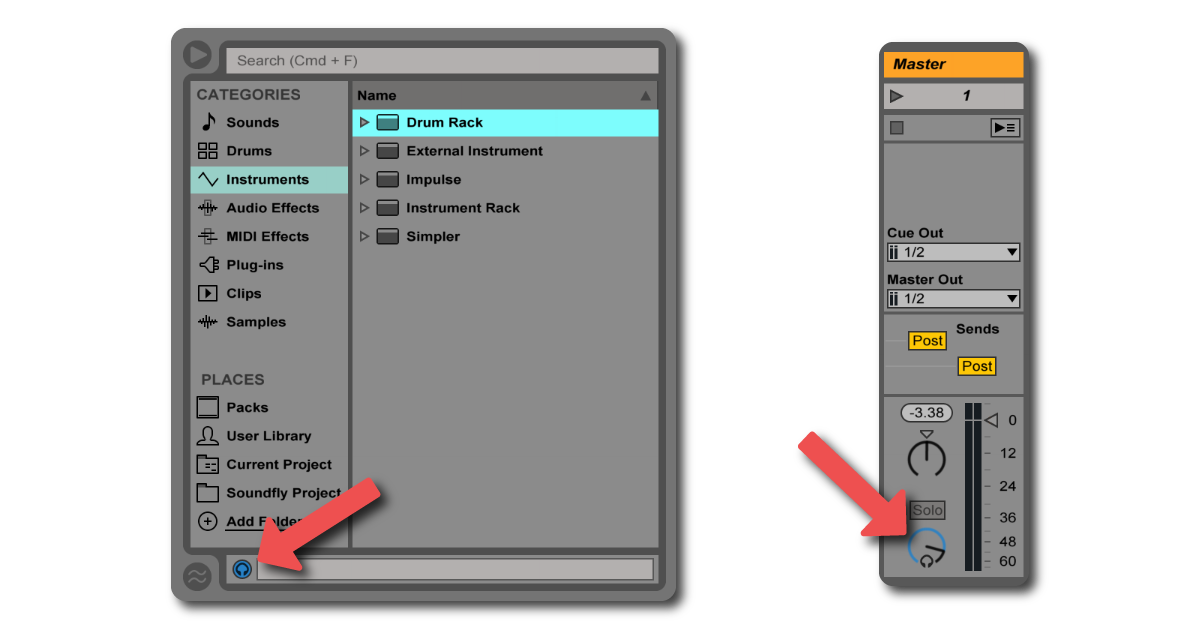
One nice feature about Ableton’s browser is that you can preview sounds quite easily. Make sure the blue headphones icon is turned on. Then click on a .aif, .wav, or .adg file once, and you’ll be able to hear what it sounds like. You can adjust the preview volume level by moving the blue knob in the master channel.
Loading an 808 Kit
Follow along with the video below to load Ableton’s Kit-Core 808.adg into a session of your own.