+ Producers, Synth Heads and Sci-Fi Nerds, our new course with synthwave pioneer, Com Truise: Mid-Fi Synthwave Slow-Motion Funk, is out now!
Today we’re going to learn how to emulate that classic warm keyboard sound that starts Radiohead’s “Everything in Its Right Place” in just a couple of steps.
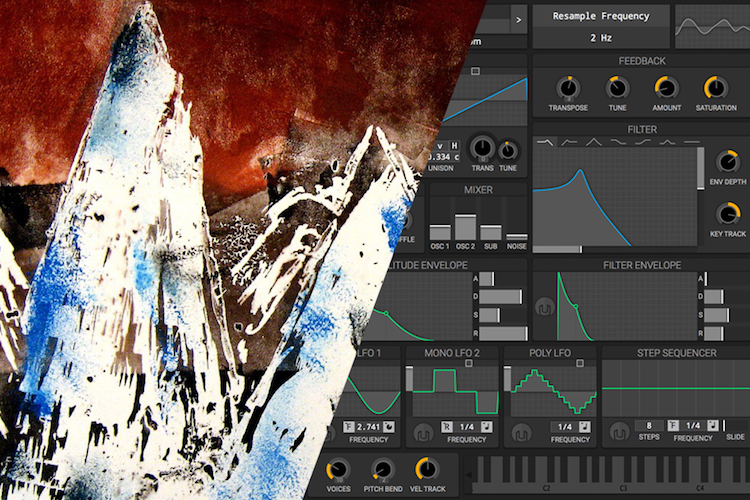
A couple of notes: First, we’ll be working in the newly released version of Helm V0.6.1, an impressively powerful free digital synth plugin. Download the free version here to follow along, or check out our recent article on free digital synths and find the program you like best.
Secondly, this patch is almost surely recorded at least twice, and panned hard right and hard left. It was also recorded with the legendary Prophet 5 analog synth (using pulse waves), which has a particular character to its oscillators and filters.
So, if your patch doesn’t sound exactly like the original from the get-go, don’t be discouraged. Since the Prophet has 5 voices to work with, be sure to turn the number of voices up to 5. You’ll find this option in the bottom left-hand corner of Helm.
Also, to get you started, here’s a downloadable MIDI file of the bass part (124bpm, 10/4 time signature) that you can drop into your DAW and loop. But first, don’t forget to check out Soundfly’s online course, Advanced Synths and Patch Design for Producers, and learn how to move beyond presets to create a wide array of scintillating synth sounds for your productions.
And in case you’re curious, here’s a handy explainer from our YouTube channel on how the oscillators and waveforms work in your synth, and how this knowledge can help you design custom patches for any imaginable sound!
How to Create the Patch: Radiohead — “Everything in Its Right Place”
1) Waveform: One sawtooth waveform
Although it’s clearly filtered, this is a harmonic-rich sound, so we’ll reach for a sawtooth wave on our oscillator, and we’ll just need the one.
Note: You may want to turn down your volume before you hit play — the sound will suddenly enter mid-video.
2) Filter: Low-pass filter, moderate resonance
This key part has a great constant-action filter which really helps it sing. We’ll give our low-pass filter a moderate resonance so we hear it. It’s fairly closed — somewhere down in the 100–200Hz range. Again, note how that emphasis moves around with the different notes — we’ll give our patch some keyboard tracking on the filter to help give it some life. Remember, this is when what note you play opens the filter more or less — lower notes mean a lower filter frequency, higher notes mean a higher frequency.
3) Envelopes: Filter envelope — no attack, long decay, light sustain, mild release; Amp envelope — the same, but short release
These envelopes are a little tricky, and you should take some time comparing your patch to the original to get this sound to taste. We’ll start by altering the filter envelope until the decay feels long enough that it’s constantly articulating a slight filter sweep downwards, with each keystroke. There’s a slight sustain to the envelope so that the low end of the patch is maintained, letting some of the “warmness” breathe through.
The amplitude envelope basically matches this articulation, but with a very short release time. Notice that, because the amp envelope has a shorter release time than the filter envelope, it doesn’t give us a chance to hear the filter envelope releasing — and that’s just how we want it.
4) Modulation: None!
That’s it! Is every parameter in its right place? Feel free to post your results in the comments below (SoundCloud links will automatically embed). Be sure to tell us what synth you used, and how you got to your result.
Don’t stop here!
Continue learning with hundreds of lessons on songwriting, mixing, recording and production, composing, beat making, and more on Soundfly, with artist-led courses by Kimbra, Jlin, Kiefer, RJD2, Ryan Lott, and of course, Com Truise: Mid-Fi Synthwave Slow-Motion Funk.