+ Learn to craft more compelling beats and warped, broken rhythms with Son Lux’s Ian Chang. His innovative course is out now on Soundfly.
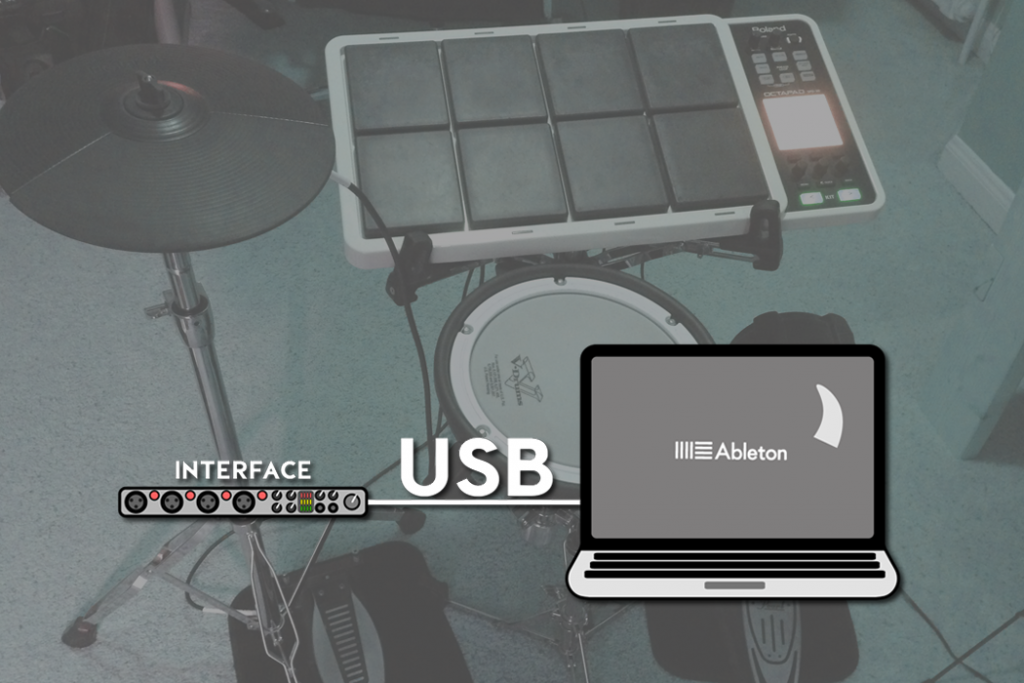
One of the best ways to explore complete drumming versatility when using a percussion pad is to combine it with your Digital Audio Workstation (DAW), such as Ableton Live, Pro Tools, Logic Pro, or Reason. In this article, I’m going to break down the steps to connect your percussion pad to Ableton Live.
One thing to note: even if you don’t have Ableton Live or a Roland SPD-SX, the steps used to connect a percussion pad are completely transferable. Once everything is all connected with your DAW, we’ll go into some detail about how you can use Ableton’s Drum Rack instrument and audio effects to make your sounds come to life. Ready?
First of all, you’ll need:
- Computer and DAW
- Percussion pad (i.e., Roland SPD-SX, Yamaha DTX M12, etc.)
- USB cable
- Audio interface (headphone jack can also be used for output)
The first thing we’ll need to do is set up the percussion pad to function as a MIDI controller. A MIDI controller is a device — keyboard, drum pad, or foot pedal — that sends MIDI data to your computer. That data is then translated into note numbers, processed by a MIDI instrument like a synthesizer or drum machine, and converted into audio.
Because your percussion pad is going to function as a controller, you won’t be using the percussion pad’s output, and the sound will now be controlled by the computer’s output.
Setting Up the Pad as a MIDI Controller
1. Turn on your drum pad (in the following examples, we’ll use a Roland SPD-SX).
2. Click on the Menu button.
3. Go the Setup option, click Enter, scroll down to Option, and click Enter.
4. Use cursors to set USB Mode to AUDIO/MIDI.
5. Connect your pad via USB to your computer’s USB port.
6. Open Ableton Live.
7. Click on the Live tab on the top left of your screen.
8. Scroll down to Preferences.
9. Click on the Link/MIDI tab once you’re in the Preferences window.
10. Under the MIDI Ports section you should see this:
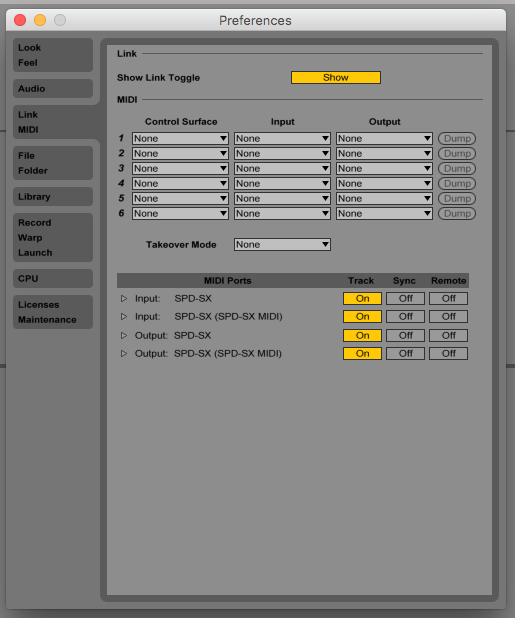
The three MIDI functions allow you to record audio (Track), send tempo information (Sync), and control Ableton’s parameters (Remote). In this case, we’re only looking to use the pad to play and record, so highlight the Track button.
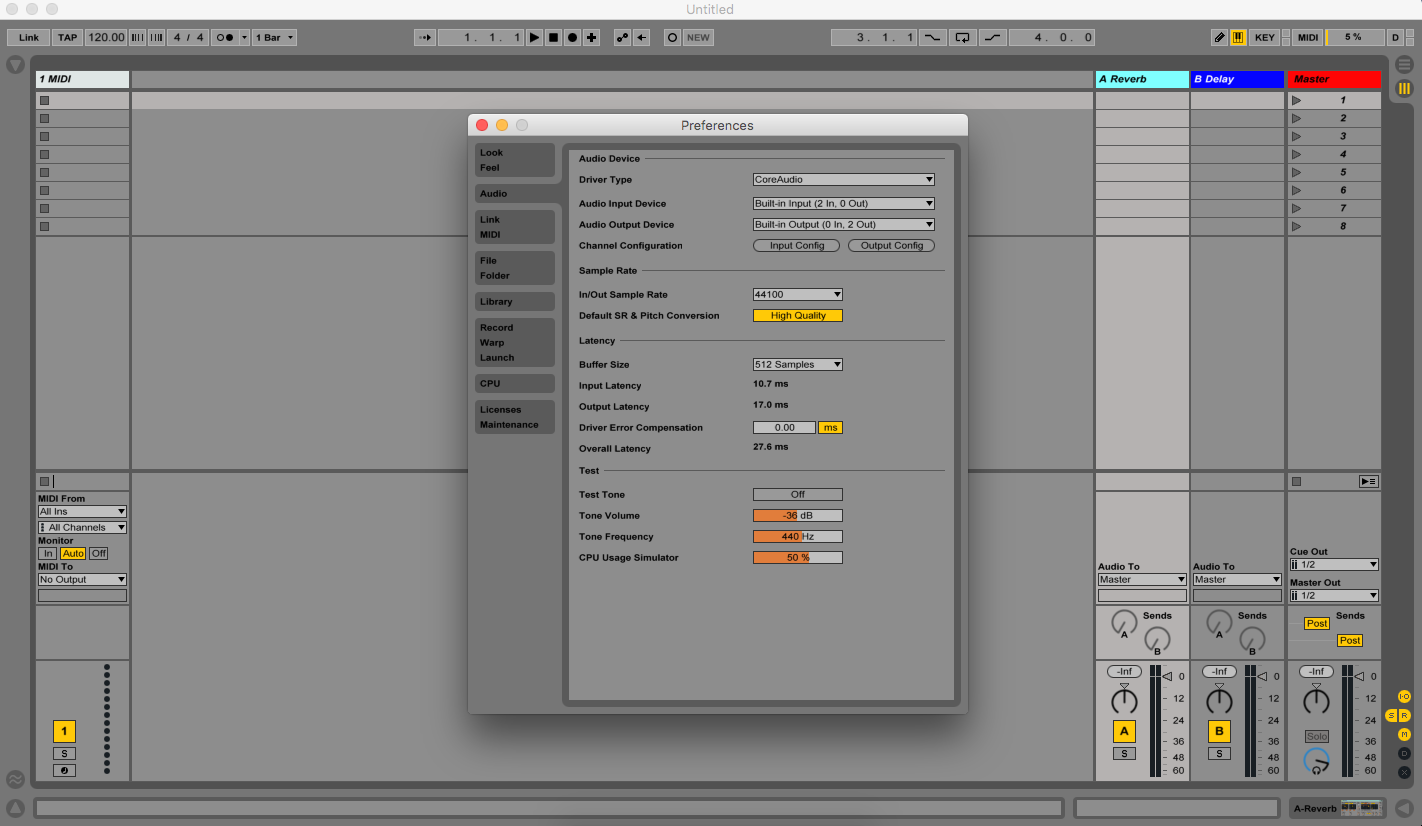
Click on the Audio tab in Preferences and make sure that the Input and Output are set to either Built-in Input/Output (the computer’s headphone jack gives output) or to your interface (the brand and model name will appear) Input/Output. In the case of the latter, audio will come out via the interface’s external output and the interface’s headphone jack.
Exit the Preferences menu by clicking the red X at the at the top left of the pop-up menu.
Setting Up the MIDI Notes on Percussion Pad
1. Click on the Menu button on the Roland SPD-SX.
2. Use the arrows to highlight the KIT icon, and then click Enter.
3. Click on the F3 button (located below the display screen) to select the MIDI function.
4. Move the arrows to highlight MIDI Note #.
5. Drum Rack default notes and corresponding numbers are as following:
C2(24) – C#2(25) – D2(26) – D#2(27) G#1(20) – A1(21) – A#1(22) – B1(23) – E1(16) – F1(17) – F#1(18) – G1(19) – C1(12) – C#1(13) – D1(14) – D#1(15).
7. Using a stick, hit the pad where you would like to assign a MIDI note.
8. Click on +/- buttons to select the desired MIDI note number.
9. Repeat the previous two steps to assign MIDI notes to the other pads.
10. Click the Exit button twice when you’re finished assigning MIDI notes.
Note: The Roland SPD-SX automatically saves pad assignment changes, so there’s no need to look for a specific save button.
+ Learn production, composition, songwriting, theory, arranging, mixing, and more; whenever you want and wherever you are. Subscribe for full access!

Introduction to the Drum Rack
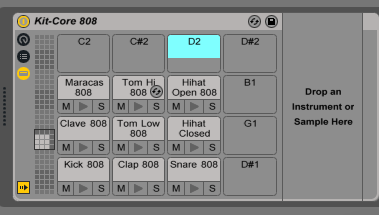
The Drum Rack in Ableton is a powerful instrument that allows you to load up to 128 samples into MPC-style blocks that can be triggered with a keyboard or drum pad. Each clip can be up to 60 seconds long, and the pitch, timbre, and effects can be altered on each clip added to the Drum Rack. If you’ve never used this tool, here’s a quick and easy tutorial.
In the browser under the Categories heading, select Drums and scroll down through the drum presets until you find something you like.
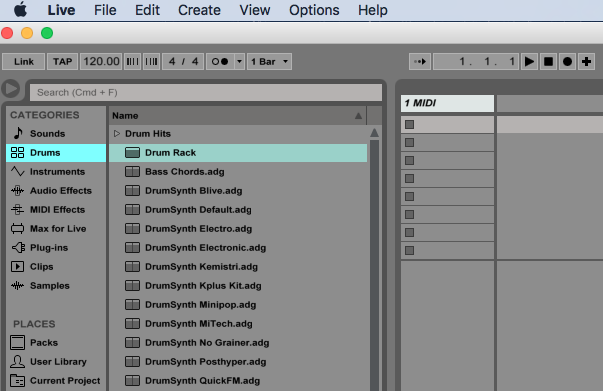
Once you find a drum preset you like, double-click it, and it will create a MIDI track with a Drum Rack on it. Make sure the track is record armed by pressing the Record-Arm button.
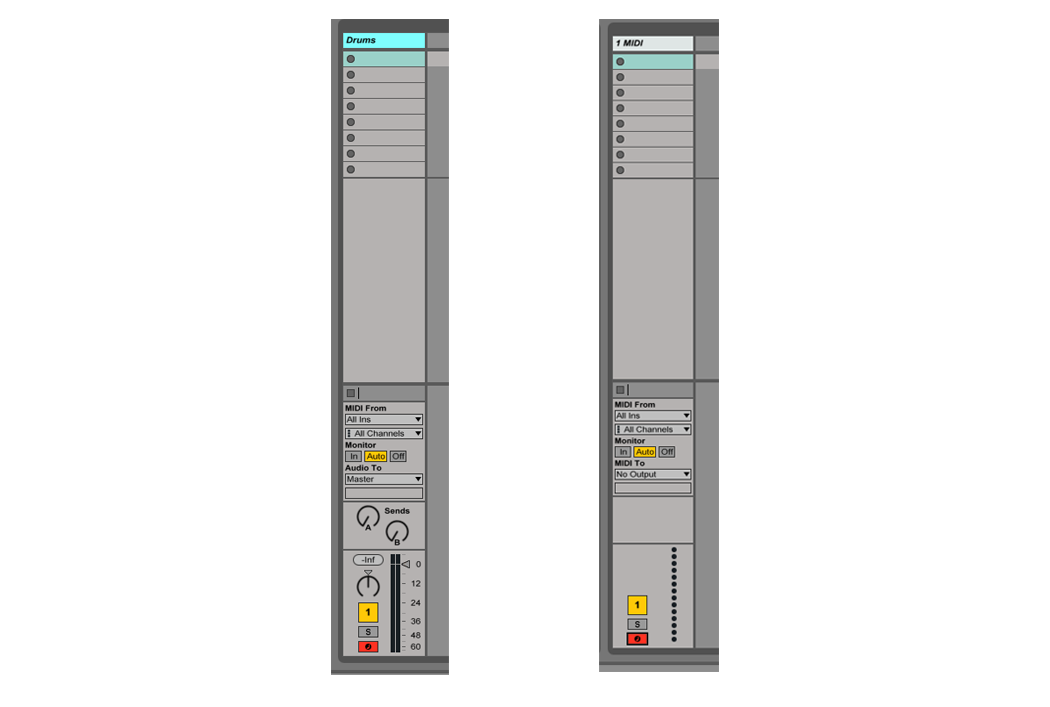
Armed Drum Rack Armed MIDI track
Play the sounds that are now assigned to the pad.
Another way to add sounds is to drag them onto the Drum Rack blocks from either the Samples folder or from your desktop. Also, because the Roland SPD-SX has nine pads, I tend to use the first three columns and rows of the drum rack to place my drum sounds.
Adding Drumming Effects
Adding some effects to your drums can add some flavor to your sound. I often find myself going back to the same handful of effects, as I’ve learned how to play with them more naturally. These include a nice reverb, some delay, and phasing.
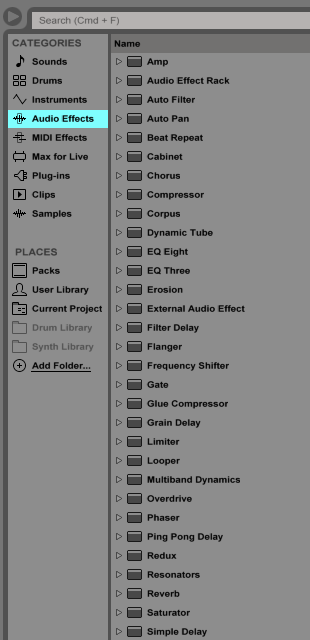
Go to the Ableton browser and click on the Audio Effects tab. To use the default version of a given effect, double-click on the effect name (“Beat Repeat,” “Chorus,” etc.), and it’ll appear beside the selected track.
To load effect presets and choose a more customized version of that effect, click on the triangle beside the effect name, and it’ll open a drop-down menu with various presets that you can double click to load into your track.
Effects like reverb and delay will translate your drum hits into a wider and more dynamic sound. If you learn to change the parameters on the effect while playing, it can create a ton of variation throughout songs, albums, and live sets.
Play around with a bunch of effects to see which of Ableton’s presets you like best, and don’t be afraid to go online and buy plugins with more expansive possibilities! When you find what’s right for you, dive right in and explore.
Troubleshooting
If you’re having issues with latency as you’re playing, lower the sample rate in the Preferences — Audio section to somewhere between 512 to 128 bits. If there’s no sound coming out, double check that the track you want to play is record armed, the audio output settings are correct in Preferences, and that the USB cord connecting your electronic drum pad to your computer is connected properly.
Lastly, if you’re looking for inspiration on how to more seamlessly integrate the drum pad into playing with your acoustic kit, check out my previous article, “Introduction to Electronic Drumming: Adding a Drum Pad into Your Performance Setup.”
Keep on Grooving…
Continue your learning with hundreds of lessons on songwriting, mixing, recording and production, composing, beat making, and more on Soundfly, with artist-led courses by Kimbra, Com Truise, Jlin, Kiefer, RJD2, and our new The Pocket Queen: Moving at Your Own Tempo.


