+ Create and arrange original, instrumental hip-hop music from sampling pioneer RJD2 in his Soundfly course, RJD2: From Samples to Songs.
Vinyl records have enjoyed an immense resurgence in popularity over the last decade. But how exactly do they work? How are two channels of full-bandwidth audio information (over 20 minutes’ worth on a typical 12-inch side) stored in a single, tiny, spiral groove on a plastic disc?
The basic principles involved are actually rather simple, but the details of the technology’s implementation (as optimized over decades) can be quite complex and fascinating!
The Basics
Let’s start at the beginning.
The grooved vinyl record is placed on a turntable, which rotates at a constant speed, and a tiny stylus is placed in the groove. This stylus traces a tight spiral, leading it from the record’s outer edge to its inner diameter, following subtle groove modulations (squiggles) along the way. The better the stylus, the more accurately it will trace every detail — every turn, facet, hill, and dale — in the groove.
The stylus is attached to a tiny magnet positioned close to a tiny coil of wire¹. As the magnet moves within the coil, a very small electric current is generated in the wire. This electric current — which varies in proportion to the squiggles in the groove — is sent to an amplifier (and, ultimately, speakers) in order to reproduce the sound that was mechanically encoded on the disc.
Done! Just kidding; there’s so much more. But now you have permission to get up and go put your favorite record on while you read the rest!

+ Read more on Flypaper: “(Artificial) Space is the Place: A Reverb Technology Primer”
How It’s Made
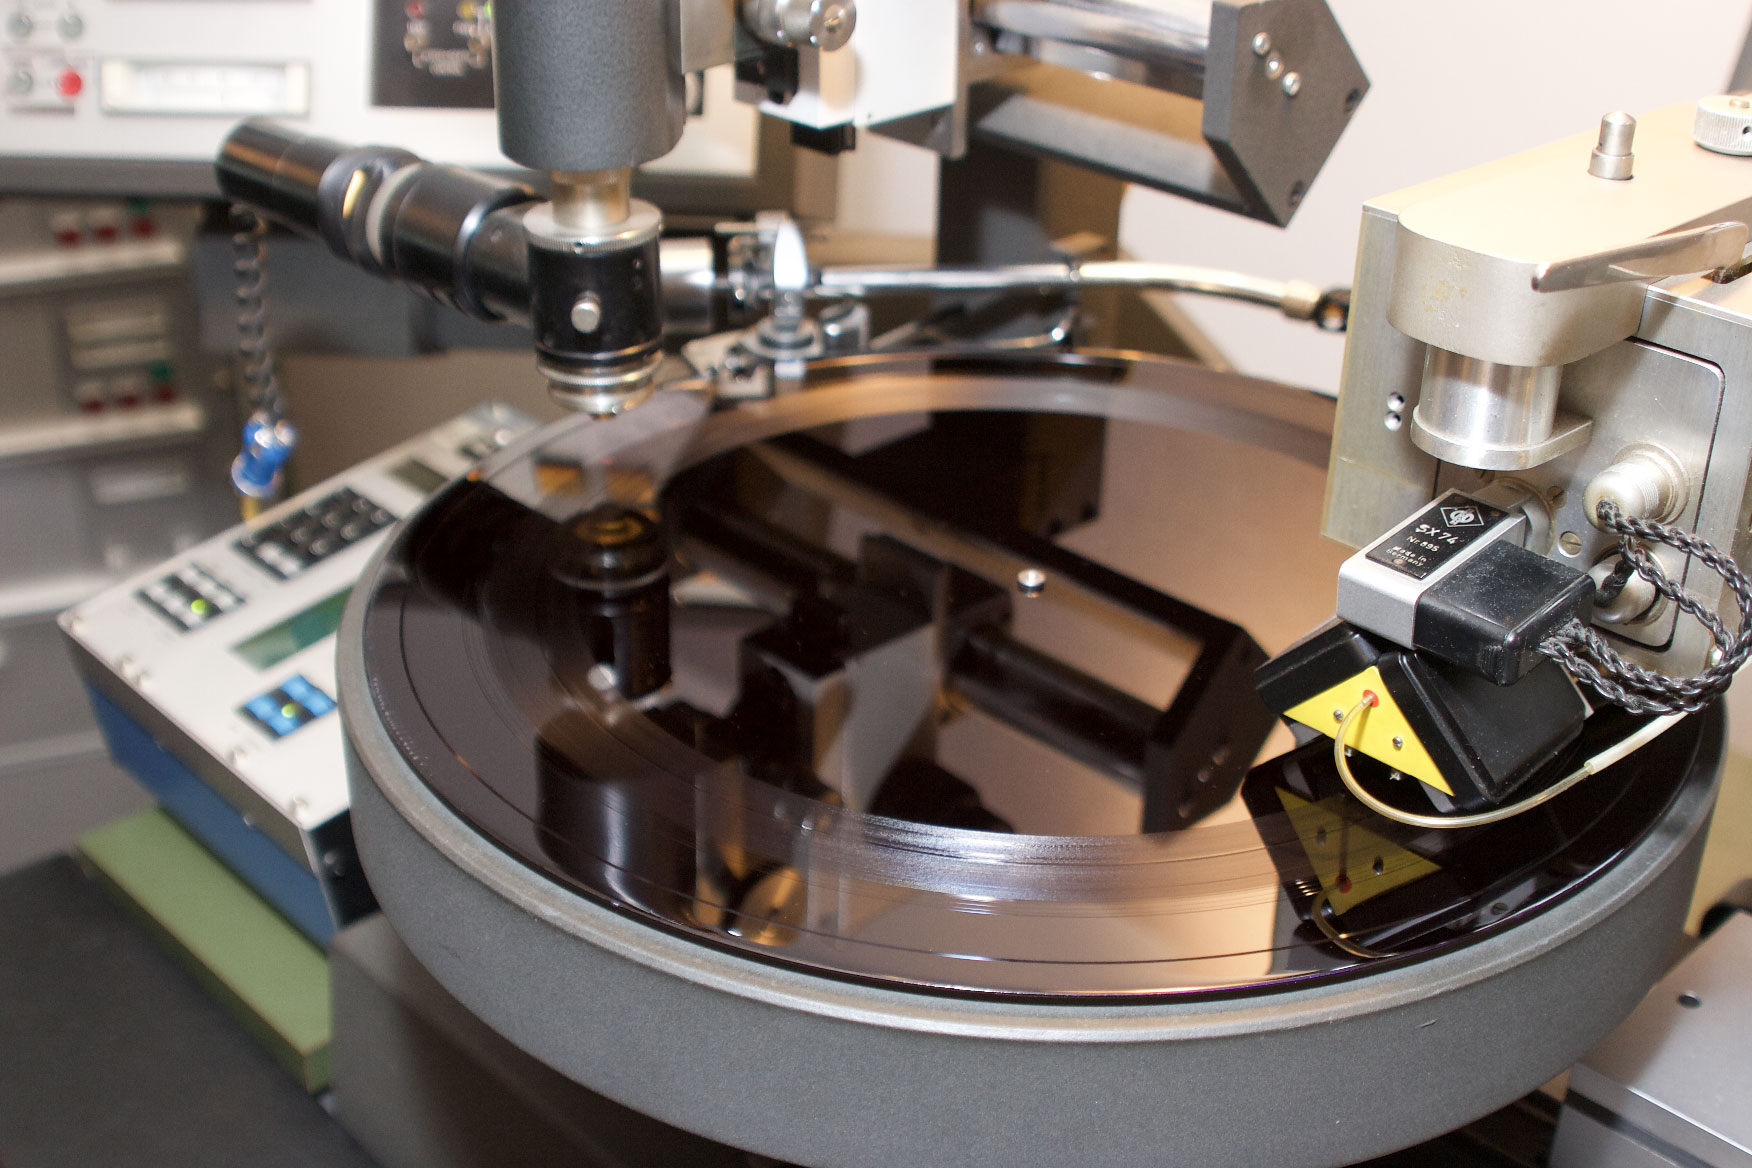
The mastering engineer uses a specialized disc-cutting lathe to carve a spiral groove, complete with all of the music’s squiggles, into two relatively soft lacquer discs², one for each side.
These delicate lacquer discs are never played; they’re shipped directly to a plating facility. Here, the lacquers are chemically treated to prepare them for several steps of metal plating, eventually producing a set of metal stampers.
These stampers, which are perfect negatives of the lacquer disks (they have ridges instead of grooves) are mounted on a record press. Vinyl plastic is heated and extruded (squeezed out) between the two stampers, filling out every little space, to produce a durable two-sided record.
The RIAA Curve: Longer Play (Part 1)
Very early on, it was discovered that bass frequencies make for large, broad excursions (squiggles) in the groove. In order to avoid the grooves running into one another, they’d have to be spaced very far apart, severely limiting the duration of the disc. In an effort to maximize playing time, early record companies employed a clever trick using two equalizers.
When the groove was cut into the master record, a proprietary EQ setting would severely reduce bass. An equal-but-opposite EQ would then be built into the consumer’s record player, restoring the bass that the first EQ removed. Since the signal actually being cut onto the disc had less big-bass squiggle, much longer sides were possible.
These early EQ curves weren’t completely standardized, however, so there were some compatibility issues between players and records from different companies. And even with this processing, early shellac records, which rotated at 78 RPM (revolutions per minute), could only store a few minutes per side.
[For a quick aside, check out this utterly fascinating catalog of different EQ settings for old record companies.]
In 1954, the Recording Industry Association of America (RIAA) standardized a single set of curves to be employed by all manufacturers of records and playback equipment. All modern phono preamps employ the exact reverse of this standardized curve in order to properly decode the processed signal. (This is why your turntable will sound very thin and harsh if plugged into a standard “auxiliary” preamp!)
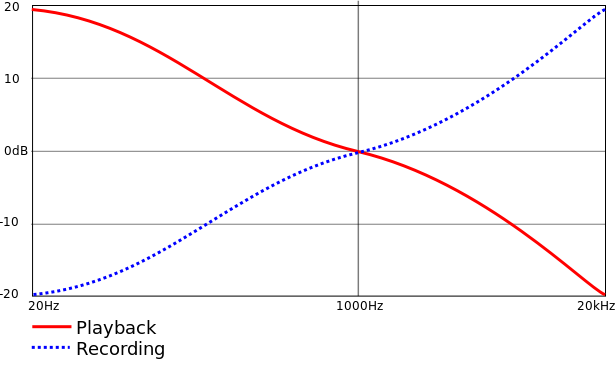
When the mastering engineer “encodes” (applies the RIAA EQ curve), a severe bass reduction (-20dB at 20Hz) reduces groove size, allowing more material to be squeezed onto a side. An equally extreme treble boost (+20dB at 20kHz) helps mask surface hiss.
On playback, a reverse of the standard EQ (hidden within the consumer’s phono preamp) decodes the signal, restoring the amount of bass and treble to normal. As the treble is turned down to normal, the high-frequency hiss is also turned down (from “normal” to “very slight”), resulting in effective noise reduction.
Variable Pitch: Longer Play (Part 2)
To a vinyl-cutting engineer, “pitch” means “amount of space between grooves.” If a record’s grooves are too far apart, space is wasted and side length isn’t maximized. But if the grooves are so close together that they collide (a phenomenon called an overcut), skipping and mistracking become likely.
Early lathes were cut with a fixed pitch, which meant that the grooves were always spaced consistently. In the early 1950s, Neumann developed a primitive automated variable pitch system and continued to refine the concept over decades before finally arriving at state-of-the-art computerized pitch control.
A variable-pitch lathe allows the grooves to be spaced closer together when possible (usually in quiet passages), and further apart when the signal demands more space. On masters made from analog tape, an extra playback head on the tape machine (called a preview head) allows the pitch computer to analyze the signal in advance of the cut to determine groove spacing³.
Below is an example of a machine equipped with a preview head. Note the long, circuitous tape path. After encountering the preview head, the tape is routed around a number of extra guides and rollers before reaching the playback head. This extra length is precisely engineered to achieve the correct time delay.
Between the standard RIAA curve and computerized pitch-control technology, it’s now typical to expect playback times of 20 minutes on a 12” 33.3 RPM side without audible compromise. Even longer durations are often possible, though a few subtle trade-offs are sometimes required.
One Groove, Two Channels: Achieving Stereo

Until very late in the 1950s, all records were mono (one channel). On a mono record, the stylus tracks lateral movement (side-to-side squiggles) only — the groove is a consistent depth. When record companies saw a market for two-channel stereo recordings, the vertical dimension of the groove (up-and-down hills and valleys) was right there for the taking!
But the most obvious solution — to use “lateral” as one channel and “vertical” as the other — presented at least two problems. For one, it would make stereo records incompatible with mono turntables (you’d only get one side instead of a summation of both). Another challenge: Large vertical excursions (hills) make for difficult tracking. The last thing we want is a ramp that launches the stylus right out of the groove!
Ultimately, a brilliant solution was conceived, albeit one requiring a bit of clever mathematics. With a little pencil-pushing, “left” (L) and “right” (R) channels can be rearranged as “mid” (M) and “side” (S).
“Mid” contains everything that’s the same in both L and R, and “side” contains everything that’s different between them. To encode into mid-side: (L+R)/2 = M and (L-R)/2 = S. To decode back into stereo, M+S = L and M-S = R. It might seem strange, but it works!
If the stereo signal is converted into mid/side for cutting, both aforementioned problems are solved. The “mid” channel moves in the lateral side-to-side dimension, resulting in perfect compatibility on a mono player. Remember: M = (L+R)/2. The “side” signal moves in the vertical dimension, and as long as bass frequencies are kept in-phase and close to the middle of the stereo field, there will be few large vertical excursions (read: “launch ramps”).
Here are some great illustrations explaining the basics of lateral and vertical grooves and how the cutterhead encodes them on a disc.
If you’ve ever encountered a Fairchild 670 stereo compressor (or one of the many plugin emulations), you may have noticed that its mid-side mode is called “LAT/VERT.” This stands for “lateral/vertical” and betrays the Fairchild’s early history as a disc-mastering compressor!
Even still, some rare types of stereo signal — phase issues and hard-panned bass frequencies, chiefly — can be challenging for your mastering engineer to cut. But a good engineer will have a few tricks up their sleeve to deal with even these rare circumstances.
Diameter Loss: The Inside Track
Imagine you’re on a large, flat carousel ride that spins at a rate of 33.3 revolutions per minute. Regardless of where you stand on the carousel, one complete revolution takes the exact same amount of time — roughly 1.8 seconds. If you stand at the very outer edge, you get an exciting ride — the carousel’s large diameter means you travel a considerable distance over 1.8 seconds. Conversely, the ride near the center is much more pedestrian: You’ll travel a much shorter distance (and therefore move much more slowly).
Similarly, on a vinyl record, the stylus travels along the innermost groove at a far lower rate of speed than it travels along the outermost groove. As a result, the higher frequencies — the fastest, smallest squiggles — get a little scrunched together on the inside.
For this reason, high frequencies become harder to reproduce the closer you get to the center of the disc (i.e., the end of the side). A subtle loss of top end is common as you approach the middle, but higher frequencies can also become distorted as the playback stylus struggles to track the sharp twists and turns. These shortcomings are known as diameter loss.
If releasing your music on 33.3 RPM vinyl, it can be smart to keep this in mind when sequencing your music. If you look through your record collection, you may notice lots of records where the last song on each side is a ballad!
Putting It All Together
Because of all of the above juggling acts (and more besides), creating and playing back high-fidelity vinyl are fragile propositions. Popular claims of better-than-digital sound are far from empirically verifiable even under ideal conditions, let alone real-world conditions.
Nevertheless, there’s something truly engaging about a great-sounding record, and the fidelity that can be achieved is rather stunning considering the primitive nature of the basic technology. Many listeners swear that a good vinyl-listening experience is uniquely immersive — at the very least, there’s surely something enjoyable about the tactile, ritualistic experience of record-playing.
Whatever the reason (or reasons), an ever-larger share of listeners seem to engage more deeply with vinyl than with other media — and now you know a little about how it works!
Ready for even more?
Check out Soundfly’s variety of courses on songwriting, mixing, beat making, recording, composing, and more, led by artists like Kimbra, Com Truise, Jlin, Kiefer, The Pocket Queen, and RJD2: From Samples to Songs.