

+ Recording and mixing your vocals at home? Grammy-winning artist Kimbra explores how to harness the full creative potential of your music in her new course!
A vocal chain is a string of processing modules that combine to make the raw audio from a microphone sound “better,” perhaps more like the final audio you hear in a mixed piece of music.
Although there are no hard-and-fast rules about what must be included in a standard vocal chain, typically one would expect a standard chain to include a preamp, an EQ, compression, and some effects.
Historically, audio engineers needed to create their vocal chains using hardware, but for anyone recording vocals in the 21st century, this is fortunately no longer the case. For those who’d like to achieve the same quality but don’t have access to the gear, Arturia have faithfully emulated several classic processing modules in their FX Collection (and introduced a few original ones as well).
Today, let’s take a look at how we can use Arturia’s 1973-Pre, FET-76, and Plate-140 emulations, along with their original Delay ETERNITY, to form an adaptable and affordable vocal chain. And finally, we’ll be using this vocal sample from our friends at Splice as an example:
The dry vocals we’ll be processing.
Let’s dive in! But first, for all you singer-songwriter-producers out there, Soundfly just launched a brand new course with Kimbra, in which she herself demystifies her variety of vocal techniques and the creative inspirations behind her most beloved songs. Go check out this in-depth and awe-inspiring new course, Kimbra: Vocal Creativity, Arranging, and Production, exclusively on Soundfly.
1. Applying a Preamp
The first step in our vocal chain is pre-amplification. A preamp takes an input signal and applies positive or negative gain to achieve the desired level of amplitude.
In this case, our vocals have already been recorded through a preamp, so there’s no need to apply more gain, but if you’re using your interface’s onboard pre (in other words, if you’re plugging a mic directly into your interface), you might try applying gain using an emulation plugin like Arturia’s 1973-Pre instead.
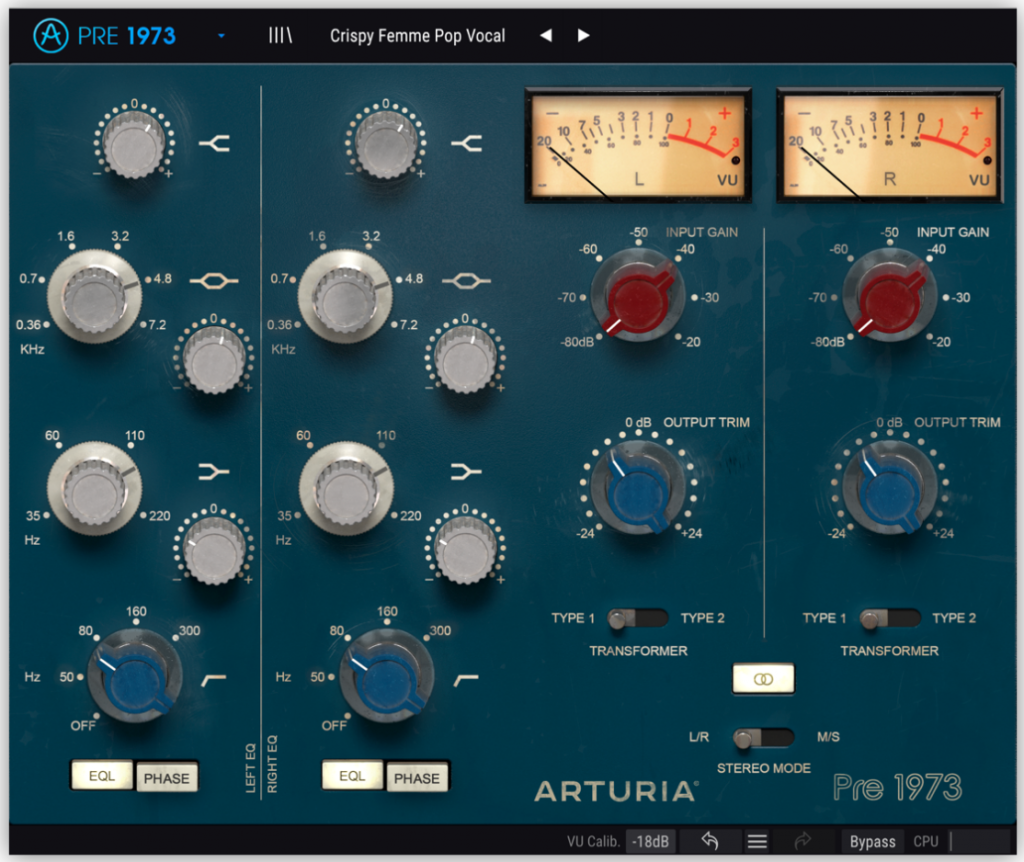
Our preamp settings.
For this patch, we’ll primarily rely on some of the EQ features of the 1973-Pre. A gentle high pass along with some shelving will suffice to get our vocal ready for the next stage, as the high-frequency bite adds a bit of pop flavor.
Here’s how our vocal sounds after the 1973-Pre:
The vocals after the 1973-Pre.
2. Applying Compression
Next, we’ll use Arturia’s Comp FET-76 emulation to apply some compression. Performing a moderate squeeze to the signal, this step in the chain will even out our vocal’s peaks, which will make it feel more full and powerful.
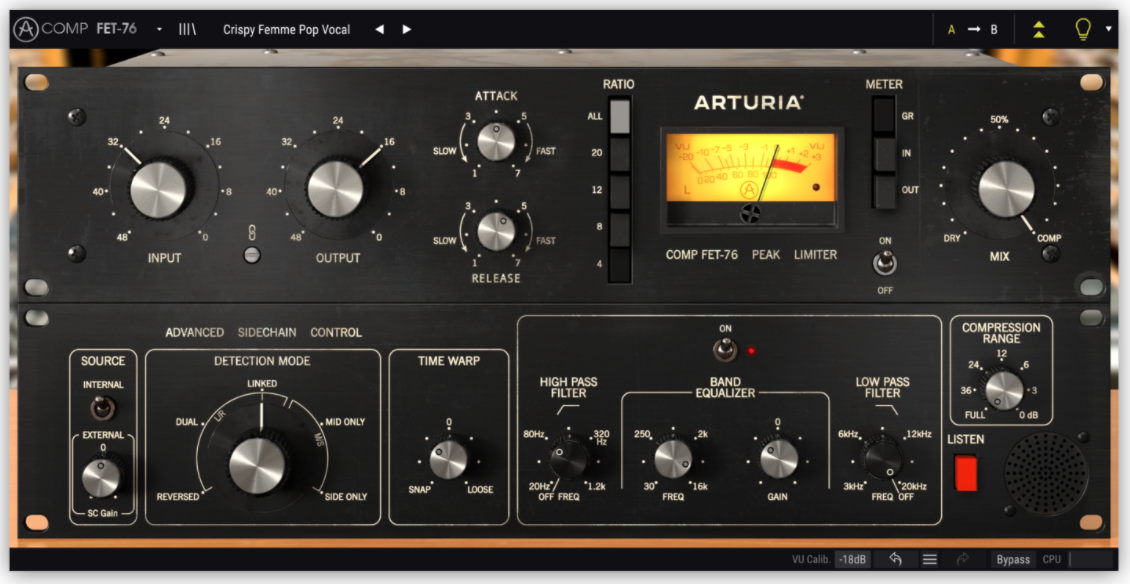
Our compression settings.
Additionally, we’ve taken care of sibilance using the advanced sidechain controls. We scooped the signal used for detection somewhere between 5 – 10 kHz to control sibilant consonants, pairing this processing with a gentle high pass at 80 Hz.
Here’s how our vocal sounds after the Comp FET-76:
The vocals after the FET-76.
+ Learn production, composition, songwriting, theory, arranging, mixing, and more — whenever you want and wherever you are. Subscribe for unlimited access!

3. Applying Reverb
Now that we’ve dialed in our dynamics processing, let’s give the vocals a sense of space. When we listen to someone speaking or singing in person, we almost always hear more than just the sound emanating from their mouth; we hear the various reflections of that sound added to it, which vary based on the physical characteristics of the space we’re in.
By adding reverb, we’ll simulate a “room,” which should help make our artificially dry vocal come to life.
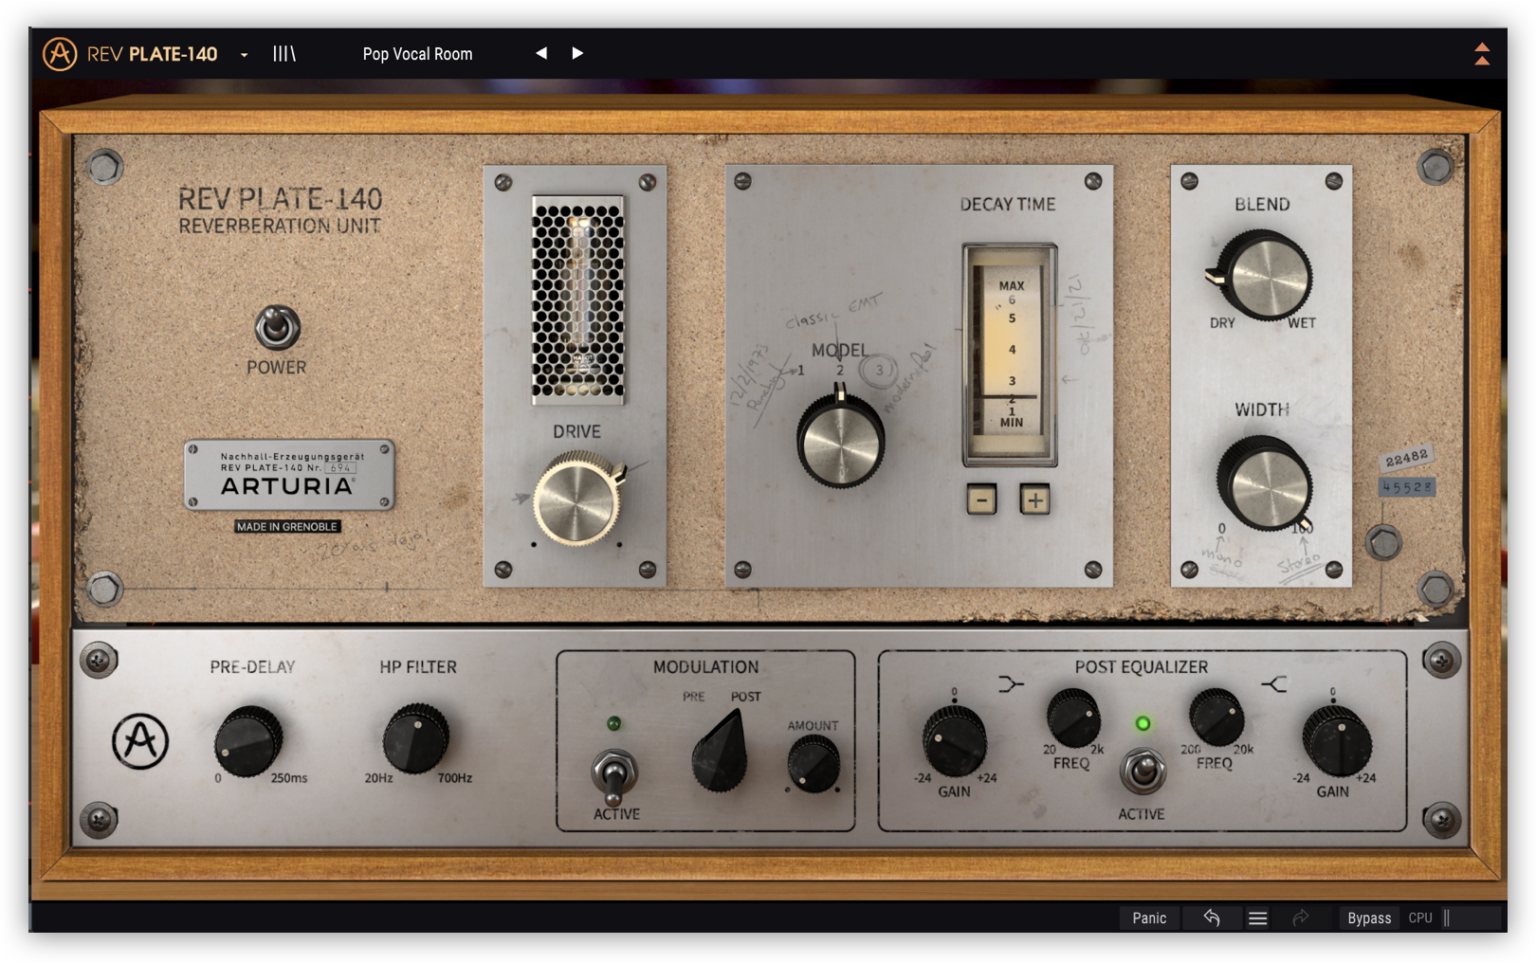
Our reverb settings.
This patch makes use of Arturia’s classic EMT plate model. A low decay time value means the simulated room feels smaller to match the low pre-delay value, despite the full stereo width. We also apply a final touch of character with some tube amp drive.
Here’s how our vocal sounds after the Rev Plate-140:
The vocals after the Plate-140.
4. Applying Delay
A little bit of delay can go a long way in adding that final polish to our vocals. Using Arturia’s Delay ETERNITY, we’re going to create a simple quarter-note delay, with no fancy ping-pong or dynamic panning.
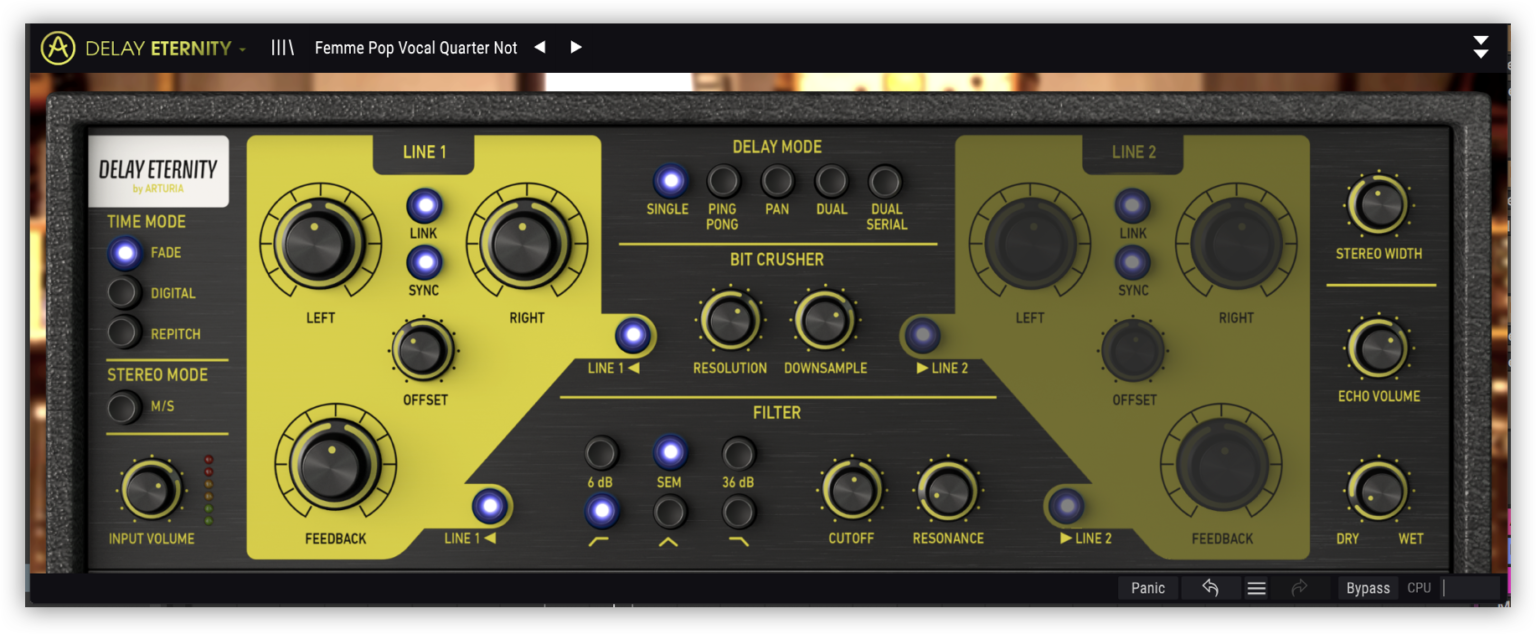
Our delay settings.
Eagle-eyed readers will notice a significant amount of feedback in this patch. We’ll apply a bitcrush effect to the feedback, crushing the signal to a resolution of 8 bits. You might find this effect a bit aggressive, but give it a shot. You may find that the extra distortion introduced by the bitcrusher can help the delay effect cut through a mix and sound present and airy.
Finally, we’ll run the feedback signal through a high pass filter and push up the cutoff to around 1 kHz. This filter will help us avoid low-frequency rumble and ensure that the echo doesn’t run into the dry vocal signal, especially around the 200 – 500 Hz range where the voice’s fullness resides.
The vocals after the Delay ETERNITY.
This vocal chain is fairly versatile, but even so, it’ll sound best when adjusted to suit your vocalist and the mix that their performance is situated in (always be sure to ultimately make decisions based on how the vocals sound in the context of the entire track, rather than in isolation).
Feel free to download all the presets here and tweak them for a quick and effective vocal chain.
Want more?
Continue learning with hundreds of lessons on songwriting, composing, home recording, electronic production, beat making, and much more. Explore Soundfly’s exciting courses like Modern Pop Vocal Production, Unlocking the Emotional Power of Chords, and Kimbra: Vocal Creativity, Arranging, and Production.
—
Max Rewak is a record producer, audio engineer, and music writer, based in New York and currently working in Sounds content at Splice.