+ Recording and mixing your songs at home? Preview Soundfly’s online course, Modern Pop Vocal Production for free, and subscribe here to get unlimited access.
Every production and every song is unique, but the lead vocal is typically the part that most directly engages the average listener. The human voice, with all of its frailty, power, and expressive nuances, is a very strong communicator of feeling. As a species, much of our hard-wired empathy responds to the human voice, reading its complexity and emotional shading. It’s primal. Not to mention, the vocal carries a heavy load — it delivers both the melody and lyric of the song. It’s worth getting right!
There are no hard-and-fast rules for either the recordist or the singer when recording vocals. Whatever works for you is right for you, and my experiences (and opinions) will differ from yours and even from some of my most esteemed colleagues and heroes. Consider this but one set of perspectives.
That said, let’s take a look at a few things that I feel can facilitate maximum recorded expression from a vocalist (whether that’s you or someone else). And before we move on, if you want to go deeper on recording, processing, and mixing your vocals in general, check out Soundfly’s comprehensive course on Modern Pop Vocal Production.
Know Your Stuff
Although I’ve seen vocalists give great performances when reading from a lyric sheet, I feel it’s almost always better when the lyric is memorized. The engagement with the moment seems deeper when the song and its emotional content are fully internalized.
But if a lyric sheet (or device) is used, make sure it’s positioned at natural eye level. Craning the neck downward to look at a music stand can constrict the throat, impacting both timbre and pitch.
If a music stand is a must, consider an inexpensive wire stand over a standard orchestral-style stand. This is one situation where cheap and cheerful is better because acoustic reflections off the nicer stand’s broad metal surface can sometimes cause undesirable artifacts in the recording.
Select Your Tools… Expediently!
If the vocalist knows and understands the material, their most emotionally engaged delivery often occurs on the first few passes through the tune. This is a good reason to separate any intensive gear-selection rituals from the actual tracking process. The last thing I want to happen is for the singer to give their most heart-rending performance while I’m in the control room toggling between a C12 and the U47, puzzling over which I prefer.
Truth be told, the quality of the performance is going to outweigh the capture tools virtually all of the time. It’s good to keep that in perspective before devoting billable studio hours to elaborate shootouts.
If you’ve booked time in a well-equipped room, resist the urge to let microphone lust or gear tourism distract you from your mission. You’re here foremost to record a killer vocal performance. There’s something to be said for putting up one or two choices, quickly making sure you like what you hear, and getting on with it.
If you’re recording at home with more modest means, it’s often a matter of just using what you have available, which can be very liberating. Although, if a project is particularly important, many major cities have microphone-rental services by the day. If budget allows, this isn’t the worst way to learn your way around some of the more esteemed standard tools.
In case you’re eager to learn more about how mics work and how they differ before you buy, here’s “A Quick Guide to Microphones,” courtesy of Soundfly’s free course series Any Sound Will Do.
Space Is the Place
Your acoustic environment can also have a rather large impact on your recording results. Commercial facilities tend to be easier in this regard, but there are a few ways you can survive a home studio with less-than-stellar acoustics.
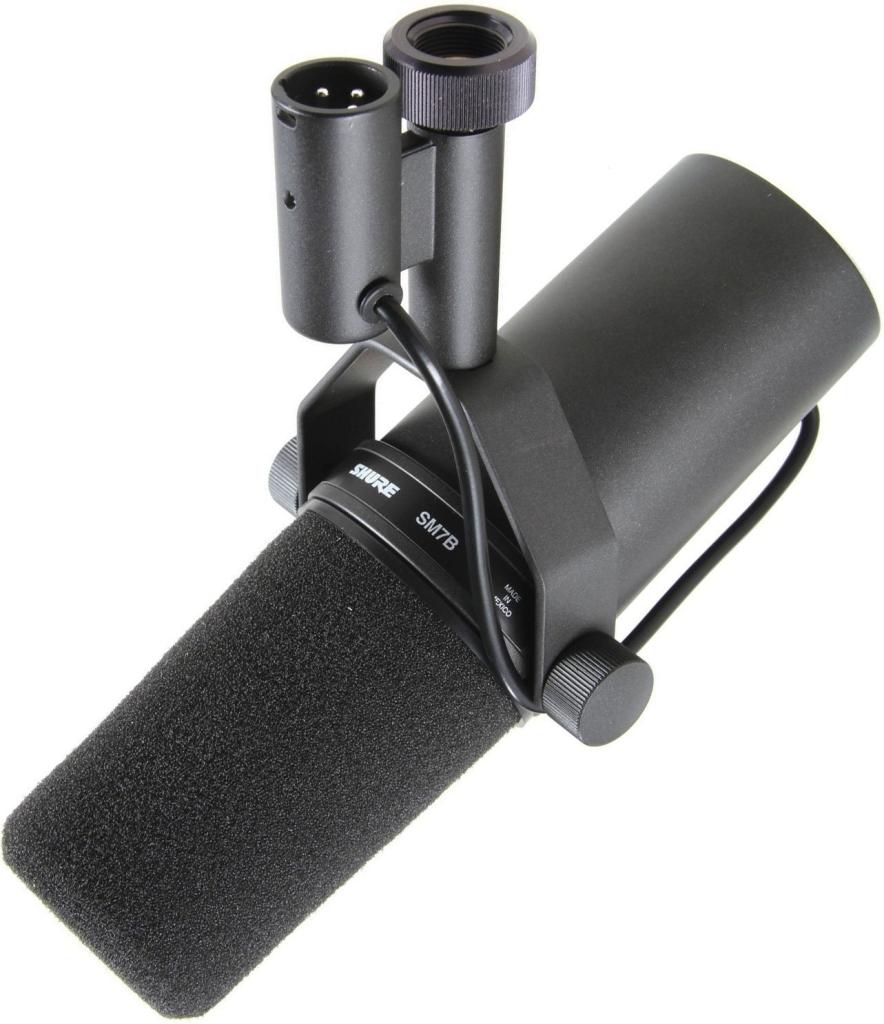
Some home recordists prefer to stand closer to a less-sensitive microphone in order to minimize the impact of the room. The humble Shure SM7 continues to be popular among DIY home recordists most likely for exactly this reason.
But a more flexible alternative is to build or invest in a couple of head-height absorptive panels (or gobos). By placing these in “V” formation with the mic in the middle, you can reduce the influence of undesirable room acoustics. For the record, I’ve had better luck with this approach than I’ve had with commercially available stand-mounted devices that claim to do the same thing.
Set Up for Flow
There’s a certain momentum to a vocal session, and unnecessary disruptions or delays can really have a negative impact on both the performance and the vibe in the room.
If I’m recording someone else, I like to make sure that the setup is complete and tidy before the singer arrives. Once I’ve verified that all the lines are passing signal, unused lengths of cable get coiled neatly on the floor at the base of the mic stand. If I’m in a facility with personal headphone mixers, I’ll set up a good cue mix and clearly label the singer’s station. Tea or a fresh glass of water are both nice touches, as well!
The goal is to make the recording process disappear, to keep the focus on the song and lyric. If I’m recording myself, I can afford to be a little more relaxed, but I still like to make sure that all technical details are sorted before beginning.
Once you’re ready to roll, double check that the microphone height is natural and appropriate. Decide whether or not you’d like to use a pop filter or windscreen. Air blasts from plosives (vocal “P” sounds) can cause exaggerated low-end thumps, and it’s a standard practice to insert a screen of some sort between mouth and mic to stop the air.
The downside is that none of these devices are completely acoustically transparent. Foam windscreens and fabric pop filters can dull the sound slightly. The pricier metal screens aren’t always as neutral as purported, either. I personally usually opt for the fabric.
If you place the microphone above the vocalist pointing downward (and out of the direct line of fire), however, you can sometimes get away without using a screen at all — particularly if your vocalist is skilled and aware. Should an errant pop sneak through, performing a quick edit using a high-pass filter only on the offending spot usually does the trick.
Headphones: Handle with Care
When it’s an option, using no headphones at all is my favorite because it feels so much more natural. If you’re recording a solo piano with vocal, or a quiet acoustic ensemble playing in one room together, I highly encourage trying a few takes with the cans off. You might be astonished at how quickly the pitch, sound, and ensemble blend come together!
More often, though, isolation is desired for editing and mix flexibility. There are a few things to keep in mind to ensure that we’re making the best of that situation.
Many vocalists find it helpful to remove one earpiece when singing to allow them to monitor their own voice acoustically. This experience is a bit less immersive than singing with the stereo track in both ears, but it can also be easier to find and keep the pitch center.
A compromise is to use open-back headphones that allow some ambient sound in. The tradeoff here is a higher risk of headphone bleed into the microphone (or even feedback, in extreme circumstances). Click-track bleed from headphones into the mic can be particularly problematic, so check for this early on. Some click sounds are more troublesome in this regard than others. The default Pro Tools clave sound just loves to find its way into a mic, while the classic UREI and MPC clicks are much less persistent.
Perhaps most importantly, be careful of the overall headphone level. It’s a well-documented yet scarcely discussed psychoacoustic phenomenon that extremely loud volume can impact our ability to accurately hear pitch. One experiment¹ showed a perceived pitch discrepancy of 17 cents just from increasing a playback level from 65dB SPL to 95dB SPL. Other research² and anecdotal evidence suggest even more extreme effects. That’s a pretty good reason to guard against pushing the volume ever louder.
+ Learn production, composition, songwriting, theory, arranging, mixing, and more — whenever you want and wherever you are. Subscribe for unlimited access!
Mic Technique (And What to Do in Its Absence)
There’s quite a wide range between a whisper and a shout, and just as a pianist uses technique and pedaling to control dynamics and blend, an experienced vocalist can utilize microphone technique to finesse his or her balance within the group. Moving closer to or further from the microphone is a very effective volume and tone control.
At its best, mic technique is an instinct that arises from good listening and experience. It indicates a well-formed conception of how the vocal relates to the rest of the arrangement. The more the vocalist understands context (and the more attentively he or she listens), the more likely it is that they will default to “working” the mic without even thinking about it. This both saves you from having to write a lot of automation and allows you to use compression as a sonic choice (rather than as a problem-solving tool). It’s the best-case scenario.
A self-recording vocalist can and should experiment with and aspire to this. But during the recording process, it’s seldom effective, in my experience, to try and coach someone to use mic technique that doesn’t feel natural to them. The typical drawback to this approach is that the singer begins to focus so hard on their distance from the mic that they forget to engage with the lyric!
If this is the case, just avoid clipping the converters and prepare to do a lot of rides later. If I’m working with a vocalist who’s still developing their mic technique, I might also track with a little bit of compression from my favorite piece of hardware, and/or even manually ride the level to the recorder a little with a console fader. Just be careful of overdoing it — you can always compress more later, but you can’t undo what’s been printed!
The Soft Skills
The 12 inches immediately in front of a microphone can be a very vulnerable, intimidating place. Even the most seasoned and confident singers aren’t necessarily immune, particularly if they’re recording a piece of music that’s emotionally heavy and personal to them.
A trustworthy, easy-going presence on the other side of the glass can make or break the record in these situations. If I’m producing the session, I want the artist to feel like he or she has a teammate and an advocate — not a judgmental critic. I try and make a habit of not stating the problem and, instead, getting straight to the proposed solution. In other words, instead of saying, “You were flat on that last take,” I’d much rather say, “How would you feel about trying another pass, this time with one headphone off?”
When recording yourself, the same applies. If your own analytical nature is an impediment to progress, try your best to turn off your internal critic. Sing now and evaluate later. And if you feel yourself getting so far inside your own head that you can’t connect with the lyric any longer, there’s no shame in stepping away for a while.
Hidden in Plain Sight
With all of that said, it’s really just as simple as putting a great singer in front of a great mic and pressing record. If you have a great song, a great lyric, a great arrangement, and a great vocalist, it’s hard to go too far wrong. And as your experience grows, you’ll gradually become better equipped to handle the challenges that may arise when circumstances aren’t quite as favorable.
Want to get all of Soundfly’s premium online courses for a low monthly cost?
Subscribe to get unlimited access to all of our course content, an invitation to join our members-only Slack community forum, exclusive perks from partner brands, and massive discounts on personalized mentor sessions for guided learning. Learn what you want, whenever you want, with total freedom.
—
Sources
1 Rossing, 2001, cited in Howard and Angus, Acoustics and Psychoacoustics (Fourth Edition), page 149.
2 Terhardt, Psychoacoustics of Musical Sounds, 1978. Also cited here: http://hyperphysics.phy-astr.gsu.edu/hbase/Sound/pitch.html