
By Tom Frampton of Mastering The Mix
+ Ryan Lott (of Son Lux) teaches how to build custom virtual instruments for sound design and scoring in Designing Sample-Based Instruments.
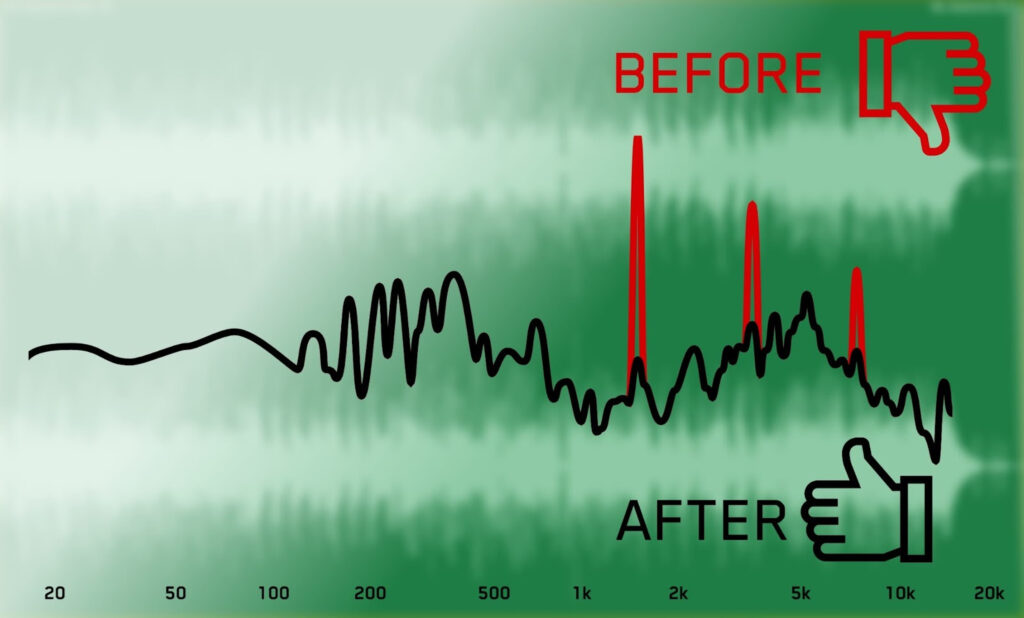
Resonances infect your mix with their unpleasant and fatiguing tone. Even if you effectively tame all the problematic resonances on individual channels during mixing, you might find that when the channels combine together, more resonances appear.
Now you’re asking yourself… Can I remove these resonances during mastering, or will that mess up my sound?
Resonance removal can be a pretty destructive process. If you overdo it the mix will start sounding like there’s a weird filter making it thin. But you don’t want to leave in resonant problems…
In this blog post, I’ll show you how to fix resonant issues during mastering without messing up your mix.
But First, How Can Resonance Removal Mess Up My Master?
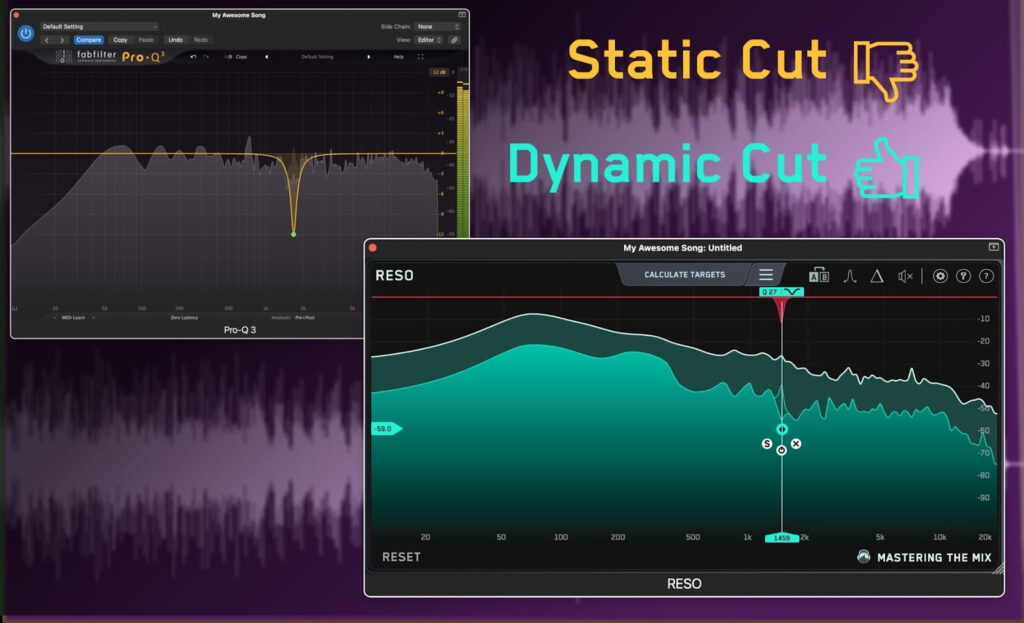
Dynamically taming resonances is a better and more transparent approach than using a static EQ cut with a high Q. When you use dynamic processing, the attenuation occurs relative to how loud the resonance is. With a static cut, the cut is always present, which is like taking a slice out of your sound.
It can sound unnatural and possibly worse than the resonance itself.
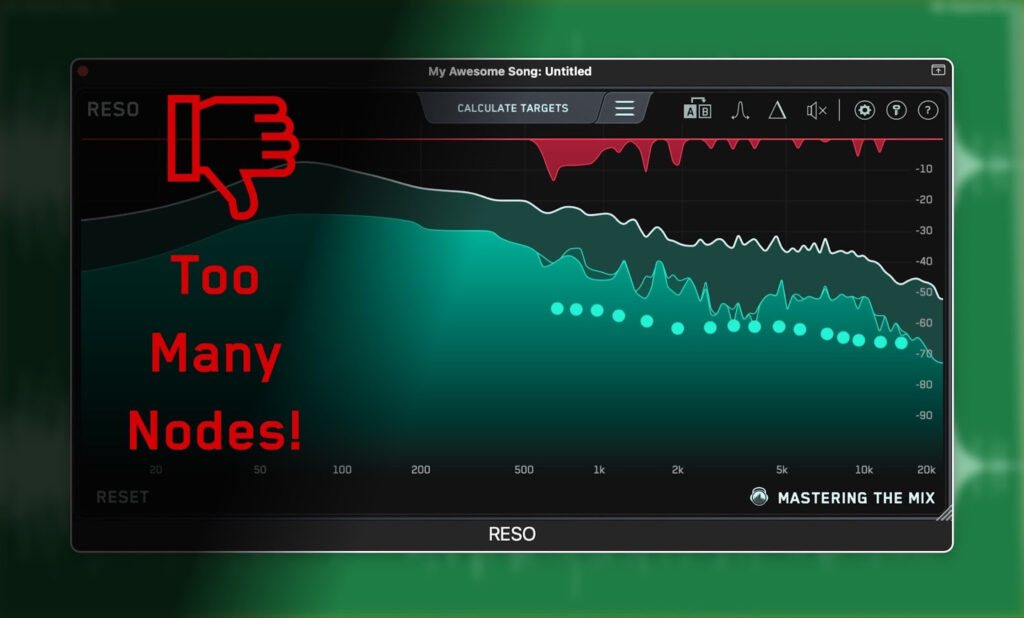
Another common pitfall is trying to fix more resonances than is necessary. As a mastering engineer myself, I’m working on a handful of tracks every day. It’s common to see between four and eight resonances in a mix that would benefit from being reduced.
Once you start going above eight, you’re cutting so much from the frequency spectrum that you’ll be affecting the overall character of the sound.
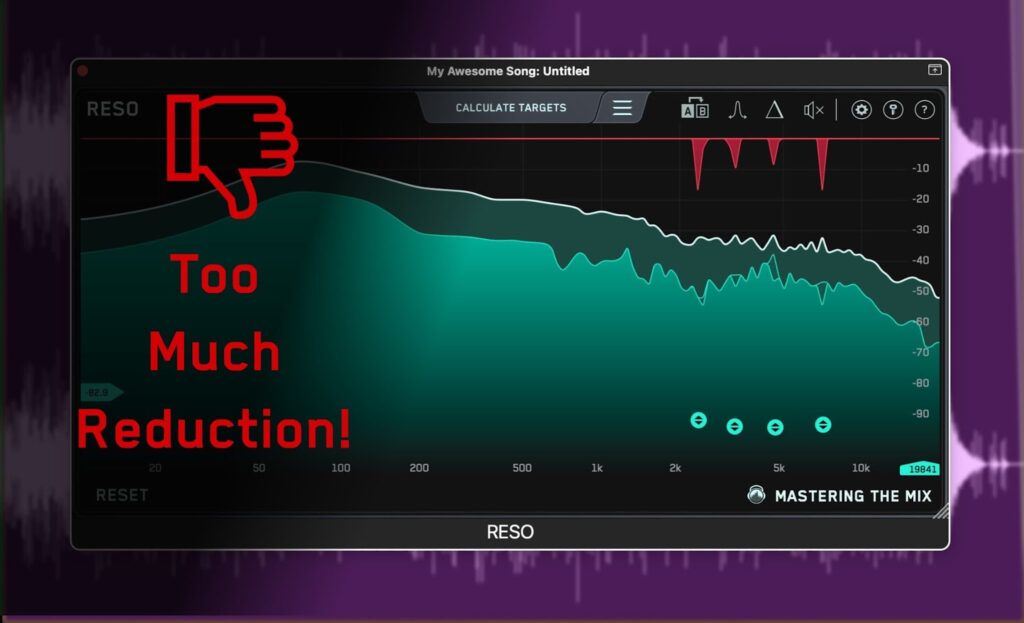
The third big error that can ruin your master is over-processing. This is where you’re ducking the resonance further than is needed to fix the problem. This results in a hollow sound, similar to when you use a static EQ cut.
Try to find the sweet spot when resolving the issue so you fix the problem just enough for the resonance to disappear without any further reduction past that point.
The final mistake is attempting to fix low-end resonances. Low frequency audio waves are much longer than mids and highs. Consider the low-end range is around 0-250Hz (a total of 250), whereas the upper midrange is around 1-4kHz (a total of 3,000).
A thin Q down in the low-end doesn’t affect the audio in the same way, it cuts a lot more. It can affect the punch of your kick and the richness of your bass. Try to start with great sounding audio early in the production process to get your low-end solid.
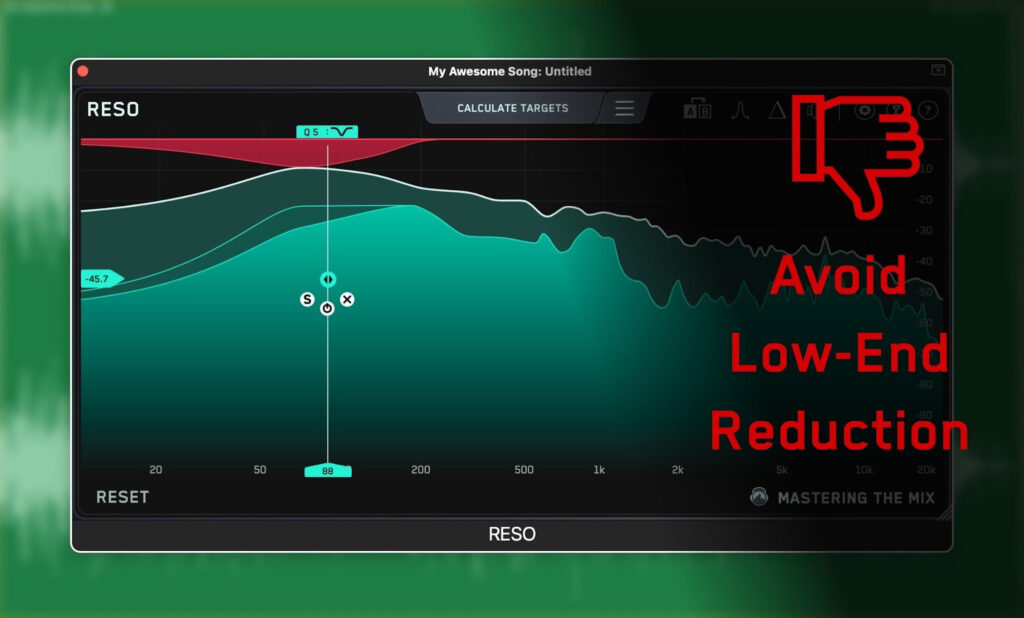
To reiterate: Avoid static cuts, don’t cut too many frequencies, don’t reduce them so much that the master sounds thin, and leave the low-end alone.
+ Read more on Flypaper: “Essential Mastering Tips for the Bedroom Producer.”
How Can I Identify Resonances During Mastering?
Mastering is about fixing what needs to be fixed, and leaving what’s already great. You don’t want to just start removing random frequencies in a hope it’ll clean up your mix.
If it ain’t broke, don’t fix it!
The best first step is to load up a great-sounding reference track to tune your ear to what a pure mix sounds like. A comparable song with similar instrumentation and vibe is key here.
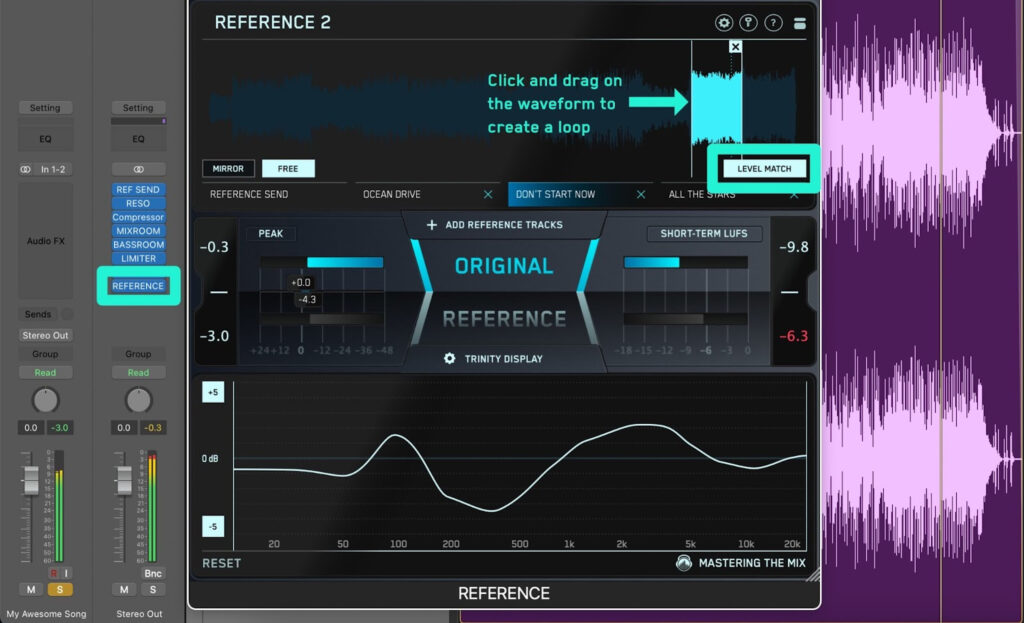
Next, fire up Mastering The Mix’s plugin REFERENCE as the final plugin on your master channel and import your reference track. REFERENCE’s level match feature will be engaged by default. Loop the chorus of your reference track, as well as the chorus in your own project, and jump back and forth.
Pay attention to the upper mid range which is where the worst-sounding resonances often lie. Do you notice any thin sounding spikes poking through the mix when you compare it to your reference track?
If not, great! No need to fix a problem that isn’t there. Move on to mastering your track.
If you do hear resonances, it’s time to dive a bit deeper.
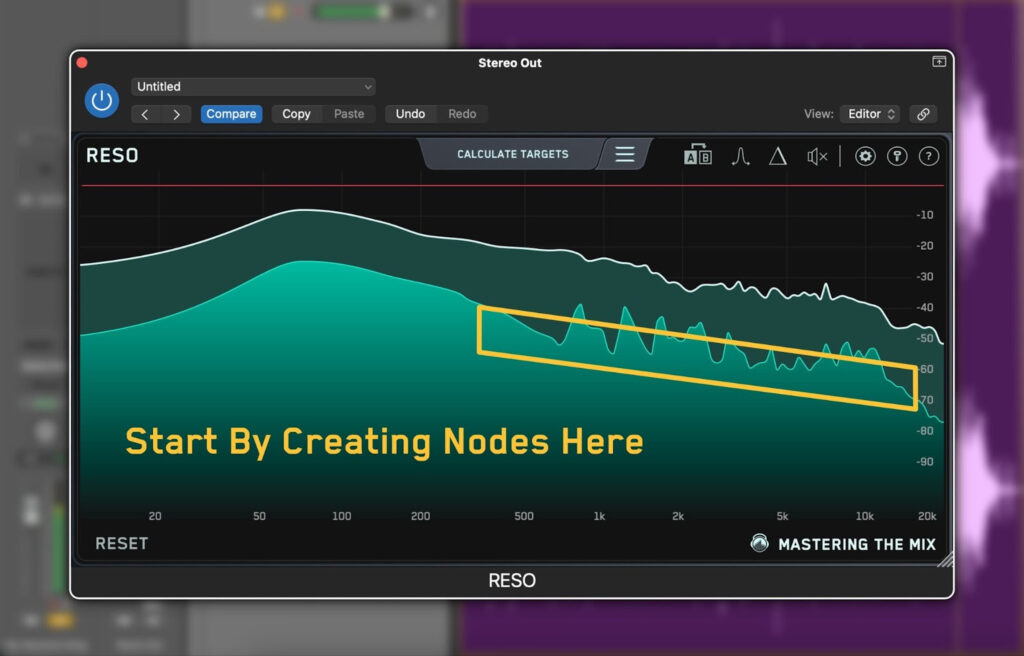
So fire up RESO as the first plugin in your mastering chain. Now hold Control as you sweep your mouse around the upper mid range of the frequency spectrum.
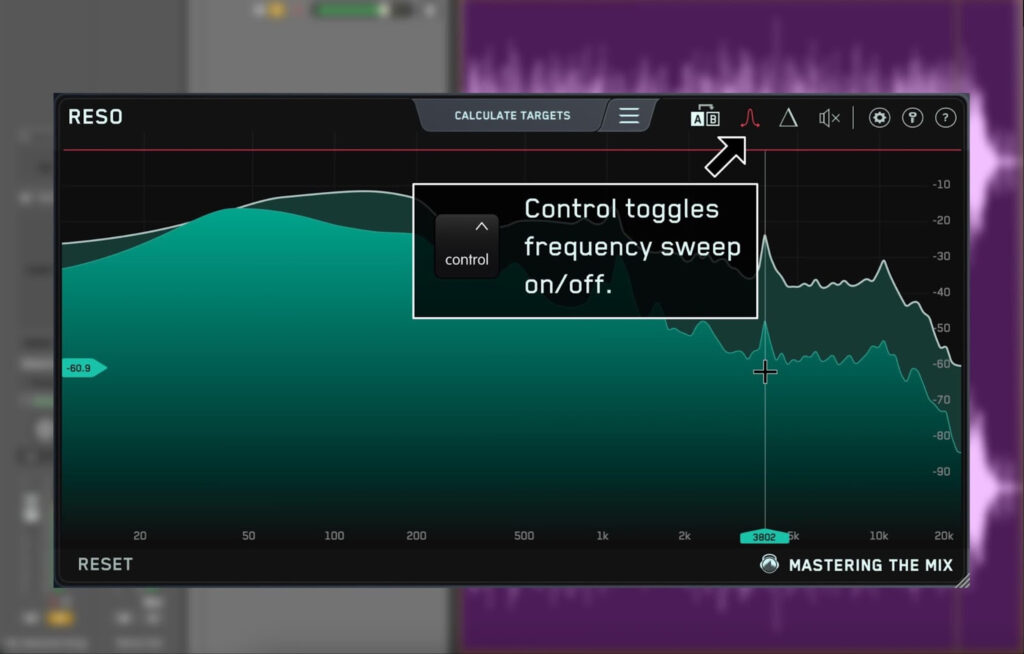
This will ever so slightly boost the frequencies where the mouse is allowing you to connect your ears to what you’re seeing visually. It allows you to quickly seek and destroy the resonances you can hear but you’re not sure exactly where they sit in the frequency display.
When you hear a frequency jump out that sounds particularly bad, you’ve found one of the culprits. Be conscious of the tuning of the track, and try not to focus only on resonances that are in tune with the music. It’s completely possible that there are resonances in tune that would benefit from being fixed so don’t ignore them altogether. Listen for resonances that sound off key too.
+ Read more on Flypaper: “How to Make Your Mixes Louder (the Right Way).”
How Can I Fix Resonances During Mastering?
As you sweep through the spectrum in RESO and locate the resonances, double click to create a node on that specific frequency.
The vertical position of the node matters. This is the threshold. When you place a node, you’re basically saying: “No audio above this point for this frequency.”
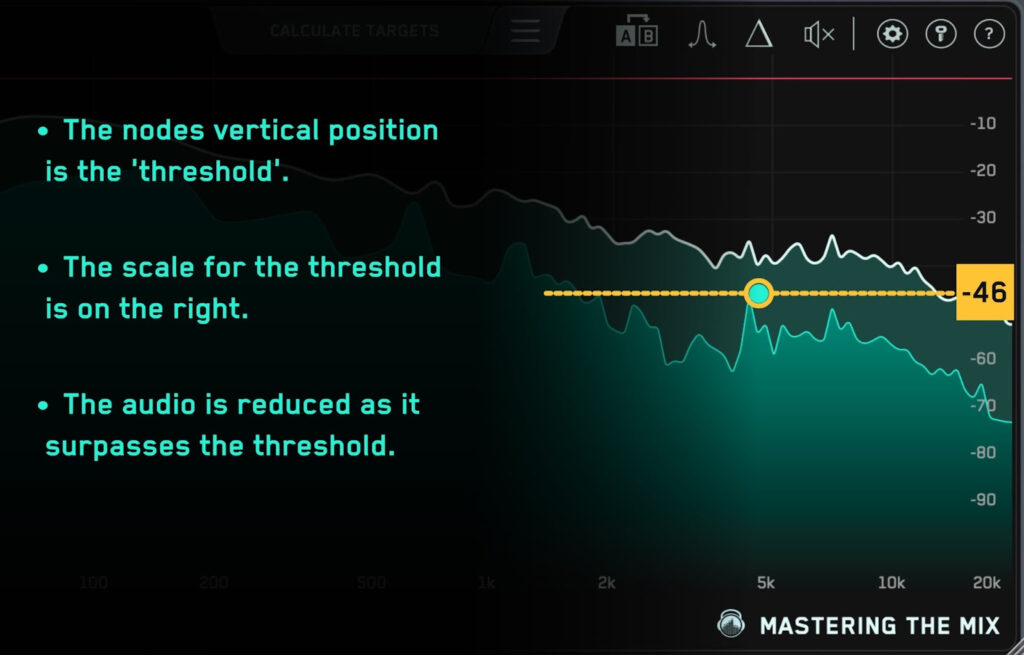
A good starting point for the node position is to place it more or less in line with the top of the real-time frequency spectrum.
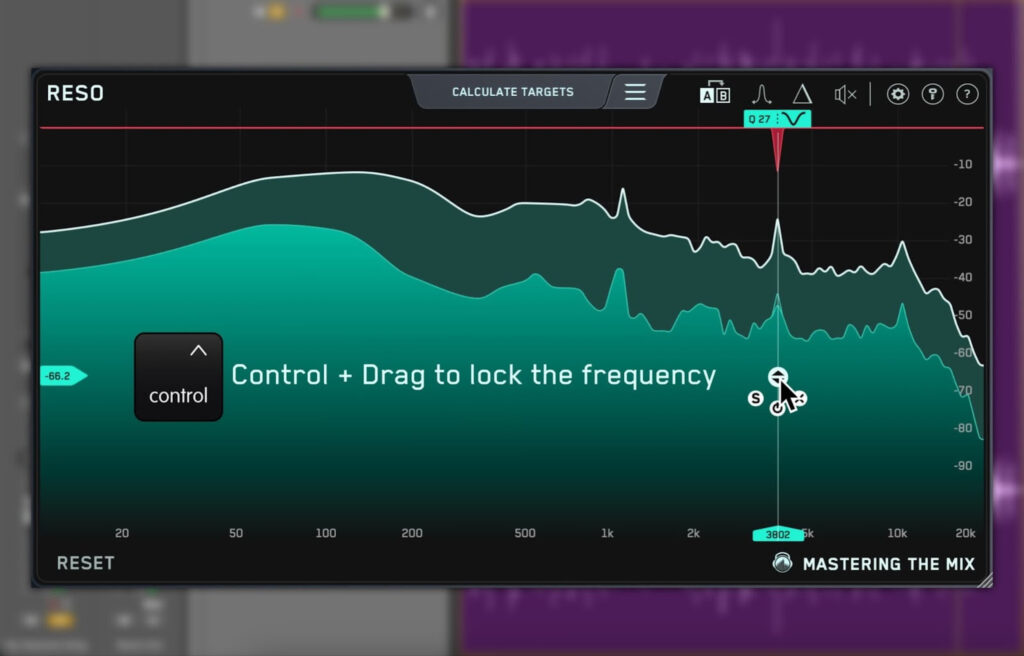
From here, you can hold Control to lock the frequency, then drag it down for more processing. The more significant the resonance, the more you may wish to reduce the threshold by dragging the node down.
The Q bandwidth of each node is displayed at the top of the display. It’s optimized to the frequency and automatically updates as you move the node around. The higher the frequency, the higher (or thinner) the Q.
However, you’re in control! You can adjust the Q bandwidth if you think it’s necessary by scrolling up or down on the node.
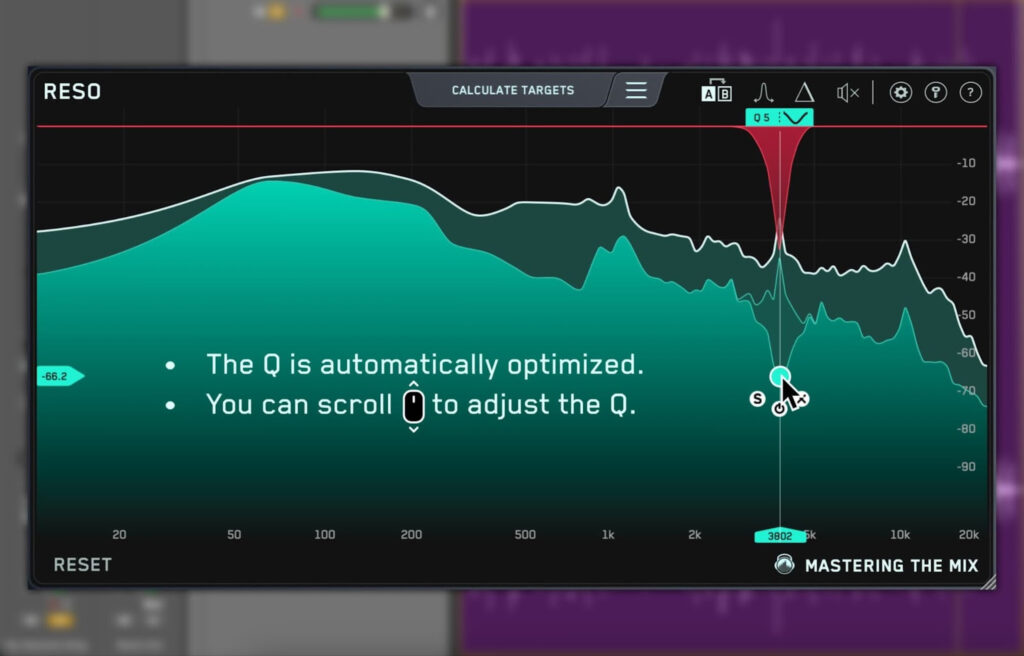
A broader Q is displayed by a lower number, and will carve out a greater width of frequencies. This is where you need to be extra careful, as the sound can fall apart if you overdo it…
Don’t worry, I’ll explain how to avoid overdoing it in the next section. That being said, a broader Q might be exactly what the resonance needs to be successfully remedied. Here’s how.
- Locate the resonance and double click to create the node around the top of the frequency display.
- Hold Control and drag it down until the resonance is fixed.
- If you’ve brought the node down significantly and you still have the issue, try increasing the Q. (You might need to increase the threshold by moving the node up to compensate.)
+ Read more on Flypaper: “8 Tips for Mixing an Entire Album So It Sounds Consistent.”
How Do I Know If I’ve Overdone It?
Every producer on Earth has, at some point, gone down a crazy route and completely messed up their mix. Fixing resonances can not only save a mix but also elevate it sonically in a super-impressive way. Overdoing it will do the opposite and ruin your mix.
So, how can we check and be sure what we’ve done works well?
There are three sanity checks I carry out every time I’m fixing resonances when mastering.
1. Hit Bypass
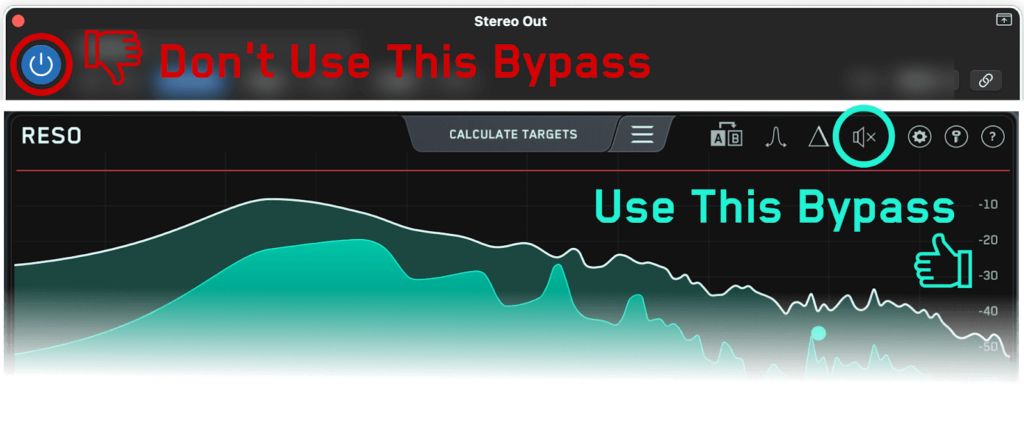
A simple bypass of the plugin will give you a clear indication of how you’ve processed the sound.
Use the plugins built in bypass, as this will allow you to hear the audio continuously without a jump. The jump you get when you use the DAW plugin wrapper bypass button is the audio latency compensation being turned on and off. Hearing the audio without this jump really helps the brain focus on the tiny details which is paramount when mastering.
Level matching is often not necessary here as the loudness difference of the before and after is around -0.1dB.
Be honest with yourself. If the mix sounds too thin or weirdly filtered you might need to reduce the processing.
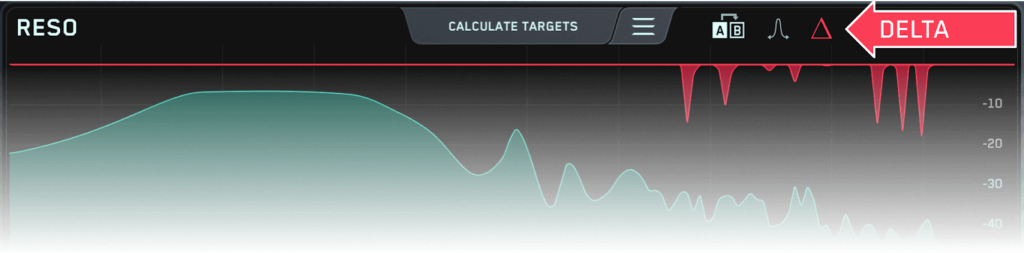
2. Hit Delta
The delta is the difference between the input and the output audio. This allows you to solo the frequencies you’ve removed from the mix. The delta should sound horrible! It’ll also give you a clear indication of how much processing is being applied.
3. Reference Again
Finally, fire up that reference track again. Jump back and forth focusing on resonances. Does your master still have a good amount of presence and bite in the upper mids? Are there any resonances still left to fix?
Should you remove resonances during mastering? Yes! It can actually be incredibly transformative for your sound. Just don’t overdo it or you’ll wreck the song.
Don’t stop here!
Continue learning with hundreds of lessons on songwriting, mixing, recording and production, composing, beat making, and more on Soundfly, with artist-led courses by Kimbra, Com Truise, Jlin, Kiefer, and the new Ryan Lott: Designing Sample-Based Instruments.