+ Learn to record and mix your music in Logic Pro with Soundfly’s online course, Intro to Making Music in Logic Pro X. Preview for free today!
So you want to show off your brand new song to a record label or potential manager, or to book a string of upcoming gigs, or even your friends and family, but there isn’t a producer in sight who could do it on short notice and for less than a few grand. Well, the good thing is that this situation is exactly what Logic Pro is made for.
Today we’re going to talk about the essential songwriter’s demo: A piano vocal.
Sure, it may not be a fully produced radio-ready single, but you will end up with a great-sounding demo that could save you a lot of time and money if or when you eventually bring your tracks to a professional studio. And the best part is, you don’t even really need a keyboard. Of course, it helps to have one, but a MIDI controller or even your laptop keyboard can work just fine.
Just one thing before we get started. There are two ways to do this.
The first is free-hand, which is to say that you record piano and vocals at the same time and even if they’re off tempo the two are synced together. It will sound more free and raw, but you’ll have a hard time syncing rhythmic elements and timed processing such as delay and reverb in a consistent manner. The second way is to record on grid, whereby you’ll record to a click-track to steady your tempo. In this case, it’s best to record one track at a time, but that doesn’t mean you can’t sing to yourself while you record your keyboard takes.
We’re going to go with the second route today, but everyone’s workflow is different so feel free to experiment. If you’re looking to get a bit more out of this versatile DAW — how to compose, record, edit, mix, add effects, and develop shortcuts and personalized methods in the process — definitely check out Soundfly’s premium course, Intro to Making Music in Logic Pro X. Otherwise, let’s get started!
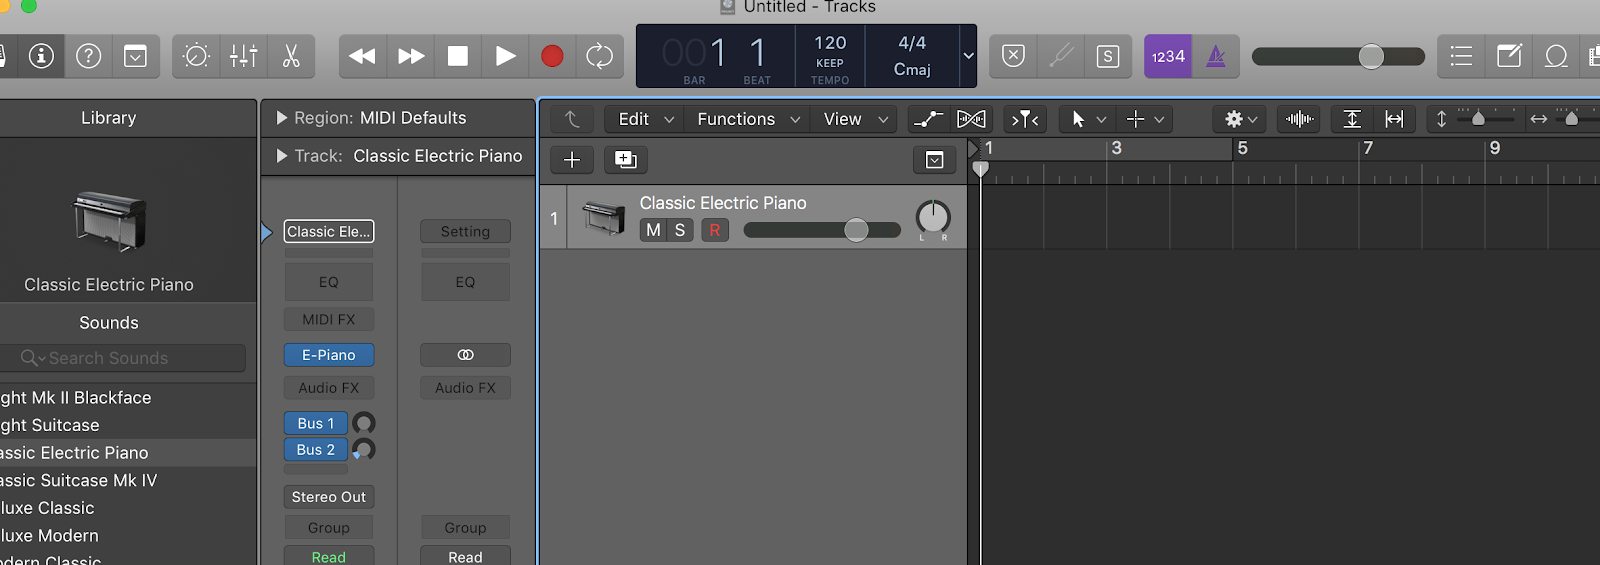
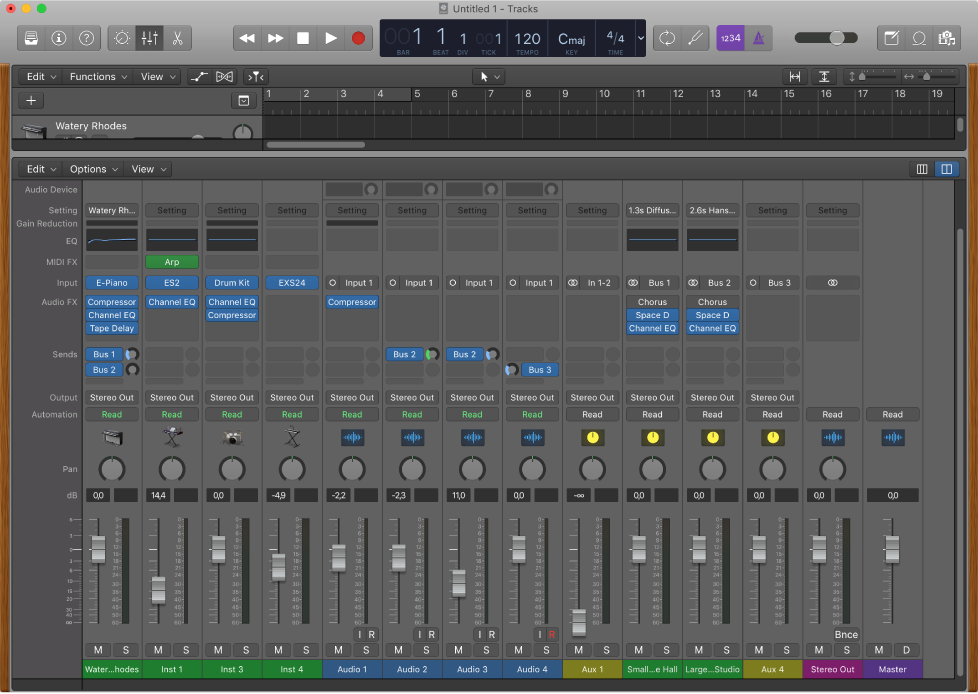
1. Create Your Template
Alright, first, create a New Track. When you first open a new template on Logic Pro, it will automatically prompt you to create a new track. After that, go to the menu bar and select Track to create a new track. Fairly straightforward, right?
You will then be prompted to select the kind of track you would like to create. For the basic piano vocal demo, you will likely be using a software instrument and an audio track.
2. Set the Tempo and Time Measurement
Logic makes it really easy to set your tempo and time signature. If you look in the top toolbar, you will see a black box with a list including Key, Tempo, and Time Signature.
To change your tempo, double-click the tempo box and type in the tempo of your song. Follow the same instructions by double-clicking the time signature or key to change them.
3. Recording With or Without the Click
If you look next to your volume bar, you’ll notice a picture of a metronome next to a “1,2,3,4.” Those numbers indicate a four-beat (one measure) count in before you’re meant to start playing, and the metronome is how you’ll control whether you hear the click or not.
All you have to do is click the box. Purple means the click will play; when it’s not purple, it won’t. I personally recommend that you record both your piano and vocals to a click track to make sure everything you might record later on is in time. It’ll also make mixing and processing that much easier.
+ Learn production, composition, songwriting, theory, arranging, mixing, and more — whenever you want and wherever you are. Subscribe for unlimited access!
4. Pick Your MIDI Sound
Logic has a ton of great built-in MIDI sounds. Your first option is to select the sound of the keyboard you’d like to record. In the top left corner, there’s a box with a file folder inside. Click on that to open the menu. From there you can turn your MIDI sound into almost anything by searching through the available sounds: everything from synths to classic, electric, and grand pianos, and percussion sounds.
Take your time. Pick out the sound you think will create the best base layer for your music. But keep in mind that you can always go back and track other instruments and sounds once everything is laid down. Now you’re ready to record your keyboard to the click.
5. Quantizing and Correcting Your Piano Recording
Once you’ve laid down your piano track, you can quantize it so that your attacks line up perfectly with the grid. This is a good way to make sure everything is in time and won’t confuse your listener with any off beats. But don’t rely too heavily on the grid or you risk making your music sound stale. (*Luckily, by using randomization techniques, you can improve that too!)
The great thing about recording to MIDI is that you can always go in and move notes or chords around by hand. So if the quantization makes some parts of your track sound wacky, just highlight whatever notes you want to edit, and drag them forward or backward in time. The same goes for correcting wrong notes — just drag them into the correct position and voila!
6. Proper Miking for Vocals
Home producing your vocals takes some to get used to. Here’s some advice to help you out. But in the mean time, let’s talk about the microphone. If you’re recording at home, you’re probably going to use whatever mic you have lying around. So make sure to purchase something that fits with what you plan to record next time you get to the store.
During the soundcheck process, place your mic in a stand and adjust the height and placement that works for you. You want it to feel comfortable so you don’t move around too much (or your voice track will sound like it’s fading in and out). You should also be mindful of your input levels. Check to make sure you’re not clipping when you’re singing at your loudest.
7. Add Effects to Your Sounds
Vocal effects may be added before or after you record. You can add these by using a combination of the sound effects in Logic’s library, and pressing the audio effects button.
The sound effects library will have presets to choose from such as “Dance Vocal,” “Natural Vocal,” etc., but feel free to pick and choose effects that sound good on your recording by trial and error. A little bit of reverb or delay can go a long way in making the vocals in your demo stand out and not sound jarringly raw.
8. Tune Your Vocals
There are a ton of pitch corrector plugins out there to make sure you’re fully in tune and sounding great — and no, you don’t need to go full Auto-Tune. If you’re a bit of a perfectionist though, you may want to hand tune them yourself. Head into the Audio Editor to find an option called Flex. From there, you’ll be able to tune any of your vocals by dragging them up or down to the correct note or fine pitch, or even flatten out the vibrato.
9. Getting a Decent Rough Mix
If you’re mixing at home and just getting started, I’d advise checking out Soundfly’s Faders Up: Modern Mix Techniques course to learn everything there is to know about DIY mixing best practices. But making sure your headphones and monitors are a decent quality will also help, even if this is just a piano vocal demo.
Play around with panning the tracks to potentially double the vocals across your left and right. Then slap some EQ on each of the tracks to bring out the frequencies that will give them definition. When in doubt, use a reference track to help you identify how it should sound in the best case scenario.
And once the mix starts to come together, make sure to play your track back on as many different speakers and listening devices as possible (the car, your laptop, your phone’s ear buds, etc.) and take notes. Listen, and trust your own ears.
10. Sharing Your Song in iTunes
Now that you’ve finished recording and your track sounds great, you’ll need to get a file version you can send around. To make a quick mp3 bounce of your song, click on File in the top left corner, then find Share and click on iTunes. Many platforms such as iTunes will compress the file in the process to fit their standards, so be mindful of that.
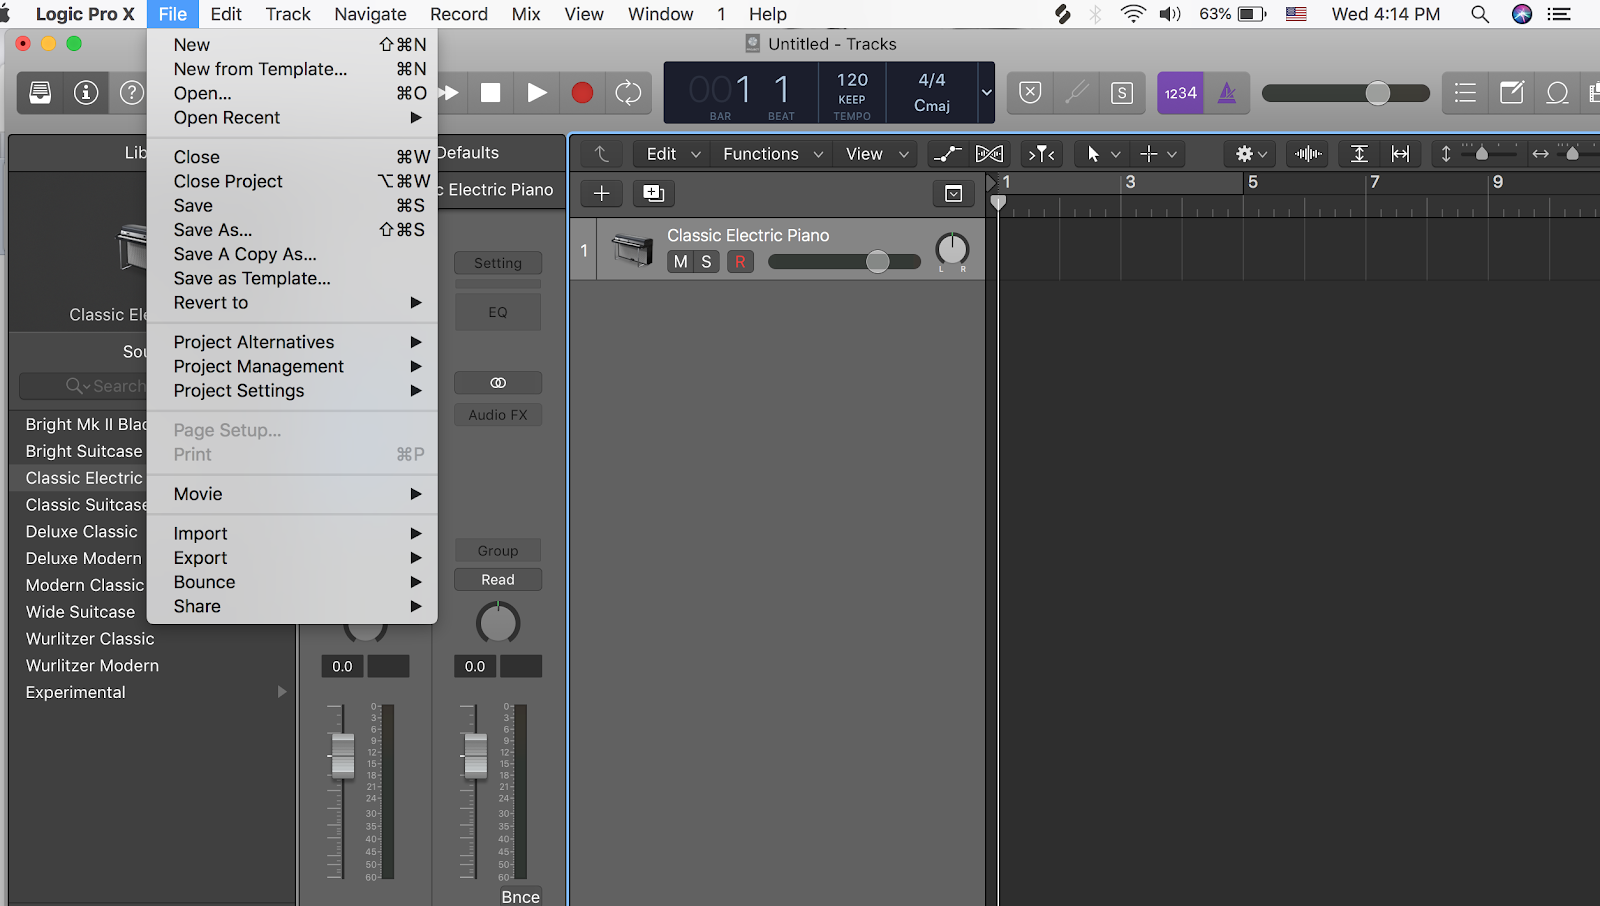
If compression matters to you, go back to File, select Bounce, and then Project and choose an uncompressed format such as .WAV or .AIFF.
Happy Demoing!
Improve your music with creativity & curiosity on Soundfly.
Subscribe to our YouTube channel for weekly videos, or join Soundfly’s all-access membership to all of our artist-led online music courses, an invite to join our Discord community forum, exclusive discount perks from partner brands, access to artist Q&As and workshops, and more.